The function moves the Quarky robot in the specified direction. The direction can be “FORWARD”, “BACKWARD”, “LEFT”, and “RIGHT”.
- Forward:
- Backward:
- Left:
- Right:
The function moves the Quarky robot in the specified direction. The direction can be “FORWARD”, “BACKWARD”, “LEFT”, and “RIGHT”.
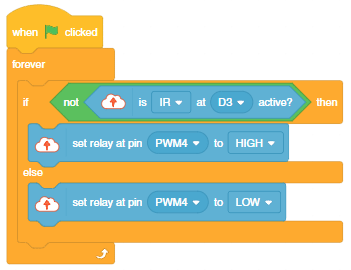
In this example, we are going to learn how to control the flame sensor to detect flame and start the exit alarm sequence that includes opening the gate, alarm beeping, and the fan being turned ON.
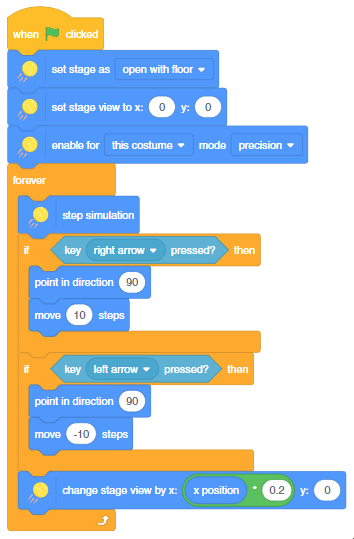
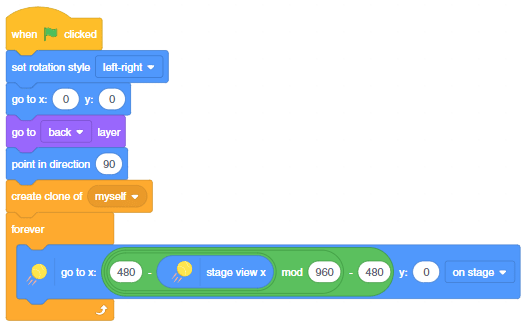
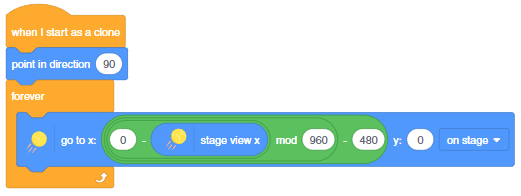
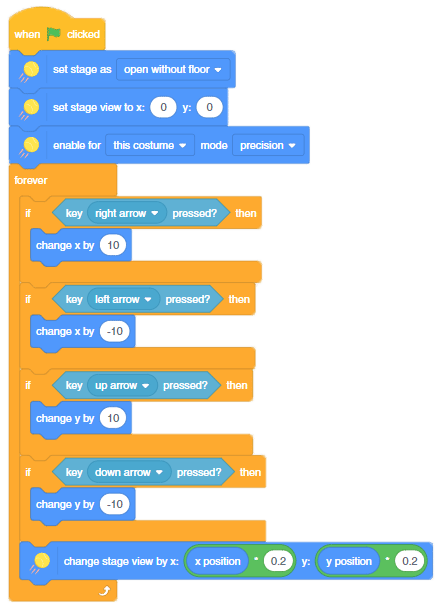
In this activity, we will make the computer program that controls the Mars Rover. It’s like a remote-control car. You can press different keys on the keyboard to make the Mars Rover move forward, backward, turn left and turn right.
In our Mars rover, there are a total of 6 motors and 5 servo motors.
The motors provide rotation to the wheels which helps the rover to attain motion in both forward and backward directions. All the left side motors (3 motors) are connected to the left motor port of Quarky and all the right side motors (3 motors) are connected to the right motor port of Quarky using a 3 port wire. This means that to control the Mars rover we have to control only 2 motors – Left and Right.
Also, there are 2 parameters to control – Direction (Forward or Backward) and Speed. With this control, the Mars rover can do all the desired motions.
The servo motors help in providing rotation to the complete wheel assembly so that the rover can change its wheel alignments and its path. These play a major role in turning cases of the Mars Rover.
We will need to turn the servo motors to the Inside Servo Position to make Mars Rover turn left and right.
sprite=Sprite('Tobi')
import time
quarky = Quarky()
rover = MarsRover(4, 1, 7, 2, 6)
while True:
  if sprite.iskeypressed("up arrow"):
	  rover.home()
	  rover.setinangle(0)
	  quarky.runtimedrobot("F",100,3)

  if sprite.iskeypressed("down arrow"):
    rover.home()
    rover.setinangle(0)
    quarky.runtimedrobot("B",100,3)

  if sprite.iskeypressed("right arrow"):
    rover.home()
    rover.setinangle(40)
    quarky.runtimedrobot("R",100,3)

  if sprite.iskeypressed("left arrow"):
    rover.home()
    rover.setinangle(40)
    quarky.runtimedrobot("L",100,3)
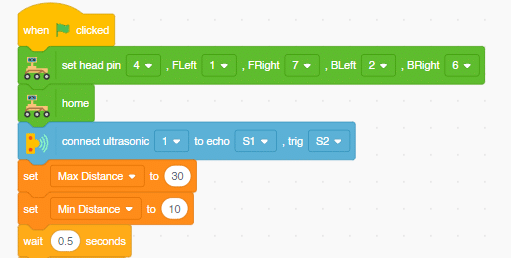
This project of obstacle avoidance is for a robot that will move around and look for obstacles. It uses an ultrasonic sensor to measure the distance. If the distance is less than 20 cm, it will stop and look in both directions to see if it can move forward. If it can, it will turn left or right. If not, it will make a U-turn.
This project of obstacle avoidance is for a robot that will move around and look for obstacles. It uses an ultrasonic sensor to measure the distance. If the distance is less than 20 cm, it will stop and look in both directions to see if it can move forward. If it can, it will turn left or right. If not, it will make a U-turn.
Main Initialization:
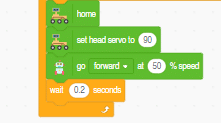
Main Logic:

Final Condition Check:
AI-based face expression detection refers to the use of artificial intelligence algorithms and computer vision techniques to analyze images or videos of human faces and recognize the emotions or expressions being displayed. The technology can detect and analyze subtle changes in facial features, such as eye movement, mouth shape, and eyebrow position, to determine whether a person is happy, sad, angry, surprised, or expressing other emotions.
Discover the various fields that utilize this technology, including psychology, marketing, and human-computer interaction. Additionally, read about the logic and code behind face detection with a camera feed, including the initialization of parameters, face detection library, loop execution, and if-else conditions. Explore how the technology continuously analyzes emotions, and how the humanoid responds with different facial expressions and movements.
sprite = Sprite('Tobi')

fd = FaceDetection()

quarky = Quarky()

import time

humanoid = Humanoid(7, 2, 6, 3, 8, 1)

# Turn the video ON with 0% transparency
fd.video("ON", 0)
fd.enablebox()

# Run this script forever
while 1:
  fd.analysecamera()          # Analyse image from camera
  sprite.say(fd.expression()) # Say the face expressions

  if fd.isexpression(1, "happy"): # if face expression is happy
    quarky.showemotion("happy")   # show happy emotion on Quarky
    humanoid.action("dance2", 1000, 1)

  if fd.isexpression(1, 'sad'):
    quarky.showemotion("crying")
    humanoid.action("updown", 1000, 1)

  if fd.isexpression(1, 'surprise'):
    quarky.showemotion('surprise')
    humanoid.action("moonwalker", 1000, 1)

  if fd.isexpression(1, 'angry'):
    quarky.showemotion('angry')
    humanoid.action("flapping2", 1000, 1)
  else:
    humanoid.home()

# Comment the above script, uncomment the below script and
# run this script to clear the stage and quarky display

fd.disablebox()
fd.video("off")
quarky.cleardisplay()The example demonstrates how to use face detection with a camera feed. Following are the key steps happening:
if statement. If the expression is happy, the Quarky device displays a happy emotion, and the humanoid performs the “dance2” action for specific time. Similarly, for sad, surprised, and angry expressions, Quarky displays the respective emotion, and the humanoid performs the associated action.

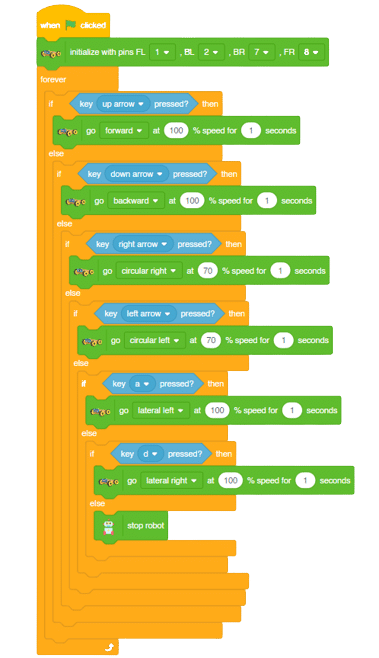
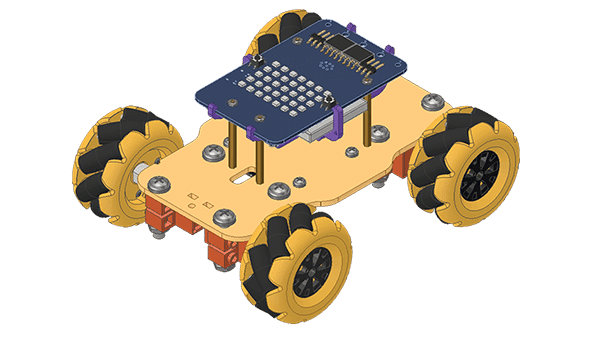
In this activity, we will make the computer program that controls the Mecanum Robot. It’s like a remote-control car. You can press different keys on the keyboard to make the Mecanum move forward, backward, left, and right.
The Quarky Mecanum Wheel Robot is a type of robot that uses a special type of wheel to move. The wheel is made of four rollers mounted at 45- degree angles to the wheel‘s hub. Each roller has its own motor and can spin in either direction. This allows the wheel to move in any direction, making it an ideal choice for navigating around obstacles and tight spaces. The Mecanum wheel robot can also turn on the spot, allowing it to make sharp turns without having to reverse direction.
Follow the steps:
sprite=Sprite('Tobi')
import time
quarky = Quarky()
robot = Mecanum(1, 2, 7, 8)
while True:
  if sprite.iskeypressed("up arrow"):
	  robot.runtimedrobot("forward",100,2)

  if sprite.iskeypressed("down arrow"):
    robot.runtimedrobot("backward",100,1)

  if sprite.iskeypressed("right arrow"):
    robot.runtimedrobot("circular right",70,1)

  if sprite.iskeypressed("left arrow"):
    robot.runtimedrobot("circular left",70,1)

  if sprite.iskeypressed("a"):
    robot.runtimedrobot("lateral left",100,1)
  if sprite.iskeypressed("d"):
robot.runtimedrobot("lateral right",100,1)Forward-Backward Motion:
Lateral Right-Left Motion:
Circular Right-Left Motion:

This project demonstrates how to use Machine Learning Environment to make a machine–learning model that identifies hand gestures and makes the quadruped move accordingly.
To test the model, simply enter the input values in the “Testing” panel and click on the “Predict” button.
The model will return the probability of the input belonging to the classes.
Click on the “Export Model” button on the top right of the Testing box, and PictoBlox will load your model into the Python Coding Environment if you have opened the ML Environment in Python Coding.
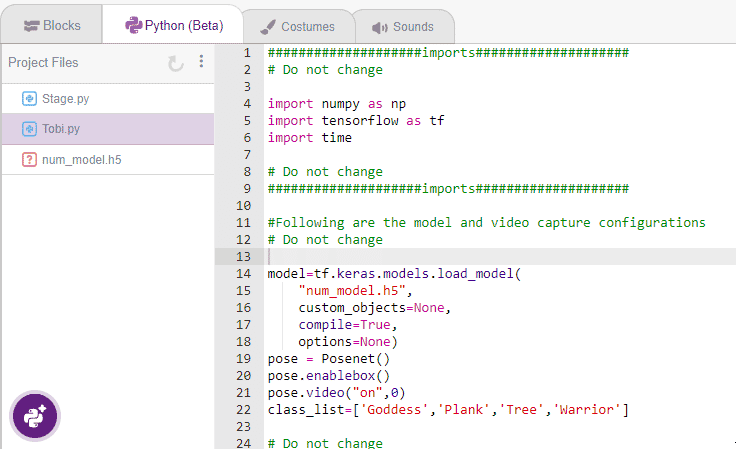
The following code appears in the Python Editor of the selected sprite.
####################imports####################
# Do not change

import numpy as np
import tensorflow as tf
import time
quarky=Quarky

quad=Quadruped(4,1,8,5,3,2,7,6)

# Do not change
####################imports####################

#Following are the model and video capture configurations
# Do not change

model=tf.keras.models.load_model(
    "num_model.h5",
    custom_objects=None,
    compile=True,
    options=None)
pose = Posenet()                                                    # Initializing Posenet
pose.enablebox()                                                    # Enabling video capture box
pose.video("on",0)                                                  # Taking video input
class_list=['Forward','Backward','Left','Right','Stop']                  # List of all the classes

# Do not change
###############################################

#This is the while loop block, computations happen here
# Do not change

while True:
  pose.analysehand()                                             # Using Posenet to analyse hand pose
  coordinate_xy=[]

    # for loop to iterate through 21 points of recognition
  for i in range(21):
    if(pose.gethandposition(1,i,0)!="NULL"  or pose.gethandposition(2,i,0)!="NULL"):
      coordinate_xy.append(int(240+float(pose.gethandposition(1,i,0))))
      coordinate_xy.append(int(180-float(pose.gethandposition(2,i,0))))
    else:
      coordinate_xy.append(0)
      coordinate_xy.append(0)

  coordinate_xy_tensor = tf.expand_dims(coordinate_xy, 0)        # Expanding the dimension of the coordinate list
  predict=model.predict(coordinate_xy_tensor)                    # Making an initial prediction using the model
  predict_index=np.argmax(predict[0], axis=0)                    # Generating index out of the prediction
  predicted_class=class_list[predict_index]                      # Tallying the index with class list
  print(predicted_class)


  # Do not change
Add this code in
def runQuarky(predicted_class):
    if pose.ishanddetected():
      if predicted_class == "Forward":
        quad.move("forward",1000,1)

      elif predicted_class == "Backward":
        quad.move("backward",1000,1)

      elif predicted_class == "Left":
        quad.move("turn left",1000,1)

      elif predicted_class == "Right":
        quad.move("turn right",1000,1)

      elif predicted_class == "Stop":
quad.home()####################imports####################
# Do not change
import numpy as np
import tensorflow as tf
import time
quarky=Quarky
quad=Quadruped(4,1,8,5,3,2,7,6)
# Do not change
####################imports####################
#Following are the model and video capture configurations
# Do not change
model=tf.keras.models.load_model(
"num_model.h5",
custom_objects=None,
compile=True,
options=None)
pose = Posenet() # Initializing Posenet
pose.enablebox() # Enabling video capture box
pose.video("on",0) # Taking video input
class_list=['Forward','Backward','Left','Right','Stop'] # List of all the classes
def runQuarky(predicted_class):
if pose.ishanddetected():
if predicted_class == "Forward":
quad.move("forward",1000,1)
elif predicted_class == "Backward":
quad.move("backward",1000,1)
elif predicted_class == "Left":
quad.move("turn left",1000,1)
elif predicted_class == "Right":
quad.move("turn right",1000,1)
elif predicted_class == "Stop":
quad.home()
# Do not change
###############################################
#This is the while loop block, computations happen here
# Do not change
while True:
pose.analysehand() # Using Posenet to analyse hand pose
coordinate_xy=[]
# for loop to iterate through 21 points of recognition
for i in range(21):
if(pose.gethandposition(1,i,0)!="NULL" or pose.gethandposition(2,i,0)!="NULL"):
coordinate_xy.append(int(240+float(pose.gethandposition(1,i,0))))
coordinate_xy.append(int(180-float(pose.gethandposition(2,i,0))))
else:
coordinate_xy.append(0)
coordinate_xy.append(0)
coordinate_xy_tensor = tf.expand_dims(coordinate_xy, 0) # Expanding the dimension of the coordinate list
predict=model.predict(coordinate_xy_tensor) # Making an initial prediction using the model
predict_index=np.argmax(predict[0], axis=0) # Generating index out of the prediction
predicted_class=class_list[predict_index] # Tallying the index with class list
print(predicted_class)
runQuarky(predicted_class)
# Do not change


 The destination devices could be
 It could be
 The actions based on the information and data could be