Deprecated: Required parameter $query follows optional parameter $post in /var/www/html/wp-content/plugins/elementor-extras/modules/breadcrumbs/widgets/breadcrumbs.php on line 1215
set ChatGPT API to () - PictoBlox Block |
Table of Contents
[BlocksExtension]

Warning: Undefined array key "pp_wrapper_link" in /var/www/html/wp-content/plugins/powerpack-elements/extensions/wrapper-link.php on line 194

Warning: Undefined array key "pp_wrapper_link_enable" in /var/www/html/wp-content/plugins/powerpack-elements/extensions/wrapper-link.php on line 196

Warning: Undefined array key "pp_custom_cursor_icon" in /var/www/html/wp-content/plugins/powerpack-elements/extensions/custom-cursor.php on line 350

Warning: Undefined array key "pp_custom_cursor_text" in /var/www/html/wp-content/plugins/powerpack-elements/extensions/custom-cursor.php on line 351

Warning: Undefined array key "pp_custom_cursor_target" in /var/www/html/wp-content/plugins/powerpack-elements/extensions/custom-cursor.php on line 352

Warning: Undefined array key "pp_custom_cursor_css_selector" in /var/www/html/wp-content/plugins/powerpack-elements/extensions/custom-cursor.php on line 353

Warning: Undefined array key "pp_custom_cursor_enable" in /var/www/html/wp-content/plugins/powerpack-elements/extensions/custom-cursor.php on line 355

set ChatGPT API to ()

Description

The block sets the user API key of the ChatGPT in the project.

How to get the API Key?

Follow the process the get your own API key.

  1. Go to the Open AI website: https://platform.openai.com/overview
  2. Create Open AI Account:
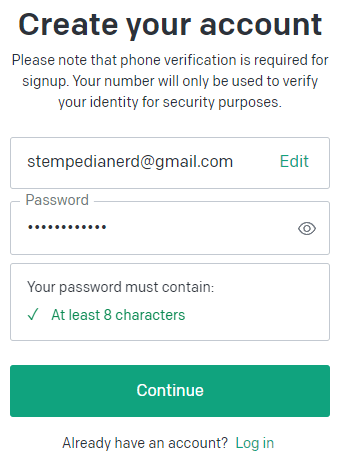
    1. Click on Signup.
    2. Enter your email ID and click on Continue.
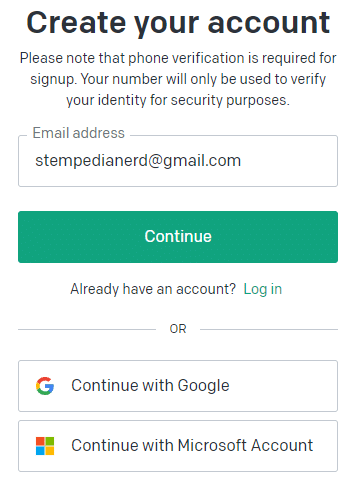
    3. Enter the password and click on Continue.
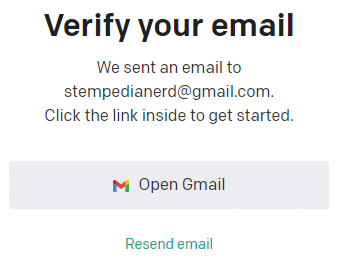
    4. Verify your email ID.
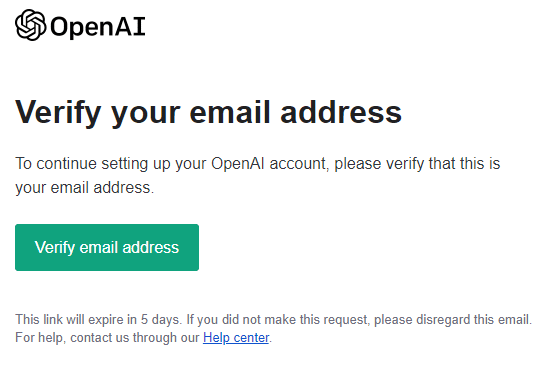
    5. Go to your email inbox and check your email from Open AI. Click on Verify Email Address.
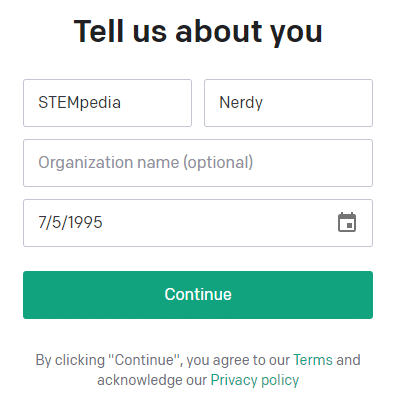
    6. Next, you have to enter details about yourself. Fill up and click on Continue.
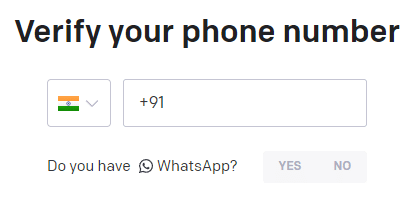
    7. Next, verify your number.
    8. Once verified you will be automatically logged in on the website.
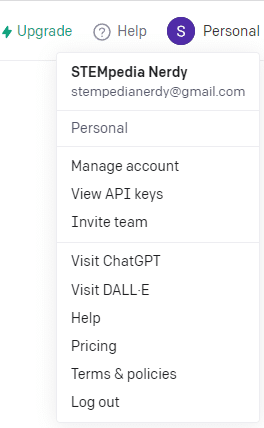
  3. Click on the Personal tab in the right top corner and select View API keys.
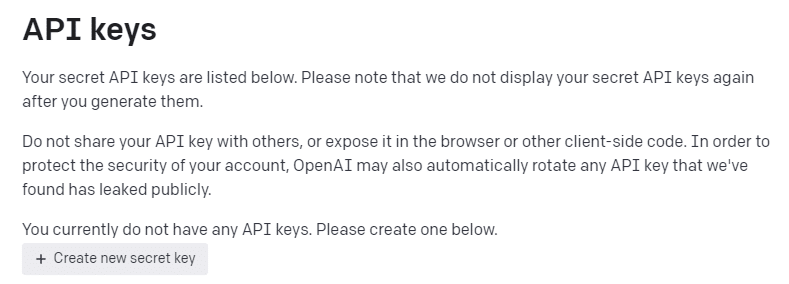
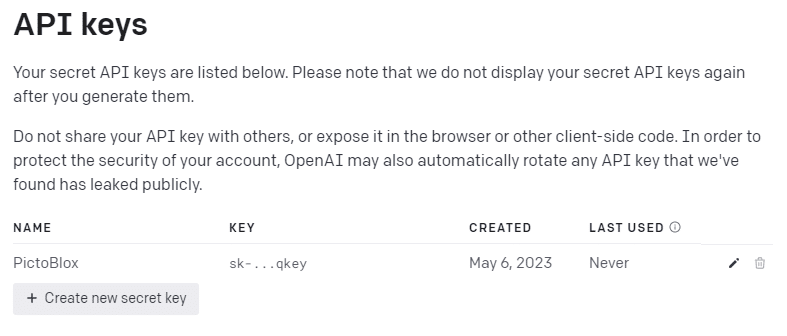
  4. You will be able to see all the API keys here. Click on Create new secret key button.
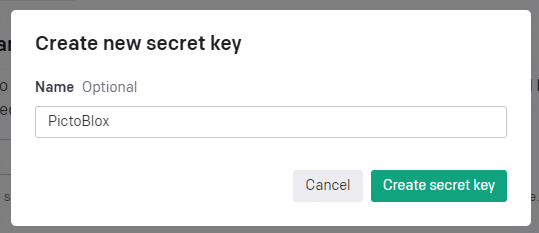
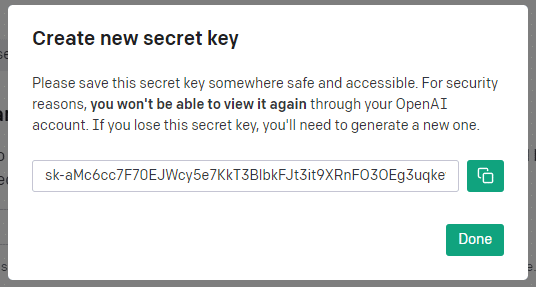
  5. Enter the secret key name of your choice and click on Create secret key.
  6. The key will be generated. Copy it and save it in a text file on your computer for future use. Click on Done.
  7. You can see the API key generated on the page.
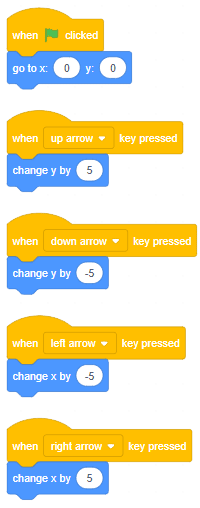
  8. Next, in PictoBlox you can add the API key in the set ChatGPT API to () block. This will set the API key for the project.

Example

The project detects the number of faces detected on the stage.

Code

sprite = Sprite('Tobi')

fd = FaceDetection()

# Enable Bounding Box on the stage
fd.enablebox()

# Set Theshold of the stage
fd.setthreshold(0.9)

fd.analysestage()

sprite.say(str(fd.count()) + " Faces Detected")

Output

Read More
The example demonstrates how face recognition works with analysis on the stage.

The example demonstrates the application of face recognition with stage. Following are the key steps happening:

  1. Initializing the program with parameters for the sprite and face detection library.
  2. Saving Chris’s face as class 1.
  3. Saving Robert’s face as class 2.
  4. Running face recognition and placing the square box sprite on the faces of Chris and Robert.

Code

sprite = Sprite('Square Box')
fd = FaceDetection()
import time

fd.setthreshold(0.5)
fd.enablebox()

# Reset Database
fd.deleteallclass()

# Adding Chirs face to database
sprite.switchbackdrop("Chris")
time.sleep(0.5)
fd.addclassfromstage(1, "Chris")

# Adding Robert face to database
sprite.switchbackdrop("Robert")
time.sleep(0.5)
fd.addclassfromstage(2, "Robert")

sprite.switchbackdrop("Robert and Chris")

while True:
  fd.recognisefromstage()
  
  print(fd.count())
  for i in range(fd.count()):
    sprite.setx(fd.x(i+1))
    sprite.sety(fd.y(i+1))
    sprite.setsize(fd.width(i+1))
    sprite.say(getclassname(i+1))
    time.sleep(1)

Result

Read More
The example demonstrates how face recognition works with analysis on the camera.

The example demonstrates the application of face recognition with camera feed. Following are the key steps happening:

  1. Initializing the program with parameters for the sprite and face detection library.
  2. Saving the face showing in the camera as class 1.
  3. Running face recognition and reporting whether class 1 is detected or not.

Code

sprite = Sprite('Tobi')

fd = FaceDetection()
import time

fd.setthreshold(0.5)
fd.video("on", 0)
fd.enablebox()
time.sleep(2)

fd.deleteallclass()

# Adding face 1 to database
fd.addclassfromstage(1, "Face 1")

while True:
  fd.recognisefromcamera()
  
  if fd.isclassdetected(1):
    sprite.say("Face 1 Recognised")
  else:
    sprite.say("Face 1 Missing")

Output

Read More
The example demonstrates the application of face detection with a stage feed.

The example demonstrates the application of face detection with a stage feed. Following are the key steps happening:

  1. Initializing the program with parameters for the sprite and face detection library.
  2. Running face detection
  3. Running the loop to show every face and its expression

Code

sprite = Sprite('Square Box')
import time
fd = FaceDetection()

# Disable Bounding Box on the stage
fd.disablebox()

# Set Theshold of the stage
fd.setthreshold(0.4)

fd.analysestage()

print(fd.count())

for i in range(fd.count()):
  sprite.setx(fd.x(i + 1))
  sprite.sety(fd.y(i + 1))
  sprite.setsize(fd.width(i + 1))
  sprite.say("Face " + str(i + 1) + ": " + fd.expression(i + 1))
  time.sleep(1)

Output


Read More
The example demonstrates how to use face landmarks in the projects.

The example demonstrates how to use face landmarks in the projects. Following are the key steps happening:

  1. Initializing the program with parameters for the sprite, pen, and face detection library.
  2. Running face detection.
  3. Running the loop to show every landmark on the face.

Code

sprite = Sprite('Ball')
fd = FaceDetection()
import time
pen = Pen()

pen.clear()
sprite.setsize(10)

fd.enablebox()

fd.analysestage()

for i in range(68):
  sprite.setx(fd.landmarksx(1, i+1))
  sprite.sety(fd.landmarksy(1, i+1))
  pen.stamp()
  time.sleep(0.2)

Output


Read More
The example demonstrates how to use face detection with a camera feed.

The example demonstrates how to use face detection with a camera feed. Following are the key steps happening:

  1. Initializing the program with parameters for the sprite, and face detection library.
  2. Running face detection.
  3. Running the loop to show every face and expression.

Code

sprite = Sprite('Square Box')
import time
fd = FaceDetection()

fd.video("on", 0)

# Enable Bounding Box on the stage
fd.enablebox()

# Set Theshold of the stage
fd.setthreshold(0.5)

while True:
  fd.analysestage()

  for i in range(fd.count()):
    sprite.setx(fd.x(i + 1))
    sprite.sety(fd.y(i + 1))
    sprite.setsize(fd.width(i + 1))
    sprite.say(fd.expression(i + 1))

Output

Read More
Beating-Heart (4)
The project shows how to create custom patterns on Quarky RGB LED in Stage Mode.

Beating-Heart (4)

Code

sprite = Sprite('Tobi')
quarky = Quarky()

import time

while True:
	quarky.drawpattern("jjbjbjjjbbbbbjjbbbbbjjjbbbjjjjjbjjj")
	time.sleep(0.4)
	quarky.drawpattern("jjjjjjjjjbjbjjjjbbbjjjjjbjjjjjjjjjj")
	time.sleep(0.4)
Read More
The project shows how to create custom patterns on Quarky RGB LED in Upload Mode.

Beating-Heart (4)

Code

from quarky import *
import time

while True:
	quarky.drawpattern("jjbjbjjjbbbbbjjbbbbbjjjbbbjjjjjbjjj")
	time.sleep(1)
	quarky.drawpattern("jjjjjjjjjbjbjjjjbbbjjjjjbjjjjjjjjjj")
	time.sleep(1)
Read More
The project shows how to create custom patterns on Quarky RGB LED in Upload Mode.

Beating-Heart (4)

Script

Python Code Generated

# This python code is generated by PictoBlox

from quarky import *
# This python code is generated by PictoBlox

# imported modules
import time


while True:
	quarky.drawpattern("jjbjbjjjbbbbbjjbbbbbjjjbbbjjjjjbjjj")
	time.sleep(1)
	quarky.drawpattern("jjjjjjjjjbjbjjjjbbbjjjjjbjjjjjjjjjj")
	time.sleep(1)
	
	
Read More
Beating-Heart
The project shows how to create custom patterns on Quarky RGB LED in Upload Mode.

Beating-Heart (4)

Script

Read More
The project makes the Quarky display the expression according to the expression identified from the Face Recognition.

Script

Read More
The example shows how to run image classification in Python on a webcam feed using OpenCV.

Image Classification Model

Code

####################imports####################
#do not change

import cv2
import numpy as np
import tensorflow as tf

sprite = Sprite("Tobi")

#do not change
####################imports####################

#Following are the model and video capture configurations
#do not change

model = tf.keras.models.load_model('saved_model.h5',
                                   custom_objects=None,
                                   compile=True,
                                   options=None)

cap = cv2.VideoCapture(0)  # Using device's camera to capture video
text_color = (206, 235, 135)
org = (50, 50)
font = cv2.FONT_HERSHEY_SIMPLEX
fontScale = 1
thickness = 3

class_list = ['Mask Off', 'Mask On', 'Mask Wrong']  # List of all the classes

#do not change
###############################################


def checkmask(predicted_class):
  if predicted_class == 'Mask On':
    sprite.say("Thank you for wearing the mask")
  elif predicted_class == 'Mask Off':
    sprite.say("Please wear a mask")
  else:
    sprite.say("Please wear the mask propertly")


#This is the while loop block, computations happen here

while True:
  ret, image_np = cap.read()  # Reading the captured images
  image_np = cv2.flip(image_np, 1)
  image_resized = cv2.resize(image_np, (224, 224))
  img_array = tf.expand_dims(image_resized,
                             0)  # Expanding the image array dimensions
  predict = model.predict(img_array)  # Making an initial model prediction
  predict_index = np.argmax(predict[0],
                            axis=0)  # Generating index out of the prediction
  predicted_class = class_list[
      predict_index]  # Tallying the index with class list

  image_np = cv2.putText(
      image_np, "Image Classification Output: " + str(predicted_class), org,
      font, fontScale, text_color, thickness, cv2.LINE_AA)

  print(predict)
  cv2.imshow("Image Classification Window",
             image_np)  # Displaying the classification window
  checkmask(predicted_class)

  if cv2.waitKey(25) & 0xFF == ord(
      'q'):  # Press 'q' to close the classification window
    break

cap.release()  # Stops taking video input
cv2.destroyAllWindows()  #Closes input window
Read More
The example shows how to run image classification in Python on an image file using OpenCV.

Image Classification Model


Code

####################imports####################
#do not change

import cv2
import numpy as np
import tensorflow as tf

#do not change
####################imports####################

#Following are the model and video capture configurations
#do not change

model = tf.keras.models.load_model('saved_model.h5',
                                   custom_objects=None,
                                   compile=True,
                                   options=None)

text_color = (206, 235, 135)
org = (50, 50)
font = cv2.FONT_HERSHEY_SIMPLEX
fontScale = 0.5
thickness = 1

class_list = ['Bacteria', 'Normal', 'Virus']  # List of all the classes

#do not change
###############################################

image_np = cv2.imread("test.jpg", cv2.IMREAD_COLOR)
image_resized = cv2.resize(image_np, (224, 224))
img_array = tf.expand_dims(image_resized,
                           0)  # Expanding the image array dimensions
predict = model.predict(img_array)  # Making an initial model prediction
predict_index = np.argmax(predict[0],
                          axis=0)  # Generating index out of the prediction
predicted_class = class_list[
    predict_index]  # Tallying the index with class list

image_np = cv2.putText(image_np,
                       "Image Classification Output: " + str(predicted_class),
                       org, font, fontScale, text_color, thickness,
                       cv2.LINE_AA)

print(predict)
cv2.imshow("Image Classification Window",
           image_np)  # Displaying the classification window

cv2.imwrite("TestResult.jpg", image_np)
cv2.waitKey(0)
cv2.destroyAllWindows()
Read More
The example shows how to run image classification in Block Coding.

Script

Read More
The example demonstrates how to use the confidence threshold in face detection (Block Coding).

Script

Output

Read More
The example displays how to detect expression using face detection and mimic the expression on Quarky. The expression is detected by the camera.

Script

Output

Read More
The example shows how to create a face filter with Face Detection. It also includes how to make the filter tilt with face angles.

Script

Exmaple

Read More
Face Landmarks
The example demonstrates how to use face landmarks in the projects.

The example demonstrates how to use face landmarks in the projects. Following are the key steps happening:

  1. Initializing the program with parameters for the sprite, pen, and face detection library.
  2. Running face detection.
  3. Running the loop to show every landmark on the face.

Script

Output

Face Landmarks

Read More
The example demonstrates how face recognition works with analysis on the camera.

The example demonstrates the application of face recognition with a camera feed. Following are the key steps happening:

  1. Initializing the program with parameters for the sprite and face detection library.
  2. Saving the face showing in the camera as class 1.
  3. Running face recognition and reporting whether class 1 is detected or not.

Script

Output

Read More
The example demonstrates how face recognition works with analysis on the stage.

The example demonstrates the application of face recognition with stage. Following are the key steps happening:

  1. Initializing the program with parameters for the sprite and face detection library.
  2. Saving Chris’s face as class 1.
  3. Saving Robert’s face as class 2.
  4. Running face recognition and placing the square box sprite on the faces of Chris and Robert.

Script

Output

Read More
The example demonstrates the use of clone and gliding function in Sprite. 

The example demonstrates the use of clone and gliding function in Sprite:

  1. Whenever the sprite is clicked, a clone is created.
  2. When a clone is created its position is set to a random position on the top of the stage and then it glides down to the bottom.
  3. When it reaches the bottom, the clone is deleted.

Script

Output

Read More
The example demonstrates how to make the sprite glide to a random position on the stage when it is clicked.

Script

Output

Read More
The example demonstrates how to use stamping and the mouse location sensing in Block coding.

Script

Output

Read More
The example demonstrates how to use keys sensing to control the movement of the sprite.

Script

Output

Read More
The example demonstrates the wall bouncing of the sprite and rotation style.

Script


Output

Read More
The example demonstrates how to make the sprite follow the mouse.

Script

Output

Read More
The example demonstrates how to add gravity into the project on a bouncing ball.

Script

  1. Main Script to change the speed and position parameters of the ball.
  2. Custom function to initialize the ball position and speed with random variables.
  3. Custom function to check the boundary conditions and set the rules.

Output

Read More
The example demonstrates how to implement mouse tracking.

Script

Output

Read More
The example demonstrates how to add movement to a sprite using the key detection hat block.

Script

Output

Read More
The example demonstrates the sprite direction in PictoBlox.

Script

Output

Read More
All articles loaded
No more articles to load
[PictoBloxExtension]