The Video Sensing Extension allows webcams to interact with Projects through Video Sensing.
Read More
PictoBlox Blocks
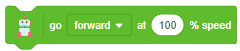
The block moves the Quarky robot in the specified direction. The direction can be “FORWARD”, “BACKWARD”, “LEFT”, and “RIGHT”.
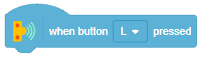
The block is a hat block and starts the execution of the script added under it when the specified push button is pressed.
The block plays the specified audio on the Quarky speaker. The block does not have any callbacks, so other blocks can be executed while this block is running.
The block opens the recognition window and shows the machine learning analysis on the camera feed. Very good for visualization of the model in PictoBlox.
The block opens the recognition window and shows the machine learning analysis on the camera feed. Very good for visualization of the model in PictoBlox.
The block sets the servo connections of the specified location to the specified pins.
The block opens the recognition window and shows the machine learning analysis on the camera feed. Very good for visualization of the model in PictoBlox.
The block sets the input for the number classification and regression model to the specified value. The dropdown of the inputs is dynamically populated according to the ML model trained.
The block opens the recognition window and shows the machine learning analysis on the audio feed. Very good for visualization of the model in PictoBlox.
The block sets the boundaries for the stage. Available types: boxed with roof, boxed without roof, open with floor, and open without floor.
The block set the state of the relay connected to the selected pin to High or Low. A high state means that the pin will have 3.3V and for Low, the pin will be 0 V. This triggers the state of the relay.
The block initializes the Expansion Board of Quarky for use. Without initialization, the board will not respond to any other blocks.
The block connects the Quarky or ESP32 to the specified Wi-Fi and password. The block is only available in the Upload Mode when the code is uploaded to Quarky.
The block sets the IFTTT event name and the webhook key for the project.
The block initializes the quadruped robot and maps the 8 servos to the specified pins.
The block creates the CSV file with the specified name and links all the data storage to it. If the file already exists, then it rewrites it.
The block initializes the Quarky Mecanum Robot Drive Motors. This allows the code to have information on which port is connected to the Front Left, Front Right, Back Left, and Back Right Servo Motors.
The block sets the randomness and creativity level of the ChatGPT responses, varying from 0 to 1. This setting controls the creativity of the system, with higher values leading to more creative output. By default, the creativity value is set to 0.7.
The read state of digital pin () block is a boolean block available in Arduino Uno, Arduino Mega, and Arduino Nano boards. It reads the state of the digital pin on the hardware and returns either a True value (if the pin is set to “High”) or a False value (if the pin is set to “Low”).
The block does the pin assignments for a 16×2 display module. The specific pins that are assigned are for the Reset (RST), Enable (EN), Data 4 (D4), Data 5 (D5), Data 6 (D6), and Data 7 (D7) pins of the module. This initialization enables the code to use the 16×2 display.
This block initializes a Robotic Arm connected to a Quarky Expansion Board. The user can select the specific pin connected to the servo motors from a dropdown menu. Once initialized, the robotic arm will respond to code and be ready for further instructions.
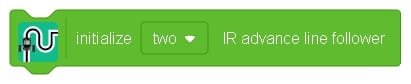
Configure Quarky for advanced line following by connecting two IR sensors to analog pins or three IR sensors to digital pins for optimal alignment and control.
Starts the script when the green flag is clicked.
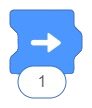
Moves the sprite a specified number of step forward.
Shows a specified message in a speech bubble above the selected sprite.
Pauses the script for a specified amount of time (in seconds).
This button allows to record a sound from mic.
After execution, the sprite will draw lines on the stage when sprite is moved.
After connection is established, moves the quarky a specified number of step forward.
Lights up the LED of the quarky with specified color.