[PictoBloxExtension]

Speaker (Quarky)

Quaky-sensors
Extension Description
Controls the speaker of the Quarky to play music.

Introduction

The extension allows you to control the speaker of the Quarky.

Connecting Quarky with PictoBlox

Let’s begin by first connecting Quarky to PictoBlox. Select your preferred type of device i.e. either the desktop/laptop or your smartphone and follow the instructions.

Desktop

Follow the steps below for connecting Quarky to PictoBlox:

  1. First, connect Quarky to your laptop using a USB cable.
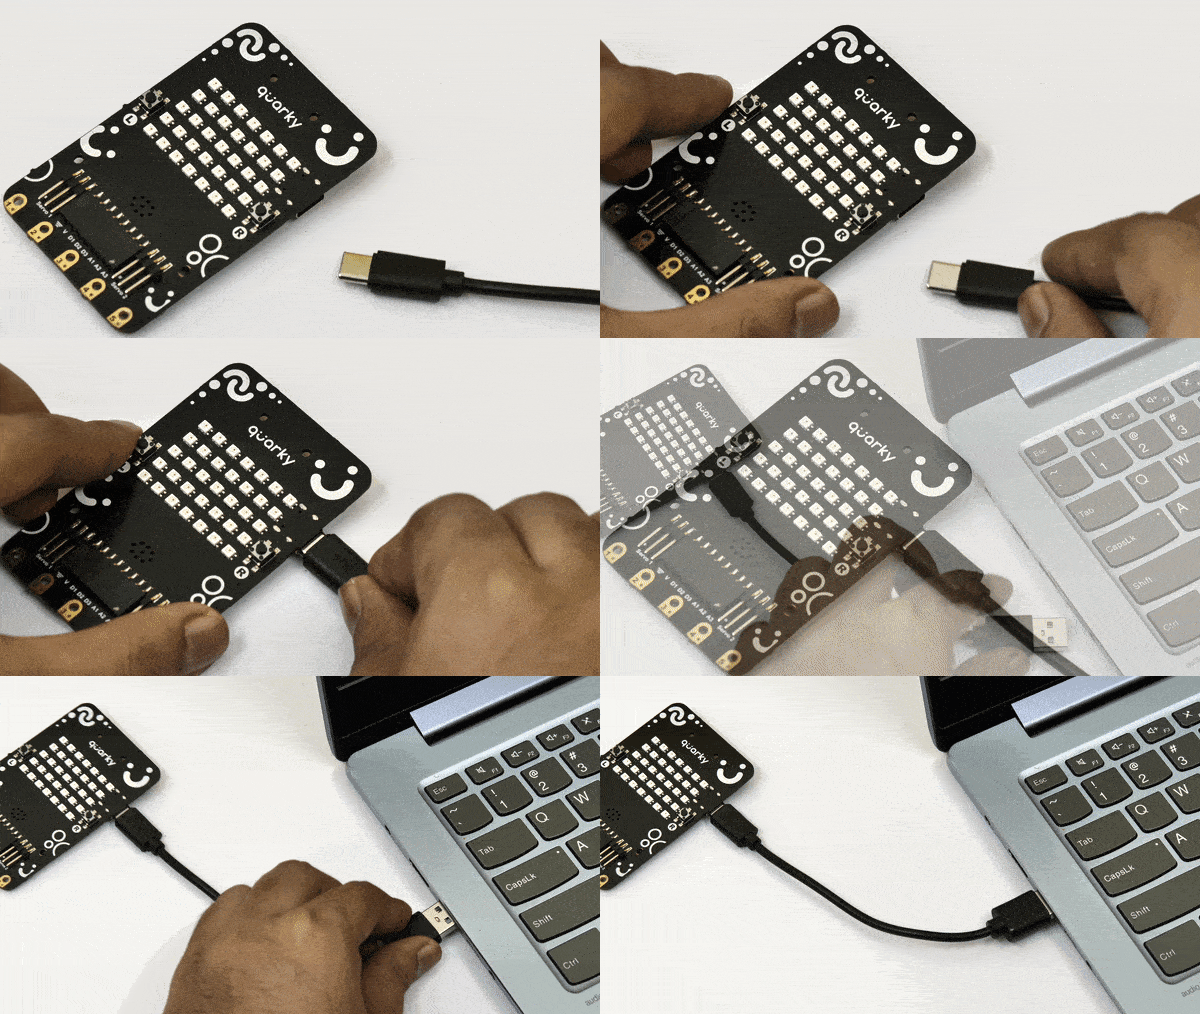
    Power Quarky
  2. Next, open PictoBlox on your desktop.
  3. After that, select Block or Python Coding as your coding environment.
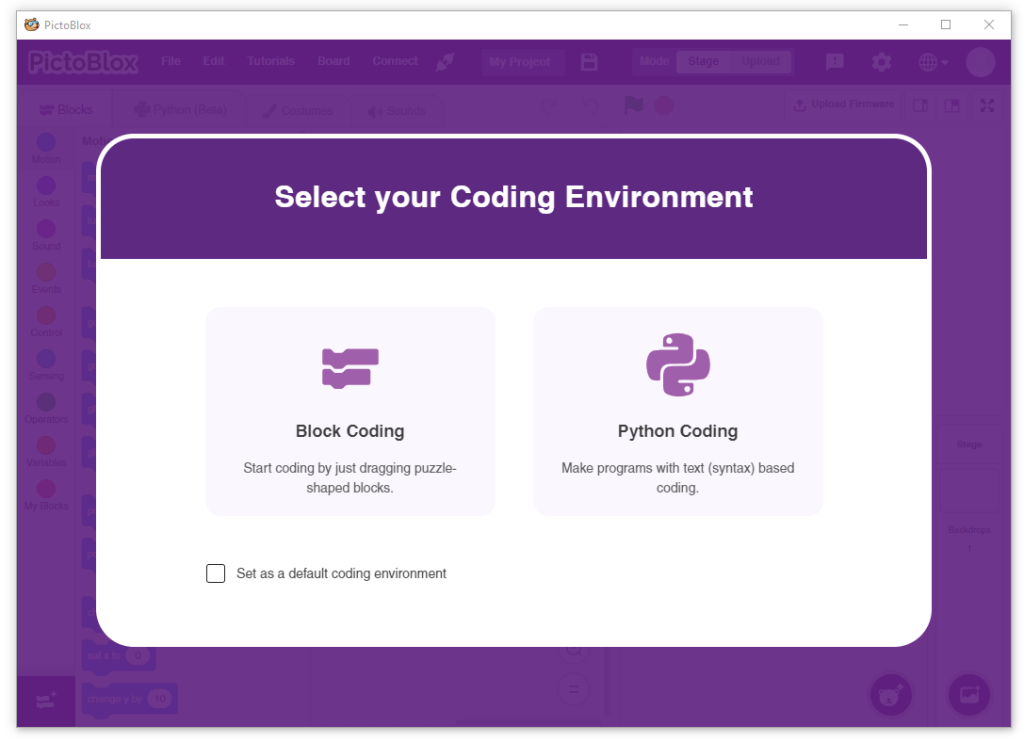
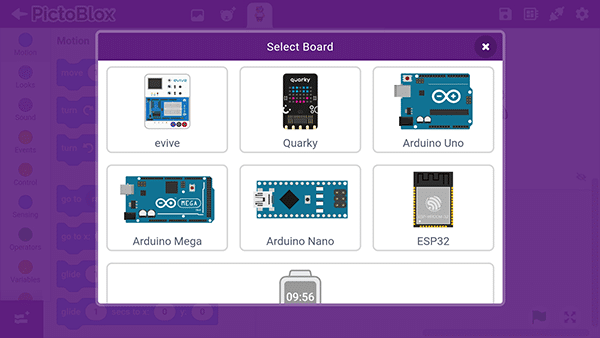
  4. Then, click the Board button in the toolbar and select board as Quarky.
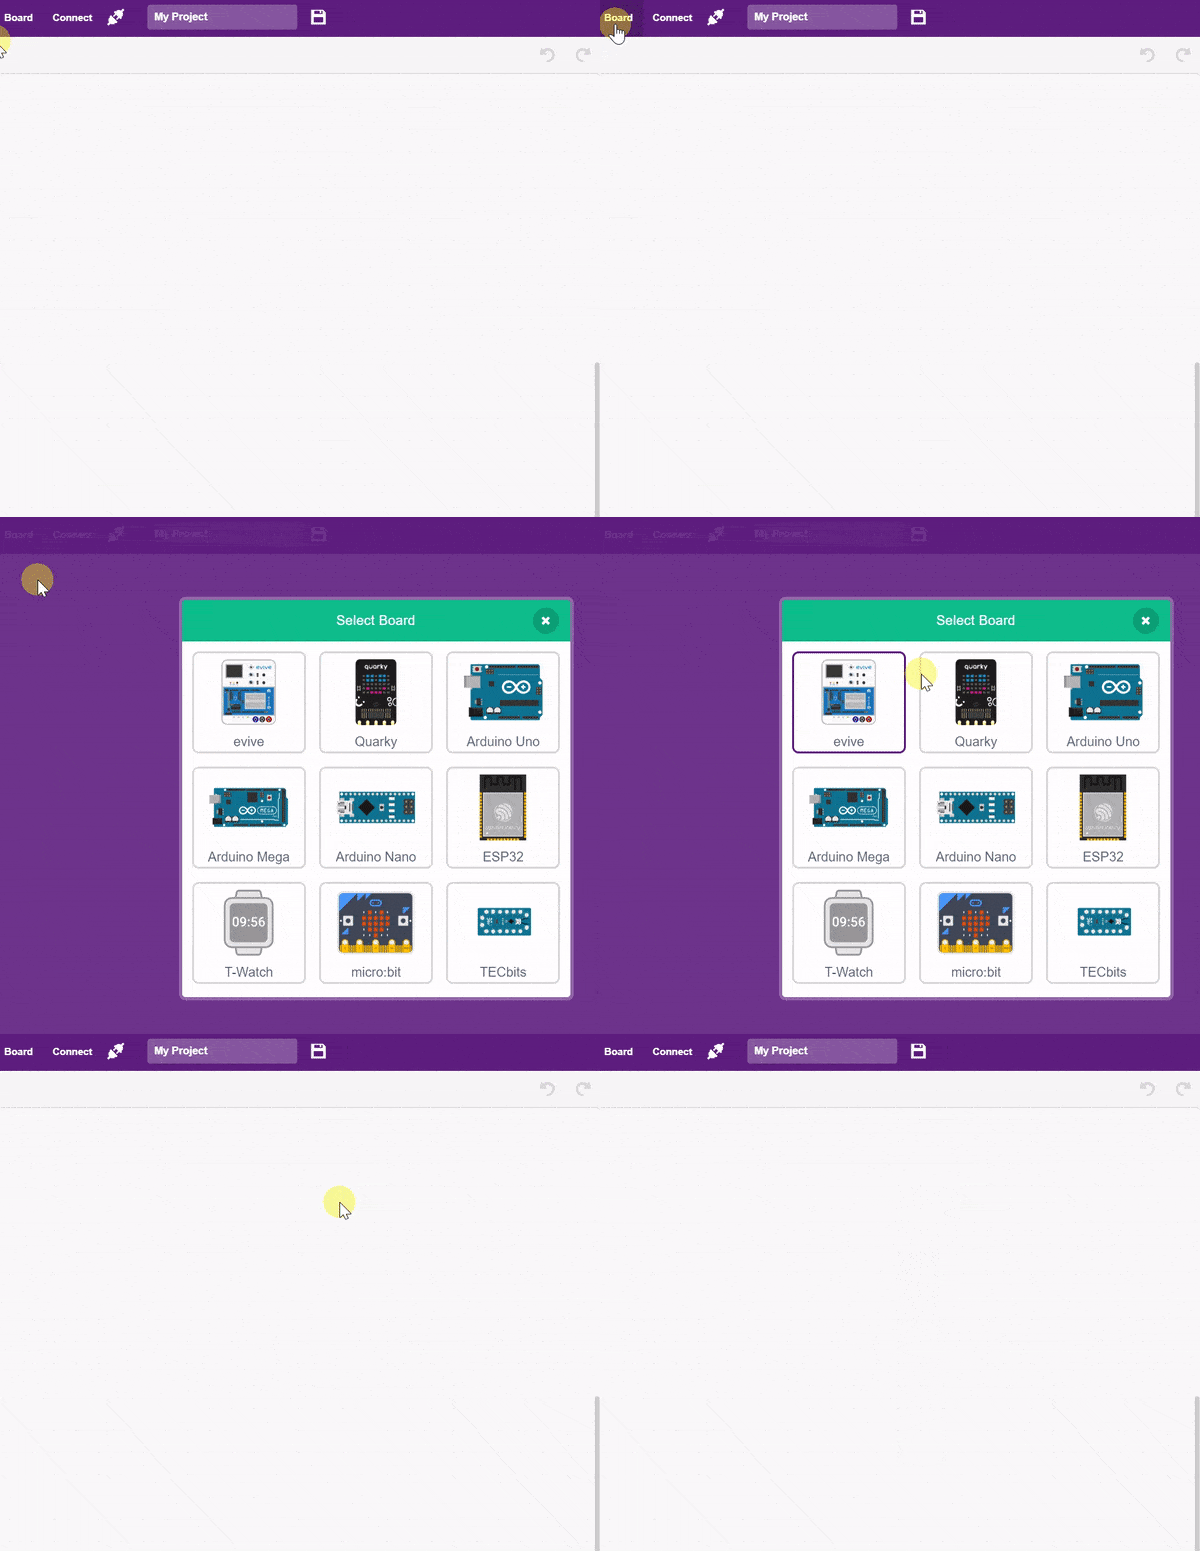
  5. Next, select the appropriate Serial port if the Quarky is connected via USB or the Bluetooth Port if you want to connect Quarky via Bluetooth and press Connect.
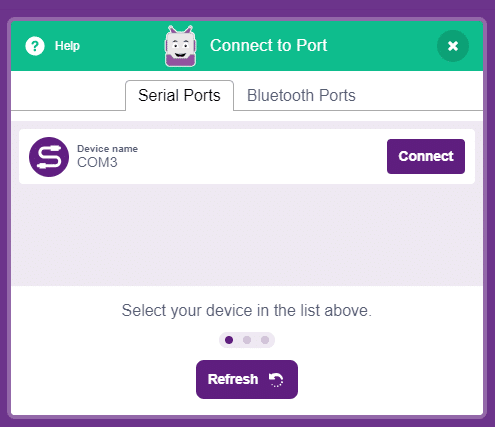
    COM Port

And voila! Quarky is now connected to PictoBlox.

Mobile

Follow the steps below for connecting Quarky to PictoBlox:

  1. First, power ON Quarky.
  2. Open PictoBlox on your smartphone. Go to My Space and make a new project by clicking the ‘+(plus)’ button in the bottom-right corner.
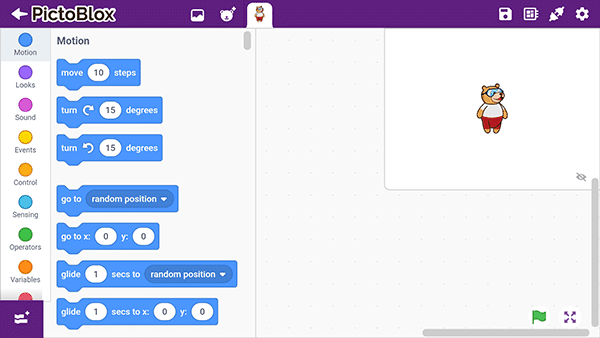
    PictoBlox in Mobile Phone
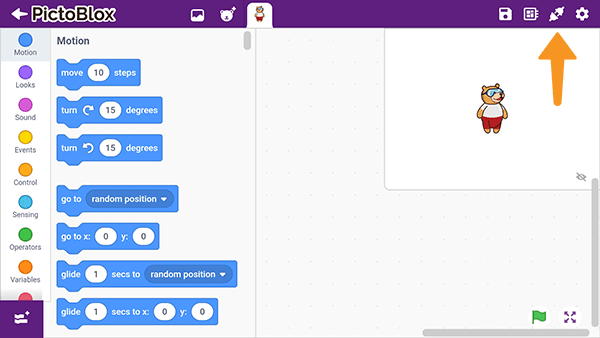
  3. Then, tap the Board button in the top-right corner of the toolbar.
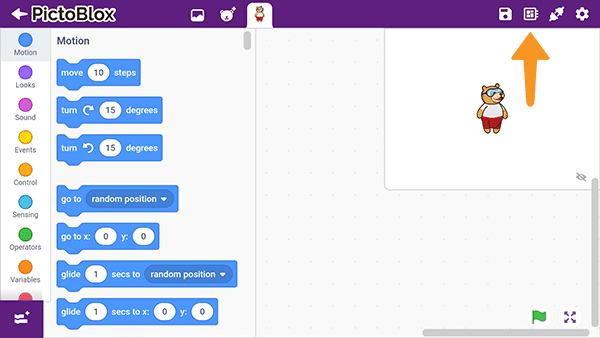
    PictoBlox BoardSelect board as Quarky.
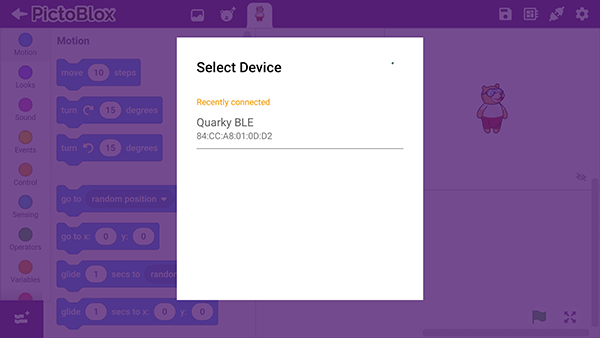
  4. Next, tap the Connect button:
    PictoBlox ConnectSelect your device from the list.

And voila! Quarky is now connected to PictoBlox.

Stage Mode

Stage mode is one of the two modes you can write your programs in Pictoblox. In this mode, you can write scripts for the sprite and boards to interact with sprites in real-time. If you disconnect the board with Pictoblox, you cannot interact with the board anymore. In this mode, you can make games and animation interacting with Quarky.

You can toggle between the upload mode and stage mode using the button on the top right side of Pictoblox.

Note:  You have to upload the firmware into the device before interacting with it. Please refer to this doc: https://ai.thestempedia.com/docs/updating-quarky-firmaware-with-pictoblox/

In Python Coding Environment, use the following object declaration to use Python functions in Stage Mode:

quarky = Quarky()

Upload Mode

Upload mode is one of the two modes you can write your programs in Pictoblox. This mode allows you to write scripts and upload them to the board so that you can use them even when it is not connected to your computer, for example, you need to upload a script for making moving robots.

In this case, Quarky will run offline according to the program and it can not interact with the stage.

In Python Coding Environment, use the following object declaration to use Python functions in Upload Mode:

from quarky import *
Read More

PictoBlox Blocks

All articles loaded
No more articles to load

Block Coding Examples

All articles loaded
No more articles to load

Python Functions

The function turns the sprite by the specified amount of degrees clockwise. This changes the direction the sprite is facing.
Syntax: right(angle = 15)
The function gives its sprite a thought bubble with the specified text, which stays for the specified amount of seconds.
Syntax: think(message = “Hello!”, time = 0)
The function will play the specified sound, with no pause to its script.
Syntax: play(sound_name = “Grunt”)
The function removes all marks made by the pen or stamping. It is the only pen block that the Stage can use.
Syntax: clear()
The function turns off the specified RGB LED of Quarky (specified with the X and Y position of the LED).
Syntax: clearled(x_position = 1, y_position = 1)
The function returns the IR sensor analog reading. The reading varies from 0 to 4095.
Syntax: readirsensor(sensor = “IRL”)
The function moves the Quarky robot in the specified direction for the specified time. The direction can be “FORWARD”, “BACKWARD”, “LEFT”, and “RIGHT”.
Syntax: runtimedrobot(direction = “FORWARD”, speed = 100, time = 1)
The function plays the specified audio on the Quarky speaker. The function has a callback, so other functions will be executed after the audio is played.
Syntax: playsounduntildone(audio = “QuarkyIntro”)
This function is used to analyze the image received as input from the camera, for the feature.
Syntax: analysecamera()
This function is used to analyze the image received as input from the camera, for the handwritten and printed text.
Syntax: analysecamera()
When the function is executed, the recognition window will open and you will get a specified time during which PictoBlox will record whatever you say. Once recorded, the speech will be converted to the text of the language you spoke in and saved locally.
Syntax: analysespeech(time = 2, language = “en-US”)
The function sets the pick action angle with the specified angle. This is useful to set a custom pick angle for the pick and place robot.
Syntax: setpickangle(angle = 40)
The function returns a tensor with a length 1 axis inserted at the index axis.
Syntax: tf.expand_dims(input, axis = 0, name)
The function calibrates the angles of the servo motors and saves them in the memory of Quarky. Due to some mechanical assembly errors, there may be some misalignment of the servos which can be handled with this block.
Syntax: setoffset(Front Right Hip Offset = 0, Front Left Hip Offset = 0, Front Right Leg Offset = 0, Front Left Leg Offset = 0, Back Right Hip Offset = 0, Back Left Hip Offset = 0, Back Right Leg Offset = 0, Back Left Leg Offset = 0)
The function reports the state of the PIR sensor connected to the selected pin. The function returns 1 when it is HIGH (or 3.3V) or 0 when it is LOW (or 0V).
Syntax: pirstatus(pin = “D3”)
The function creates an Adafruit IO object that set up the API connection between the PictoBlox and the Adafruit server with the specified username and AIO key.
Syntax: adaio.connecttoadafruitio(username = “username”, AIO Key = “AIO key”)
The function calibrates the angle servo motors and saves them in the memory of Quarky. Due to some mechanical assembly errors, there may be some misalignment of the servos which can be handled with this block.
Syntax: setoffset(Head = 0, Front Left = 0, Front Right = 0, Back Left = 0, Back Right = 0)
The function calibrates the angles of the hip and foot servo motors and saves them in the memory of Quarky. Due to some mechanical assembly errors, there may be some misalignment of the servos which can be handled with this block.
Syntax: setlegoffset(Left Hip Offset = 0, Right Hip Offset = 0, Left Foot Offset = 0, Right Foot Offset = 0)
The function allows the robot to move in the specified direction at a given speed.
Syntax: runrobot(direction = “forward”, speed = 100)
The function sets the servo motor connected to the specified servo pin of the Quarky Expansion board to the specified angle. The expansion board can control up to 8 servos simultaneously.
Syntax: moveservo(servo port = 1, angle = 40)
The function is used to return the inverse hyperbolic cosine of a given value.
Syntax: math.acosh(x)
The function takes the current end–effector position and adds an offset value to it. It then updates the end–effector position in the length and Z directions according to the specified direction. The function also normalizes the end–effector position, ensuring that the calculated offset is applied consistently.
Syntax: roboticArm.setoffset(length Offset = 0, Z Offset = 0)
This function moves the robot forward and reverse for a set time, collecting IR sensor data on white and black lines.
Syntax: calibrateir()
The function disables the automatic display of the box on face detection on the stage.
Syntax: disablebox()
The function turns the sprite by the specified amount of degrees counter-clockwise. This changes the direction the sprite is facing.
Syntax: left(angle = 15)
The function changes its sprite’s costume to a specified one.
Syntax: switchcostume(costume_name = “Tobi Jump”)
The function will stop any sounds currently being played on all sprites and the Stage. Pressing the Stop button will also stop all sounds, but is rarely used as it also stops all the other scripts running in the project.
Syntax: stopallsounds()
The function reports the Euclidean distance, in pixels, between it and the mouse-pointer or a specified sprite’s costume center.
Syntax: distance(object_name = “_edge_”)
The function will make its sprite continuously pen a trail wherever it moves until the up() function is used. The color, size, and transparency of the trail can be changed with other functions.
Syntax: down()
The function reads the digital value of the sensors connected to the specified pin. The function returns True or False.
Syntax: readdigitalinput(pin)
All articles loaded
No more articles to load

Python Coding Examples

All articles loaded
No more articles to load
Table of Contents