Deprecated: Required parameter $query follows optional parameter $post in /var/www/html/wp-content/plugins/elementor-extras/modules/breadcrumbs/widgets/breadcrumbs.php on line 1215
QR Code Scanner - Blocks, Python Functions, Projects | PictoBlox Extension
[PictoBloxExtension]

QR Code Scanner

QR scanner
Extension Description
Detect, identify and read QR codes from images.

Introduction

What is QR Code?

QR Code is a machine-scannable image that can be instantly read, using a smartphone camera. Every QR code consists of a number of black squares and dots that represent some encoded piece of information; like alphabets, numbers, etc. When your Smartphone scans this code, it translates that encoded information that only computers can understand, into something that can be easily understood by humans.
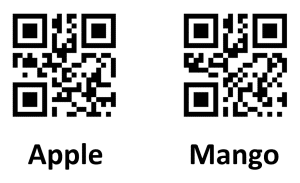
 

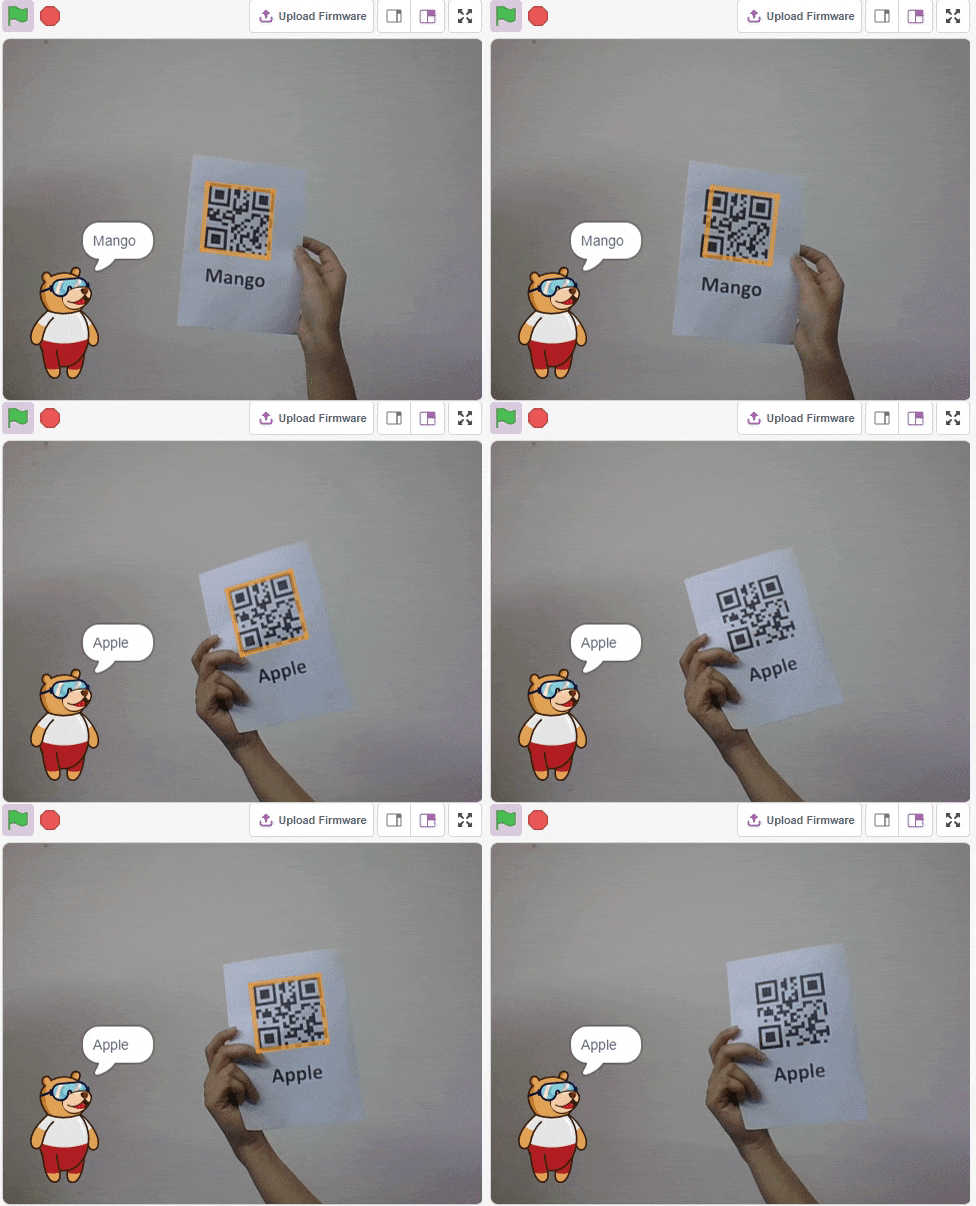
The QR Code Scanner extension allows users to scan QR codes from the camera or stage and report the information:

  1. QR Code Data
  2. QR code position on the stage
  3. QR code angle alignment on the stage

Accessing QR Code Scanner in Block Coding

Following is the process to add QR Code Scanner capability to the PictoBlox Project.

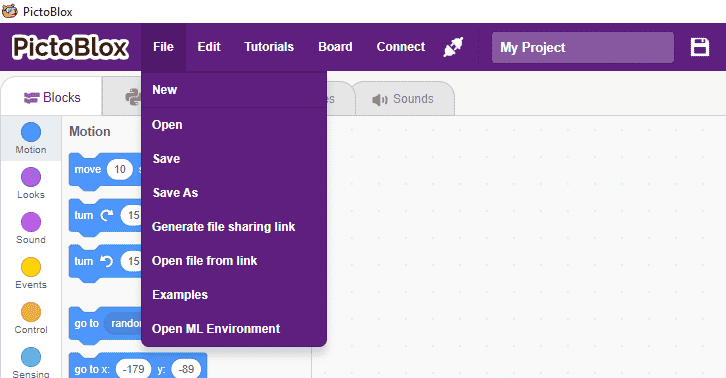
  1. Open PictoBlox and create a new file.
  2. Select the coding environment as Block Coding.
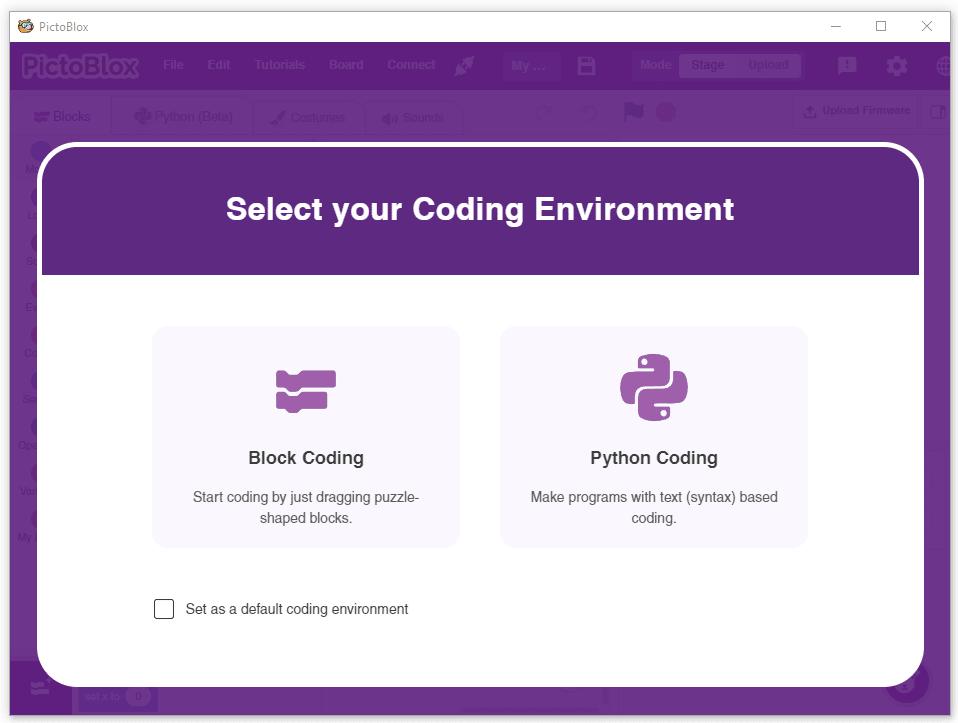
  3. Next, click on the Add Extension button and add the QR Code Scanner extension.
  4. You can find the QR Code Scanner blocks available in the project.
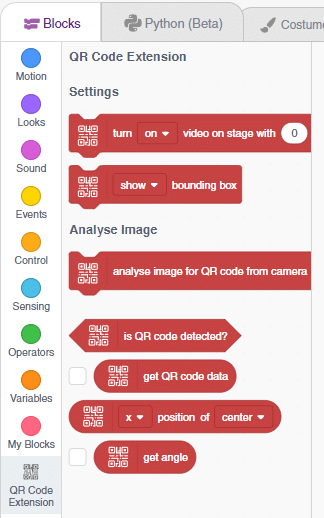
Accessing QR Code Scanner  in Python Coding

Following is the process to add QR Code Scanner capability to the PictoBlox Project.

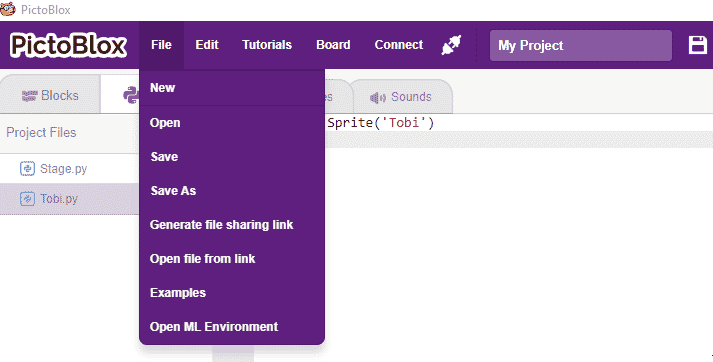
  1. Open PictoBlox and create a new file.
  2. Select the coding environment as Python Coding.
  3. Next, click on the Add Modules/Libraries button and add the QR Code Scanner extension.
  4. To access the library functions, you have to add the object declaration.
    qr = QRCodeScanner()

Example Project Video

In this project, a QR code is generated with the help of a QR code generator website. credits – https://www.qr-code-generator.com/

The QR code is linked to a URL. Then, the QR code is scanned with the help of the QR code scanner extension of Pictoblox. The project is created by RS Junction.

Read More

PictoBlox Blocks

The block is used to change the color of the entire TFT screen of evive. You can select the color from the color picker.
The block allows the user to control the brightness of LED connected to digital pins of the device using Dabble app. You can enter the pin number to which your device is connected and vary the brightness in the app.
The block reports the distance of the nearest object from an ultrasonic sensor. It returns distance in cm. The trigger pin and echo pin are connected to a digital pin of evive which can be selected from the drop-down menu.
This block initializes motor and assigns the motor its direction 1, direction 2 and PWM control pins.
To work in the stage mode, we have to upload firmware in evive which can communicate with PictoBlox in real-time. With the help of this block, we will use the upload stage mode firmware to the robot.
The block moves its sprite forward the specified amount of steps in the direction it is facing. A step is equal to one-pixel length. The block actually uses Trigonometry to move in the proper direction, as that is how a computer handles it.
The block displays a speech bubble with the specified text for the sprite that runs it, which appears on the screen for the specified amount of seconds.
The block will play the specified sound, pausing its script until the sound has finished playing.
The block pauses its script for the specified amount of seconds — the wait can also be a decimal number.
Scripts that wear this block will activate once the Green Flag has been clicked — these scripts can activate other scripts and enable the entire program. Without this block, the only way a project could run would be that it would sense the pressing of a key or clicking a sprite; the project would only last until all scripts depending on the starting scripts have ended.
The block checks if its sprite is touching the mouse-pointer, edge, or another sprite. If the sprite is touching the selected object, the block returns true; if it is not, it returns false.
turn () video on stage with () % transparency block controls the control the camera feed on the stage.
The block checks if the first value is less than the second value. If it is less, the block returns true; if not, it returns false. This block works with letters too, as well as numbers. In Scratch, letters at the top of the alphabet (e.g. a, b, c) are worth less than letters at the end (e.g. x, y, z).
The block will set the specified variable to the given value: a string or number.
turn () video on stage with () % transparency block controls the control the camera feed on the stage.
The block sets a loudness filter threshold to remove the background noise from the audio file which is being analyzed.
The turn () video on stage with () % transparency block controls the control the camera feed on the stage.
The block adds the specified text data to the specified class for the training.
The turn () video on stage with () % transparency block controls the control the camera feed on the stage.
The speak () block uses the text-to-speech tool to speak the given text. It will speak the selected voice with the chosen language in the set language to () block. Usage of the block is limited to 128 characters. If a string longer than 128 characters is given, then only the first 128 characters will be spoken.
The block translates a string from the automatically detected language to the chosen language using Google Translate.
The turn () video on stage with () % transparency block controls the control the camera feed on the stage.
The block runs an API call to get the weather data of the location specified with the Longitude and Latitude. The API call can be done only 2 times per minute. If the user wants to have the data more frequently, they have to add the custom API using set Weather API to () block.
The block will play the specified instrument for the specified amount of seconds using a sampled percussion instrument. Even though the block uses the word “drum”, the choices in the drop-down menu are many different percussion instruments including drums, triangles, bongos, cowbell, vibraslap, and various idiophones.
The when video motion > () block activates when the current video motion on the stage is greater than the number entered. 
When used in a script, the sprite will produce a bitmap image of itself which is stamped onto the stage. (Because it is merely a picture of the sprite and not a sprite itself, it cannot be programmed.) Like other Pen blocks, the Stamp block will not draw over sprites. The erase all block removes all stamped images.
when Quarky starts up block is a Hat block. Scripts that wear this block get converted into Python code when you are in Upload Mode. This block is used when one has to upload a code into Quarky.
The block displays the specified emotions on the Quarky RGB LED. These emotions are static and predefined in the code.
All articles loaded
No more articles to load

Block Coding Examples

All articles loaded
No more articles to load

Python Functions

This function is used to analyze the image received as input from the current backdrop, for the handwritten and printed text.
Syntax: analysebackdrop()
The function sets the current servo motors to the specified angle for the pick and place robot.
Syntax: setarmangle(angle = 90)
The function returns a tuple. The first element is a boolean and the second is the frame of the video.
Syntax: cap.read()
The function performs the selected action for the quadruped. The action runs for the specified times and at the specified speed.
Syntax: action(action = “dance1”, time period = 1000, cycle = 1)
The function reports the state of the IR sensor connected to the selected pin. The function returns 1 when it is HIGH (or 3.3V) or 0 when it is LOW (or 0V).
Syntax: irstatus(pin = “D3”)
The function deletes the feed with the specified name in the Adafruit IO account.
Syntax: adaio.deletefeed(feedname = “feed name”)
The function makes the servo motors connected to the wheels orient towards the left. This orientation is used for making the robot turn left in a circle.
Syntax: setleftturnangle(Angle = 40)
The function performs the selected motion for the humanoid. The motion runs for the specified times and at the specified speed.
Syntax: move(motion = “forward”, time period = 1000, cycle = 1)
The function allows the robot to cease all activity by stopping all its motors.
Syntax: stoprobot()
The function sets the analog state of the specified pin to the specified value between 0 to 255.
Syntax: setanalogoutput(servo port = 1, PWM = 50)
The function is a unary operation that calculates the inverse hyperbolic sine of a given value.
Syntax: math.asinh(x)
This function moves the end-effector of a robotic arm to a desired point in 3-dimensional space. The X, Y, and Z coordinates must be specified, as well as a parameter to set the time of movement. The function takes these inputs and sends commands to the robotic arm to move to the specified location in the desired time period.
Syntax: roboticArm.movetoxyz(XPOS = 0, YPOS = 150, ZPOS = 70, TIME = 1000)
This function sets the motor speed for the robot’s turns.
Syntax: setturingspeed(turn_speed = 50)
This function is used to analyze the image received as input from the camera, for faces.
Syntax: analysecamera()
The function sets its sprite’s X and Y position to that of the mouse-pointer or another sprite — in other words, it moves the sprite to a random position, the mouse-pointer, or another sprite.
Syntax: goto(moveto = “_random_”)
The function changes the Stage’s backdrop to the specified one.
Syntax: switchbackdrop(backdrop_name = “backdrop1”)
The function changes the specified sound effect to the value. The input is for selecting how much the sound will be changed. A positive number will make the sound effect have more effect, while a negative number will make it smaller.
Syntax: setsoundeffect(effect_name = “PITCH”, effect_value = 100)
The function returns the most recent text imputed with the input() function. When nothing has been inputted yet, the value will hold nothing.
Syntax: answer()
The function checks if the specified key is pressed. If the key is being pressed, the block returns “true”; if it is not, it returns “false”.
Syntax: iskeypressed(key = “space”)
The function sets the pen’s color to the given color – (R, G, B).
Syntax: setcolor(color = [0, 0 , 0])
The function sets the RGB LED display matrix to the emotion specified: “happy”, “angry”, “crying”, “super angry “, “surprise”, “basic”, “love”, “nerd”, “reject”, “wave”, “thinking”, “giggle”, and “disco”.
Syntax: showemotion(pattern = “happy”)
The function returns the state of the specified touch sensor of Quarky. If the touchpad is touched it will return True, else False.
Syntax: ispadtouched(touch_pin = 1)
The function performs the automatic line following logic with the parameters specified in the initializelinefollower() function.
Syntax: dolinefollowing()
This function is used to analyze the image received as input from the current costume, for the feature.
Syntax: analysecostume()
This function is used to analyze the image received as input from the current costume of the sprite, for the handwritten and printed text.
Syntax: analysecostume()
The function moves the servo motors of the pick and place robot to the pick angle specified by the user.
Syntax: pick()
The function flips a 2D array around vertical, horizontal, or both axes.
Syntax: cv2.flip(input_array, flip_code = 1)
Resizing an image means changing its dimensions of it, be it width alone, height alone, or changing both of them. Also, the aspect ratio of the original image could be preserved in the resized image. To resize an image, OpenCV provides cv2.resize() function.
Syntax: cv2.resize(image_array, dsize = (224,224))
The function sets the servo motors of the quadruped to the specified angles at the specified speed.
Syntax: moveall(servo angles = [90,90,90,90,90,90,90,90], time = 1000)
The function reports the temperature or humidity from the DHT sensor connected to the selected pin.
Syntax: dhtmeasure(parameter = “temperature”, pin = “D3”)
All articles loaded
No more articles to load

Python Coding Examples

All articles loaded
No more articles to load
Table of Contents