[PictoBloxExtension]
QR Code Scanner

Extension Description
Detect, identify and read QR codes from images.
-
 Available in: Block Coding, Python Coding
-
Mode: Stage Mode
-
WiFi Required: No
-
Compatible Hardware in Block Coding: evive, Quarky, Arduino Uno, Arduino Mega, Arduino Nano, ESP32, T-Watch, Boffin, micro:bit, TECbits, LEGO EV3, LEGO Boost, LEGO WeDo 2.0, Go DFA, None
-
Compatible Hardware in Python: Quarky, None
-
Object Declaration in Python: qr = QRCodeScanner()
-
Extension Catergory: Other
Introduction
What is QR Code?
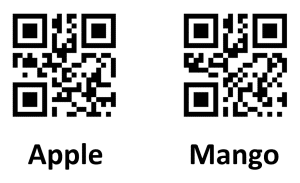
QR Code is a machine-scannable image that can be instantly read, using a smartphone camera. Every QR code consists of a number of black squares and dots that represent some encoded piece of information; like alphabets, numbers, etc. When your Smartphone scans this code, it translates that encoded information that only computers can understand, into something that can be easily understood by humans.
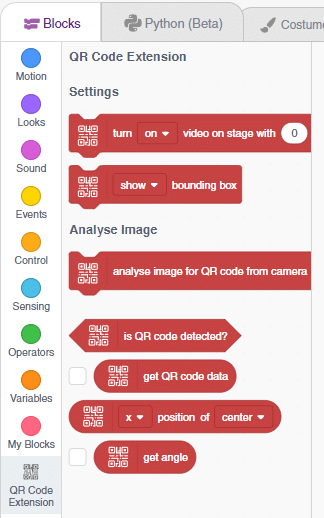
The QR Code Scanner extension allows users to scan QR codes from the camera or stage and report the information:
- QR Code Data
- QR code position on the stage
- QR code angle alignment on the stage
Accessing QR Code Scanner in Block Coding
Following is the process to add QR Code Scanner capability to the PictoBlox Project.
- Open PictoBlox and create a new file.

- Select the coding environment as Block Coding.

- Next, click on the Add Extension button and add the QR Code Scanner extension.
- You can find the QR Code Scanner blocks available in the project.
Accessing QR Code Scanner in Python Coding
Following is the process to add QR Code Scanner capability to the PictoBlox Project.
- Open PictoBlox and create a new file.
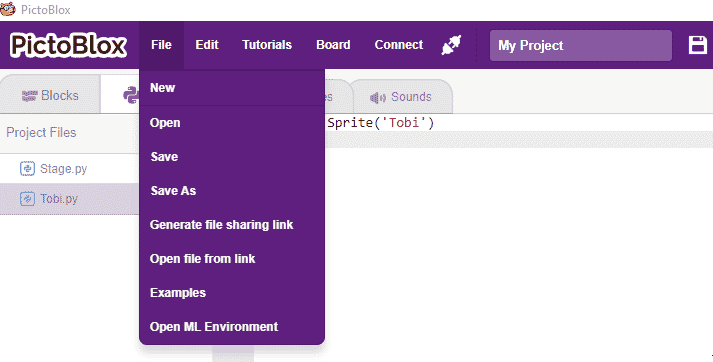
- Select the coding environment as Python Coding.
- Next, click on the Add Modules/Libraries button and add the QR Code Scanner extension.
- To access the library functions, you have to add the object declaration.
qr = QRCodeScanner()
Example Project Video
In this project, a QR code is generated with the help of a QR code generator website. credits – https://www.qr-code-generator.com/
The QR code is linked to a URL. Then, the QR code is scanned with the help of the QR code scanner extension of Pictoblox. The project is created by RS Junction.
Read More
PictoBlox Blocks
The block hides the specified variable’s Stage monitor.

The recognize () in image from URL () block extracts the image from the specified URL, analyzes it, and saves information in PictoBlox.

The block analyses the image and saves the face information locally, which can be accessed using other blocks similar to computer vision.

This block is used to analyze the image received as input from the image URL specified, for the handwritten and printed text.
The block returns the current loaded model URL or the type (Image or Pose).
The function analyses the specified test and provides the class name under which it has been classified by the NLP model.

The block analyses the image and saves the face information locally, which can be accessed using other blocks.
The block returns whether the QR Code is detected in the analysis or not.
The function returns the humidity in % of the location.
The block sets the transparency of the video stream to a certain value.

If a sprite is currently using the pen because of the Pen Down block, the block will cause the sprite to stop drawing a trail. (Otherwise, it has no effect.)

The block sets the digital state of the specified pin to HIGH or LOW / 0V or 3.3V.

The block displays the specified text on the Quarky RGB LED.

The block initializes the following line parameters for the Quarky robot – F. T1 and T2.
The block returns the IR sensor analog reading. The reading varies from 0 to 4095.

The block plays the tone on the speaker for the specified note and duration.

This block analyses the image and saves the information locally, which can be accessed using other blocks.

The block sets the servo connected to the PWM pin to the specified angle between 0 to 180.

This block is used to set the threshold for the confidence (accuracy) of object detection, 0 being low confidence and 1 being high confidence. With the threshold value, you can set the level of confidence required for object detection.

The block enables or disables the automatic display of the key points on the human pose on the stage. This is useful when you want to see if the detection is happening or not.

The block set the chassis servo motors to the specified angles.

The block enables or disables the automatic display of the key points on the human hand on the stage. This is useful when you want to see if the detection is happening or not.
The block reports the recognized class from the analyse numbers block.
The block reports the specified class confidence value of the selected class. 0 is low confidence and 1 is high confidence.
The block sets the sprite’s density, roughness, and bounce (restitution) to the defined values.
The block reports the temperature or humidity from the DHT sensor connected to the selected pin.

The block sets the specified motor of the Quarky Expansion board to the specified direction (“FORWARD” or “BACKWARD”) and specified speed.

The block sends the specified data to the selected feed as a number or as a string.
The block clears the values of the body.
All articles loaded
No more articles to load
Block Coding Examples


All articles loaded
No more articles to load
Python Functions
The function reports the value of the JSON object from the body.
Syntax: getapijson(json1 = “value”, json2 = “”, json3 = “”, json4 = “”, json5 = “”)
The function reports the object count of the JSON object from the body.
Syntax: getobjectcountapijson(json1 = “value”, json2 = “”, json3 = “”, json4 = “”)
The function is used to control the state of the camera.
Syntax: video(video_state = “on”, transparency = 1)
The function enables the automatic display of the box on object detection on the stage.
Syntax: enablebox()
The function disables the automatic display of the box on object detection on the stage.
Syntax: disablebox()
This function is used to set the threshold for the confidence (accuracy) of object detection, 0 being low confidence and 1 being high confidence.
Syntax: setthreshold(threshold = 0.5)
This function is used to analyze the image received as input from the camera, for objects.
Syntax: analysecamera()
This function is used to analyze the image received as input from the stage, for objects.
Syntax: analysestage()
This function returns the total number of objects detected in the camera feed or the stage.
Syntax: count()
This function returns the x position of the object detected. You can specify the object for which the value is needed. The position is mapped with the stage coordinates.
Syntax: x(object = 1)
This function returns the y position of the object detected. You can specify the object for which the value is needed. The position is mapped with the stage coordinates.
Syntax: y(object = 1)
This function returns the width of the object detected. You can specify the object for which the value is needed. The position is mapped with the stage coordinates.
Syntax: width(object = 1)
This function returns the height of the object detected. You can specify the object for which the value is needed. The position is mapped with the stage coordinates.
Syntax: height(object = 1)
This function is used to get the class name of the analyzed object.
Syntax: classname(object = 1)
This function is used to get the confidence (accuracy) of object detection, 0 being low confidence and 1 being high confidence.
Syntax: confidence(object = 1)
The function returns whether the specified object is detected in the analysis or not.
Syntax: isdetected(object_name = “person”)
The function returns whether the number of objects identified with the specified object class.
Syntax: detectedcount(object_name = “person”)
The function runs an API call to get the weather data of the location specified with the Longitude and Latitude.
Syntax: getweather(latitude = 23.02, longitude = 72.57)
The function returns the weather parameters (Rain, Snow, Extreme, etc.) of the location.
Syntax: weather()
The function returns the temperature, minumun, and maximum temperature of the location.
Syntax: temp(temp_type = “C”)
The function returns the atmospheric pressure (on the sea level, if there is no sea_level or grnd_level data), in hPa of the location.
Syntax: pressure()
The function returns the humidity in % of the location.
Syntax: humidity()
The function returns the wind speed (Unit Default: meter/sec) of the location.
Syntax: windspeed()
The function returns the wind direction (in degrees – meteorological) of the location.
Syntax: winddirection()
The function returns the latitude of the location.
Syntax: latitude()
The function returns the longitude of the location.
Syntax: longitude()
The function returns the time data of the location when data capture, sunrise, or sunset happens.
Syntax: time(capture_time = “sunrise”)
The function returns the city name of the location.
Syntax: city()
The function set the API keys for the Open Weather Map API calls.
Syntax: setAPI(openweathermap_API)
The function is used to control the state of the camera.
Syntax: video(video_state = “on”, transparency = 1)
All articles loaded
No more articles to load
Python Coding Examples
All articles loaded
No more articles to load
Table of Contents


