[PictoBloxExtension]

Object Detection

Object-Detection
Extension Description
AI to identify objects from images. It also tells the location and size of the objects identified.

Introduction

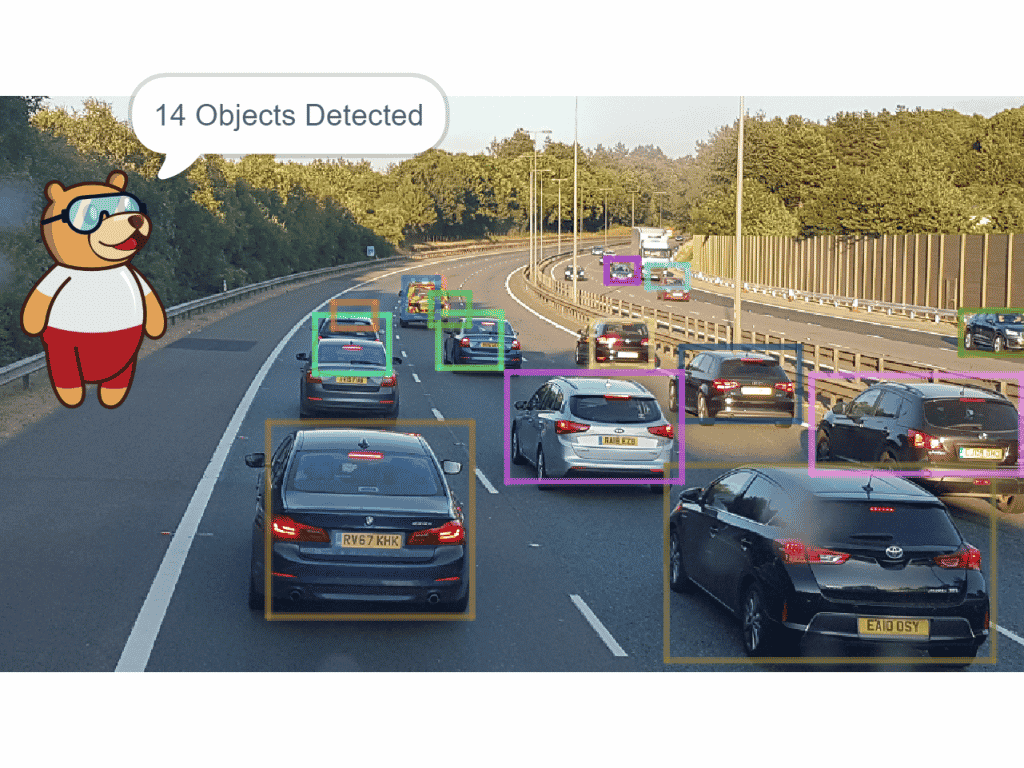
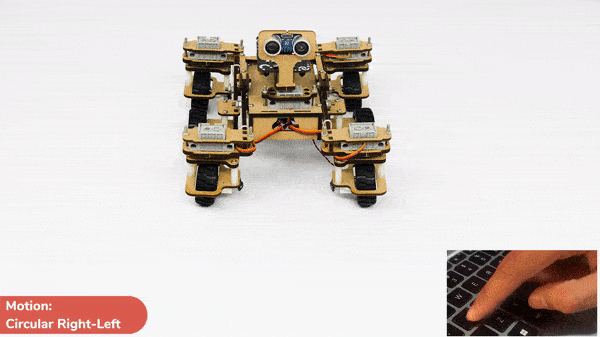
Object detection is used to locate and identify multiple objects in digital photographs. It is a computer vision technique that helps to detect objects as well as classify them. The object class may appear once or several times in the image. For example, in the following image, object detection assists us to locate the objects and classify them accordingly to the known set of objects.

Object Detection

One of the applications of Object detection includes Self-driving vehicles which detect objects in real-time and act accordingly.
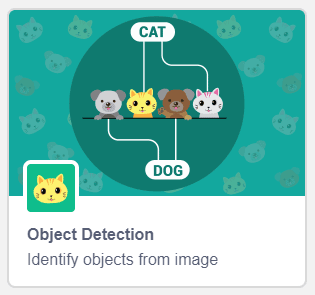
The object detection extension in PictoBlox allows you to detect the following 90 objects:

IDOBJECT (PAPER)SUPER CATEGORY
1personperson
2bicyclevehicle
3carvehicle
4motorcyclevehicle
5airplanevehicle
6busvehicle
7trainvehicle
8truckvehicle
9boatvehicle
10traffic lightoutdoor
11fire hydrantoutdoor
12street signoutdoor
13stop signoutdoor
14parking meteroutdoor
15benchoutdoor
16birdanimal
17catanimal
18doganimal
19horseanimal
20sheepanimal
21cowanimal
22elephantanimal
23bearanimal
24zebraanimal
25giraffeanimal
26hataccessory
27backpackaccessory
28umbrellaaccessory
29shoeaccessory
30eye glassesaccessory
31handbagaccessory
32tieaccessory
33suitcaseaccessory
34frisbeesports
35skissports
36snowboardsports
37sports ballsports
38kitesports
39baseball batsports
40baseball glovesports
41skateboardsports
42surfboardsports
43tennis racketsports
44bottlekitchen
45platekitchen
46wine glasskitchen
47cupkitchen
48forkkitchen
49knifekitchen
50spoonkitchen
51bowlkitchen
52bananafood
53applefood
54sandwichfood
55orangefood
56broccolifood
57carrotfood
58hot dogfood
59pizzafood
60donutfood
61cakefood
62chairfurniture
63couchfurniture
64potted plantfurniture
65bedfurniture
66mirrorfurniture
67dining tablefurniture
68windowfurniture
69deskfurniture
70toiletfurniture
71doorfurniture
72tvelectronic
73laptopelectronic
74mouseelectronic
75remoteelectronic
76keyboardelectronic
77cell phoneelectronic
78microwaveappliance
79ovenappliance
80toasterappliance
81sinkappliance
82refrigeratorappliance
83blenderappliance
84bookindoor
85clockindoor
86vaseindoor
87scissorsindoor
88teddy bearindoor
89hair drierindoor
90toothbrushindoor
91hair brushindoor

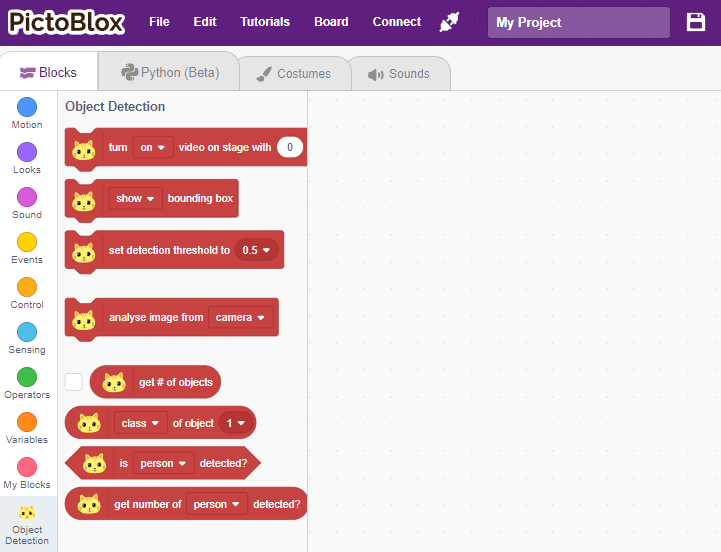
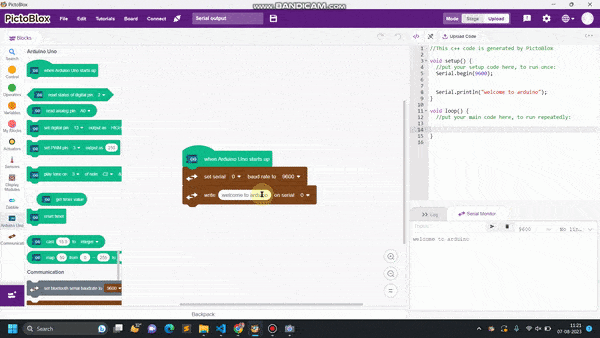
Accessing Object Detection in Block Coding

Following is the process to add Object Detection capability to the PictoBlox Project.

  1. Open PictoBlox and create a new file.
  2. Select the coding environment as appropriate Coding Environment.
  3. Next, click on the Add Extension button and add the Object Detection extension.
  4. The object detection models will be downloaded, which may take a few seconds to load.
    Downloading Models
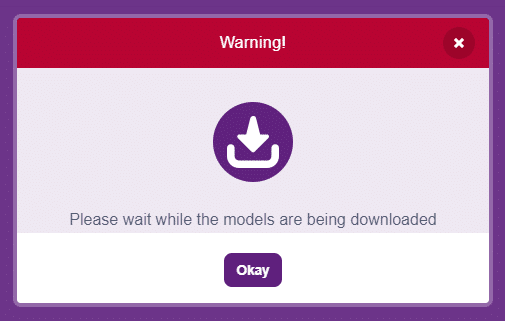
  5. Once downloaded you will get a message saying “Model loaded successfully”.
  6. You can find the object detection blocks available in the project.

Accessing Object Detection in Python Coding

Following is the process to add Object Detection capability to the PictoBlox Project.

  1. Open PictoBlox and create a new file.
  2. Select the coding environment as Block Coding.
  3. Next, click on the Add Modules/Libraries button and add the Face Detection extension.
  4. To access the library functions, you have to add the object declaration.
    od = ObjectDetection()
Read More

PictoBlox Blocks

Turn () video on stage with () % transparency block controls the control the camera feed on the stage.
This block helps move an object step by step in a given direction within a set time
This block facilitates seamless transitions to your preferred scenes. For instance, if you’re currently viewing Scene 1 and wish to switch to Scene 2, simply select Scene 2 from the dropdown menu to enact the transition.
This block is designed to refresh or reload the current scene.
This block code will give an option to control the object as player control like third person or first person. You can then use arrow keys to make your object move in respective direction.
This block of code applies velocity to the player. 
All articles loaded
No more articles to load

Block Coding Examples

All articles loaded
No more articles to load

Python Functions

The function creates an object to connect Quarky with Wi-Fi.
Syntax: wifi()
The function reads the analog value of the sensors connected to the specified pin. The function returns the int value between 0 to 4096.
Syntax: readanaloginput(pin = “A1”)
The function is used to control the state of the camera.
Syntax: video(video_state = “on”, transparency = 1)
The function moves its sprite forward the specified amount of steps in the direction it is facing. A step is equal to one-pixel length.
Syntax: move(steps = 10)
The function gives its sprite a speech bubble with the specified text — the speech bubble stays until another speech or thought block is activated, or the stop sign is pressed.
Syntax: say(message = “Hello!”, time = 0)
The function will play the specified sound, pausing its script until the sound has finished playing.
Syntax: playuntildone(sound_name = “Grunt”)
The function checks if its sprite is touching the mouse-pointer, edge, or another sprite. If the sprite is touching the selected object, the block returns true; if it is not, it returns false.
Syntax: istouching(object_name = “_edge_”)
The function is used when the sprite needs to produce a bitmap image of itself which is stamped onto the stage. (Because it is merely a picture of the sprite and not a sprite itself, it cannot be programmed). The function will not draw over sprites. 
Syntax: stamp()
The function sets the specified RGB LED of Quarky (specified with X and Y position of the LED) to the specified RGB color and brightness value.
Syntax: setled(x_position = 1, y_position = 1, color = [0, 0 , 0], brightness = 20)
The function returns the state of the specified push button. If the button is pressed it returns True or else False.
Syntax: readpushbutton(button = “L”)
The function moves the Quarky robot in the specified direction. The direction can be “FORWARD”, “BACKWARD”, “LEFT”, and “RIGHT”.
Syntax: runrobot(direction = “FORWARD”, speed = 100)
The function plays the specified audio on the Quarky speaker. The function does not have any callbacks, so other functions can be executed while this function is running.
Syntax: playsound(audio = “QuarkyIntro”)
This function helps turn the video on/off on the stage with a defined level of transparency.
Syntax: video(video_state = “on”, transparency = 1)
This function helps turn the video on/off on the stage with a defined level of transparency.
Syntax: video(video_state = “on”, transparency = 1)
The function sets a loudness filter threshold to remove the background noise from the audio file which is being analyzed.
Syntax: setthreshold(loudness = 30)
The function initializes the pick and place robot with the specified orientation.
Syntax: initialisepickplace(orientation = “HORIZONTAL”)
The function loads a model saved via model.save().
Syntax: tf.keras.models.load_model(filepath = ‘saved_model.h5’, custom_objects = None, compile = True, options = None)
The function initializes the quadruped robot object in Python and maps the 8 servos to the specified pins.
Syntax: Quadruped(Front Right Hip = 4, Front Left Hip = 1, Front Right Leg = 8, Front Left Leg = 5, Back Right Hip = 3, Back Left Hip = 2, Back Right Leg = 7, Back Left Leg = 6)
The function set the state of the relay connected to the selected pin to High or Low. A high state means that the pin will have 3.3V and for Low, the pin will be 0 V.
Syntax: setrelay(state = 1, pin = “D3”)
The function connects the Quarky or ESP32 to the specified Wi-Fi and password. The block is only available in the Upload Mode when the code is uploaded to Quarky.
Syntax: wifi.connecttowifi(WIFI = “Wi-Fi Name”, PASSWORD = “password”)
The function reports if the Wi-Fi is connected to the Quarky or ESP32 or not. This block is only available in Upload Mode.
Syntax: wifi.iswificonnected()
The function initializes the Mars Rover object in Python and maps the 5 servos to the specified pins.
Syntax: MarsRover(Head = 4, Front Left = 1, Front Right = 7, Back Left = 2, Back Right = 6)
The function initializes the humanoid robot object in Python and maps the 6 servos to the specified pins.
Syntax: Humanoid(Right Hip = 7, Left Hip = 2, Right Foot = 6, Left Foot = 3, Right Hand = 8, Left Hand = 1)
The Quarky Mecanum Robot Drive Motors are initialized by the function, which assigns each motor to a specific port. This allows the robot to be programmed to move the motors in the desired direction.
Syntax: Mecanum(Front Left = 1, Back Left = 2, Back Right = 7, Front Right = 8)
The function initializes the Expansion Board of Quarky for use. Without initialization, the board will not respond to any other functions.
Syntax: initexpansion()
The function returns the arc cosine of a number.
Syntax: math.acos(x)
This function performs the calibration process for a robotic arm by taking in the error angles of each of its three servos (link 1, link 2, and base). It then stores the offset angle for each servo to the memory of the Quarky, ensuring that the robotic arm is functioning correctly at all times.
Syntax: roboticArm.calibrate(Link1 Offset = 0, Link2 Offset = 0, Base Offset = 0)
This function ensures proper sensor alignment for precise line-following control.
Syntax: AdvanceLineFollowing(ir_num = 2)
The function sets the digital state of the specified pin to HIGH or LOW / 0V or 3.3V.
Syntax: setdigitaloutput(pin, state)
The function enables the automatic display of the box on face detection on the stage.
Syntax: enablebox()
All articles loaded
No more articles to load

Python Coding Examples

All articles loaded
No more articles to load
Table of Contents