
 Available in: Block Coding, Python Coding
Mode: Stage Mode
WiFi Required: No
Compatible Hardware in Block Coding: evive, Quarky, Arduino Uno, Arduino Mega, Arduino Nano, ESP32, T-Watch, Boffin, micro:bit, TECbits, LEGO EV3, LEGO Boost, LEGO WeDo 2.0, Go DFA, None
Compatible Hardware in Python: Quarky, None
Object Declaration in Python: nlp = NaturalLanguageProcessing()
Extension Catergory: Artificial Intelligence
Available in: Block Coding, Python Coding
Mode: Stage Mode
WiFi Required: No
Compatible Hardware in Block Coding: evive, Quarky, Arduino Uno, Arduino Mega, Arduino Nano, ESP32, T-Watch, Boffin, micro:bit, TECbits, LEGO EV3, LEGO Boost, LEGO WeDo 2.0, Go DFA, None
Compatible Hardware in Python: Quarky, None
Object Declaration in Python: nlp = NaturalLanguageProcessing()
Extension Catergory: Artificial Intelligence
Natural Language Processing, abbreviated as NLP, is a branch of artificial intelligence that deals with the interaction between computers and humans using natural language. Natural language refers to language that is spoken and written by people, and natural language processing (NLP) attempts to extract information from the spoken and written word using algorithms.
The ultimate objective of NLP is to read, decipher, understand, and make sense of human languages in a manner that is valuable.
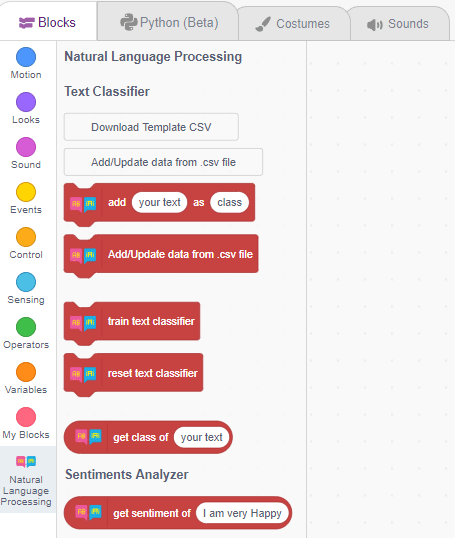
To make the text classifier, we have the Natural Language Processing extension.
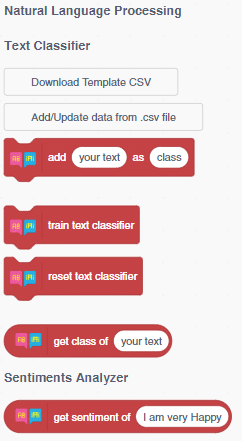
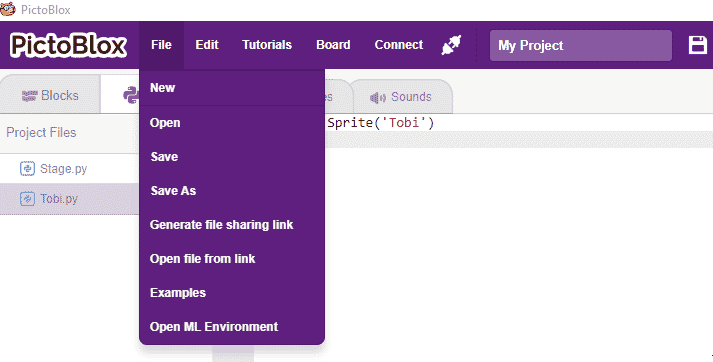
Following is the process to add Natural Language Processing capability to the PictoBlox Project.


Following is the process to add Natural Language Processing capability to the PictoBlox Project.
nlp = NaturalLanguageProcessing()


Copyright 2025 – Agilo Research Pvt. Ltd. All rights reserved – Terms & Condition | Privacy Policy