Deprecated: Required parameter $query follows optional parameter $post in /var/www/html/wp-content/plugins/elementor-extras/modules/breadcrumbs/widgets/breadcrumbs.php on line 1215
Natural Language Processing - Blocks, Python Functions, Projects | PictoBlox Extension
[PictoBloxExtension]

Natural Language Processing

NLP
Extension Description
Create and train your own text classifiers with Natural Language Processing.

Introduction

Natural Language Processing, abbreviated as NLP, is a branch of artificial intelligence that deals with the interaction between computers and humans using natural language. Natural language refers to language that is spoken and written by people, and natural language processing (NLP) attempts to extract information from the spoken and written word using algorithms.

The ultimate objective of NLP is to read, decipher, understand, and make sense of human languages in a manner that is valuable.

NLP in PictoBlox

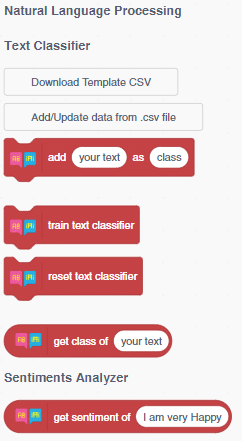
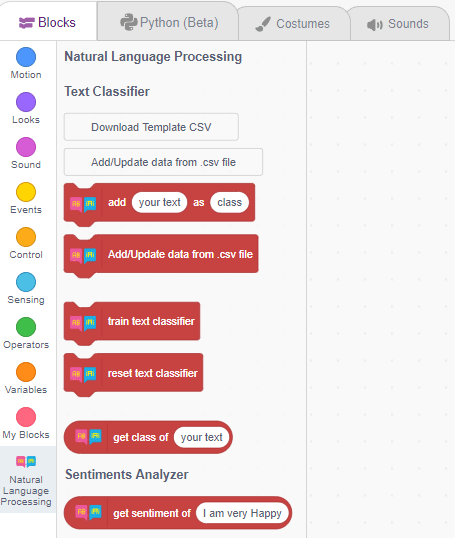
To make the text classifier, we have the Natural Language Processing extension.NLP

Application

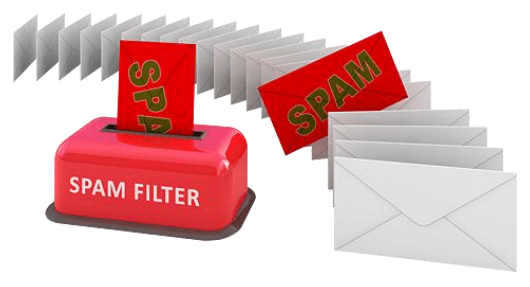
  1. Email Filters: Email filters are one of the most basic and initial applications of NLP online. It started out with spam filters, uncovering certain words or phrases that signal a spam message.
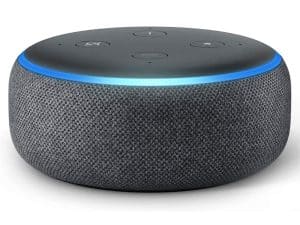
  2. Smart Assistants: Smart assistants like Apple’s Siri and Amazon’s Alexa recognize patterns in speech, then infer meaning and provide a useful response.

Accessing NLP in Block Coding

Following is the process to add Natural Language Processing capability to the PictoBlox Project.

  1. Open PictoBlox and create a new file.
  2. Select the coding environment as Block Coding.
  3. Next, click on the Add Extension button and add the Natural Language Processing extension.
  4. You can find the Natural Language Processing blocks available in the project.


Accessing NLP in Python Coding

Following is the process to add Natural Language Processing capability to the PictoBlox Project.

  1. Open PictoBlox and create a new file.
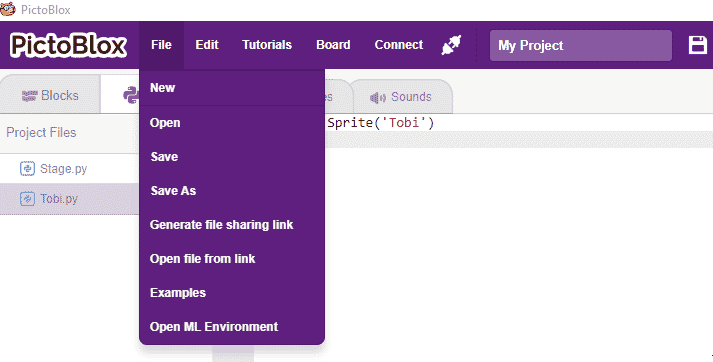
  2. Select the coding environment as Python Coding.
  3. Next, click on the Add Modules/Libraries button and add the Natural Language Processing extension.
  4. To access the library functions, you have to add the object declaration.
    nlp = NaturalLanguageProcessing()
Read More

PictoBlox Blocks

This block facilitates the selection of your desired object.
Scripts that wear this block get converted into Arduino code when you are in Upload Mode. This block is used when one has to upload a code into evive.
All articles loaded
No more articles to load

Block Coding Examples

All articles loaded
No more articles to load

Python Functions

The function turns off all the LEDs of the Quarky.
Syntax: cleardisplay()
The function sets the threshold value of the specified IR sensor to the specified value. The value can be from 0 to 4095.
Syntax: setirthreshold(sensor = “IRL”, value = 1200)
The function stops both the motors of the Quarky robot.
Syntax: stoprobot()
The function stops the execution of the audio running on Quarky.
Syntax: stopaudio()
This function is used to analyze the image received as input from the stage, for the feature.
Syntax: analysestage()
This function is used to analyze the image received as input from the stage, for the handwritten and printed text.
Syntax: analysestage()
The function reports the last text detected from the speech.
Syntax: speechresult()
The function sets the place action angle with the specified angle. This is useful to set a custom place angle for the pick and place robot.
Syntax: setplaceangle(angle = 40)
The function is used to open a camera for video capture.
Syntax: cv2.VideoCapture(camera_id = 0)
The function performs the selected motion for the quadruped. The motion runs for the specified times and at the specified speed.
Syntax: move(motion = “forward”, time period = 1000, cycle = 1)
The function reports the state of the flame sensor connected to the selected pin. The function returns 1 when it is HIGH (or 3.3V) or 0 when it is LOW (or 0V).
Syntax: flamestatus(pin = “D3”)
The function creates a new feed with the specified name in the Adafruit IO account.
Syntax: adaio.createfeed(feed name = “feed name”)
The function makes the servo motors connected to the wheels orient inwards. This orientation is used for making the robot turn right and left efficiently.
Syntax: setinangle(Angle = 40)
The function calibrates the angles of the hip and foot servo motors and saves them in the memory of Quarky.
Syntax: sethandoffset(Left Hand Offset = 0, Right Hand Offset = 0)
The function causes the robot to move in a specified direction with a specified speed for a given amount of time before stopping automatically.
Syntax: runtimedrobot(direction = “forward”, speed = 100, time = 1000)
The function moves all the servo motors connected to the Quarky Expansion board servo ports 1 through 8.
Syntax: moveall(angle 1 = 90, angle 2 = 90, angle 3 = 90, angle 4 = 90, angle 5 = 90, angle 6 = 90, angle 7 = 90, angle 8 = 90, time = 1000)
The function is used to calculate the arcsine (inverse of the sine function) of the given value and return the arcsine in radians.
Syntax: math.asin(x)
This function sets all servo motors of a robotic arm to their default angle, referred to as the “home” position.
Syntax: roboticArm.sethome()
This function allows the robot to turn left or right to follow the next black line by setting the IR threshold and adjusting turn speed.
Syntax: turnrobotusingir(turn_direction = ‘left’, next_line = ‘next’)
This function is used to set the threshold for the confidence (accuracy) of face detection, 0 being low confidence and 1 being high confidence.
Syntax: setthreshold(threshold = 0.5)
The function changes its sprite’s costume to the next one in the costumes pane, but if the current costume is the last in the list, the block will loop to the first.
Syntax: nextcostume()
The function changes the specified sound effect by the values. The input is for selecting how much the sound will be changed. A positive number will make the sound effect have more effect, while a negative number will make it smaller.
Syntax: changesoundeffect(effect_name = “PITCH”, effect_value = 10)
The function will make an input box (with the specified text above it) show at the bottom of the screen. Users can input text into it and submit it, and the input is stored then in the Answer. The Answer automatic updates to the most recent input.
Syntax: input(question = “What is your name”)
If a sprite is currently using the pen because of the down() function, the up() function will cause the sprite to stop drawing a trail. (Otherwise, it has no effect.)
Syntax: up()
The function sets the analog state of the specified pin to the specified value between 0 to 255.
Syntax: setanalogoutput(pin)
The function sets the RGB LED matrix to the pattern specified in Pictoblox. The parameter passed is a 35 char string where each char corresponds to a color in the color palette.
Syntax: drawpattern(pattern = “aaaaaaaaaaaaaaaaaaaaaaaaaaaaaaaaaaa”)
The function returns the state of the specified IR sensor. It returns True if the current IR sensor value is greater than the threshold value, else False.
Syntax: getirstate(sensor = “IRL”)
The function initializes the following line parameters for the Quarky robot – F. T1 and T2.
Syntax: initializelinefollower(F = 35, T1 = 40, T2 = 10)
The function plays the tone on the speaker for the specified note and duration. The duration is calculated by the factor.
Syntax: playtone(note = “C4”, duration_factor = 1)
This function is used to analyze the image received as input from the current backdrop image, for the feature.
Syntax: analysebackdrop()
All articles loaded
No more articles to load
Table of Contents