Deprecated: Required parameter $query follows optional parameter $post in /var/www/html/wp-content/plugins/elementor-extras/modules/breadcrumbs/widgets/breadcrumbs.php on line 1215
Mars Rover - Blocks, Python Functions, Projects | PictoBlox Extension
[PictoBloxExtension]

Mars Rover

Mars rover extension graphics
Extension Description
Control the Mars Rover Robot with Quarky.

Introduction

Mars is a fascinating planet. It’s icy cold and covered in reddish dust and dirt. Like Earth, it has volcanoes, gullies, and flat plains. Scientists can also see channels that look like they were carved by rivers and streams a long, long time ago. Over the years, NASA has sent five robotic vehicles, called rovers, to Mars. The names of the five rovers are Sojourner, Spirit and Opportunity, Curiosity, and Perseverance.

STEMpedia has created a miniature version of the Mars Rover to educate students about the different aspects of the Mars Rover in a more practical way.
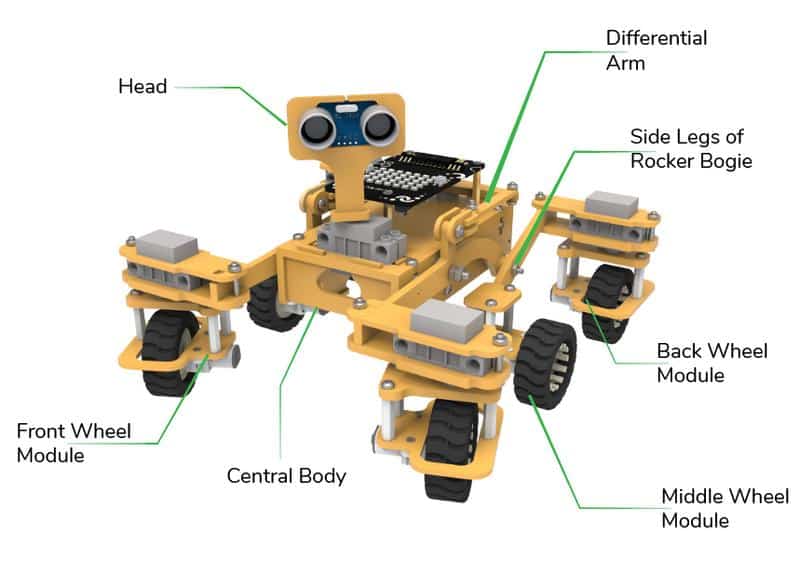
The Mars Rover is programmable with PictoBlox in both modes – Block Coding and Python Coding.

Motor and Servo Motor

In our Mars rover, there are a total of 6 motors and 5 servo motors. 

The motors provide rotation to the wheels which helps the rover to attain motion in both forward and backward directions.  All the left side motors (3 motors) are connected to the left motor port of Quarky and all the right side motors (3 motors) are connected to the right motor port of Quarky using a 3 port wire. This means that to control the Mars rover we have to control only 2 motors – Left and Right. Also, there are 2 parameters to control – Direction (Forward or Backward) and Speed. With this control, the Mars rover can do all the desired motions.
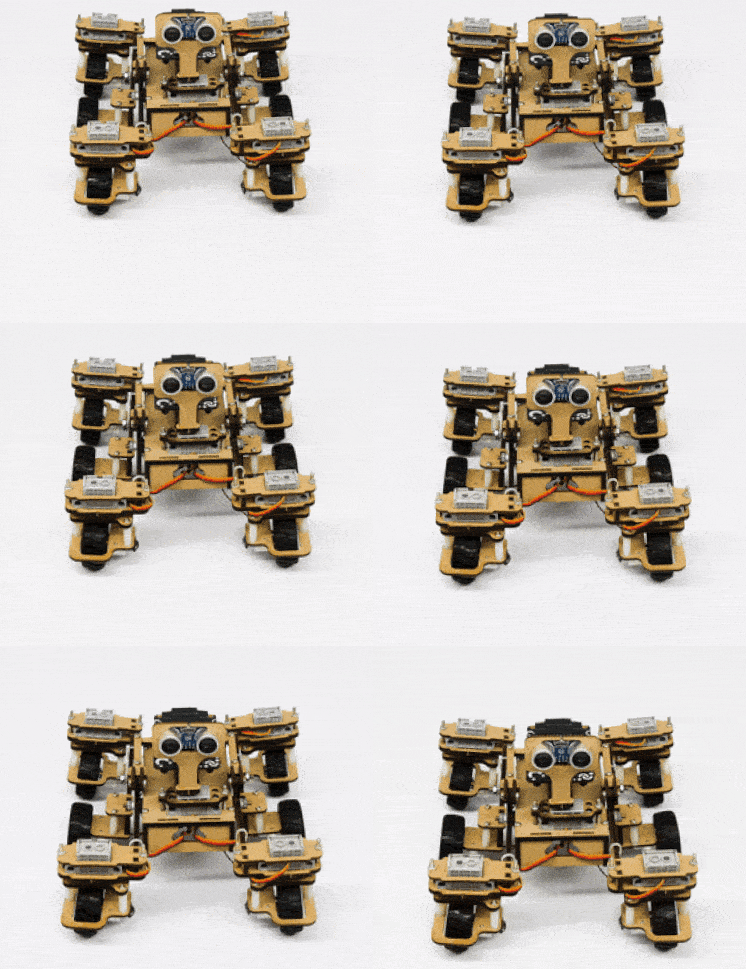
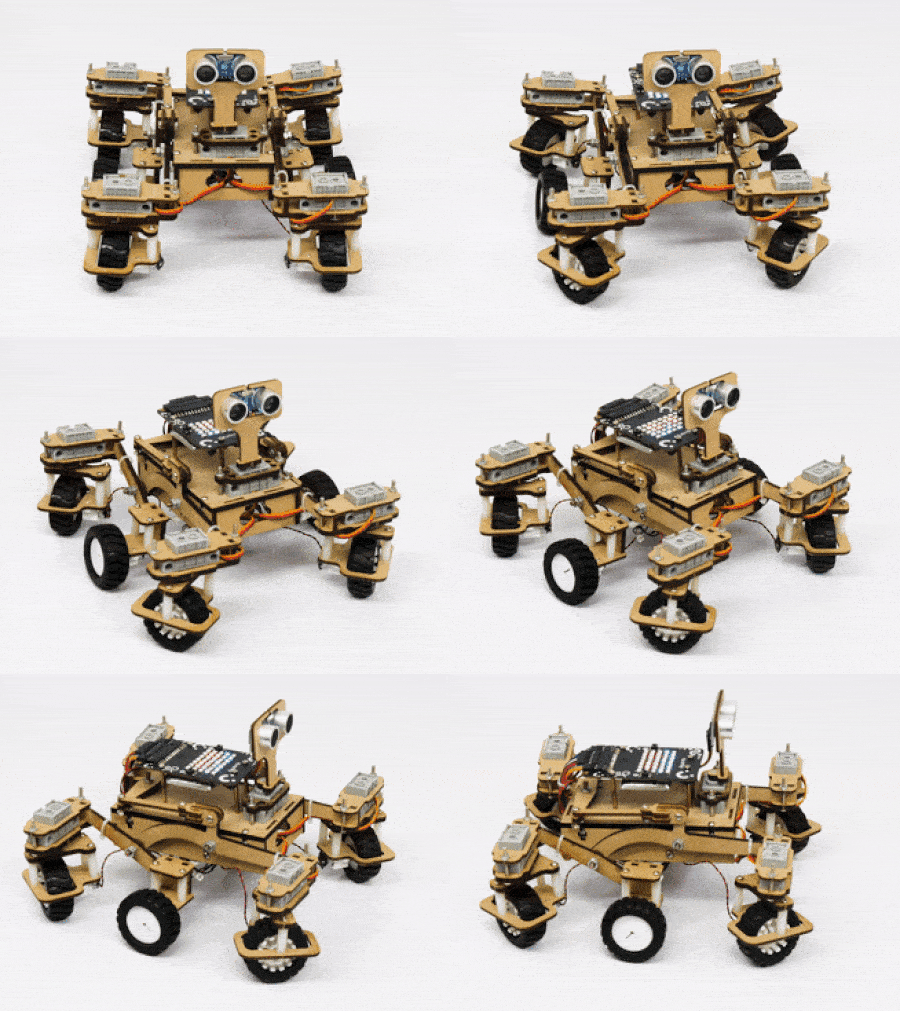
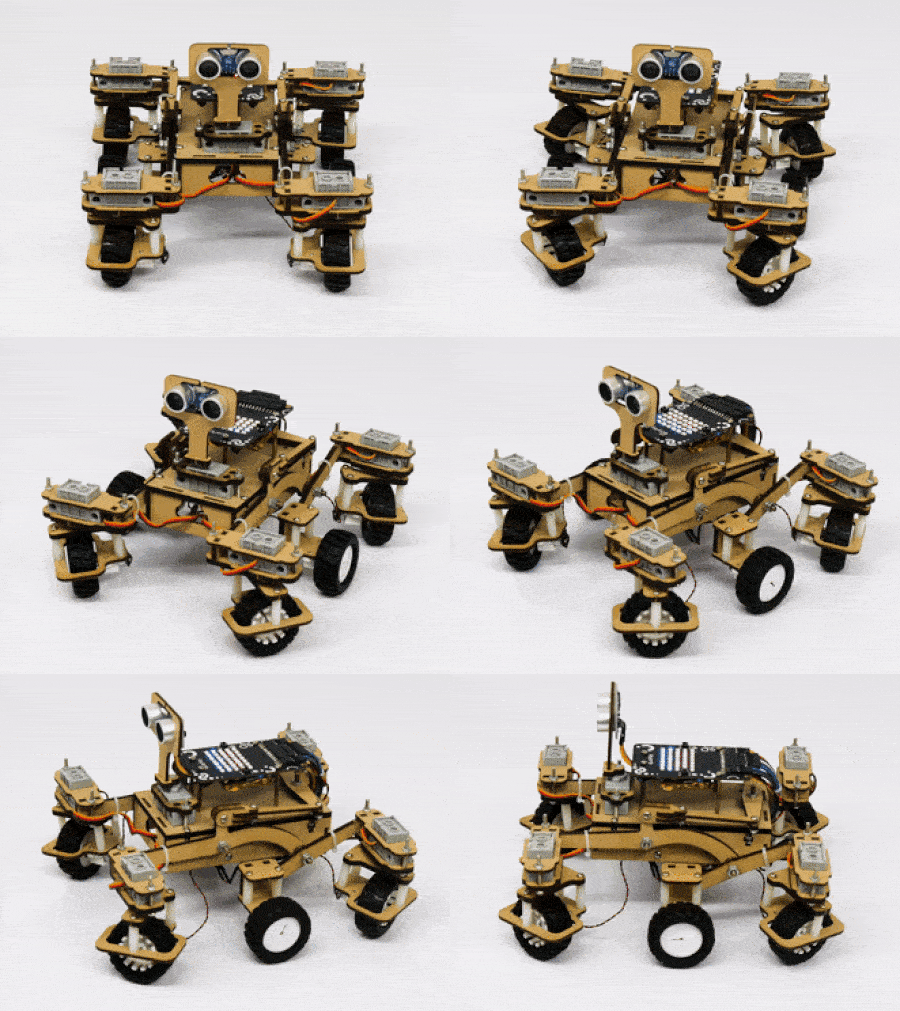
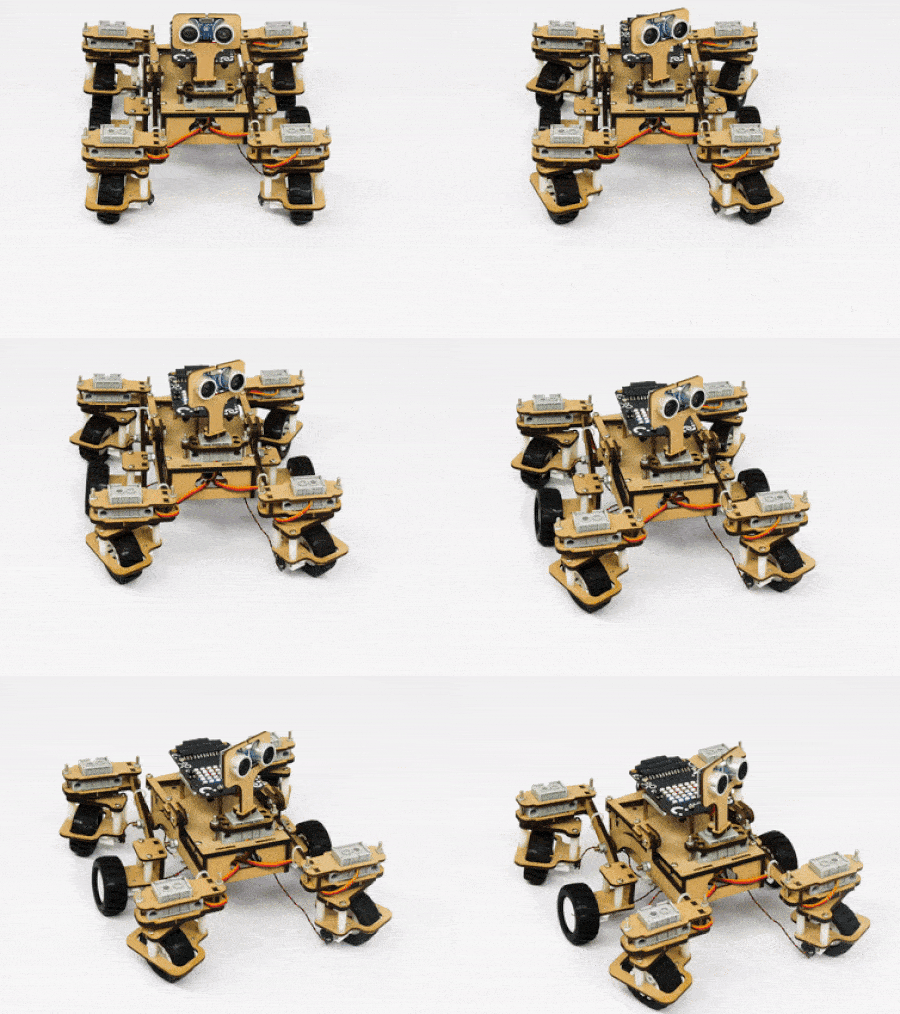
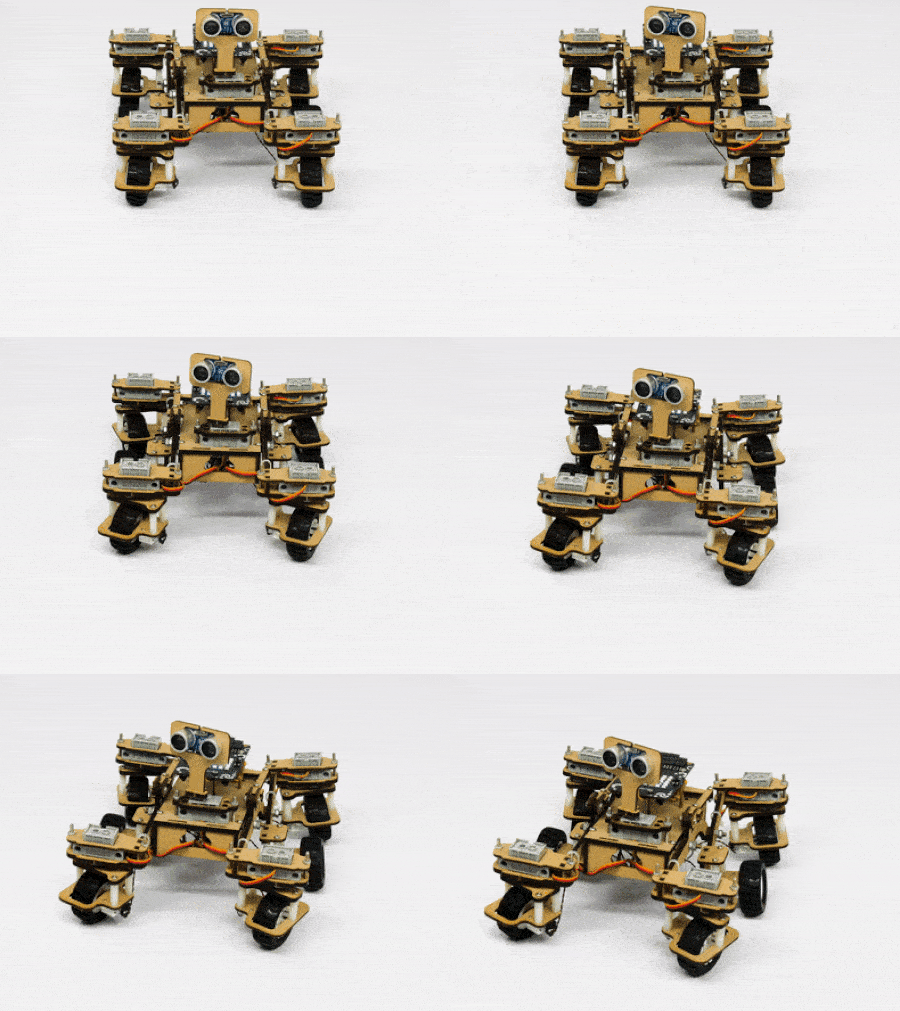
The servo motors help in providing rotation to the complete wheel assembly so that the rover can change its wheel alignments and so its path. These play a major role in turning cases of the mars rover. The front two and the back two-wheel assemblies are connected with one servo motor each. Some important turns:

  1. Turning left on the same point:
  2. Turning right on the same point:
  3. Turning left on a circle:
  4. Turning right on a circle:
Note:  The middle wheel assemblies on either side are not connected to servo motors.

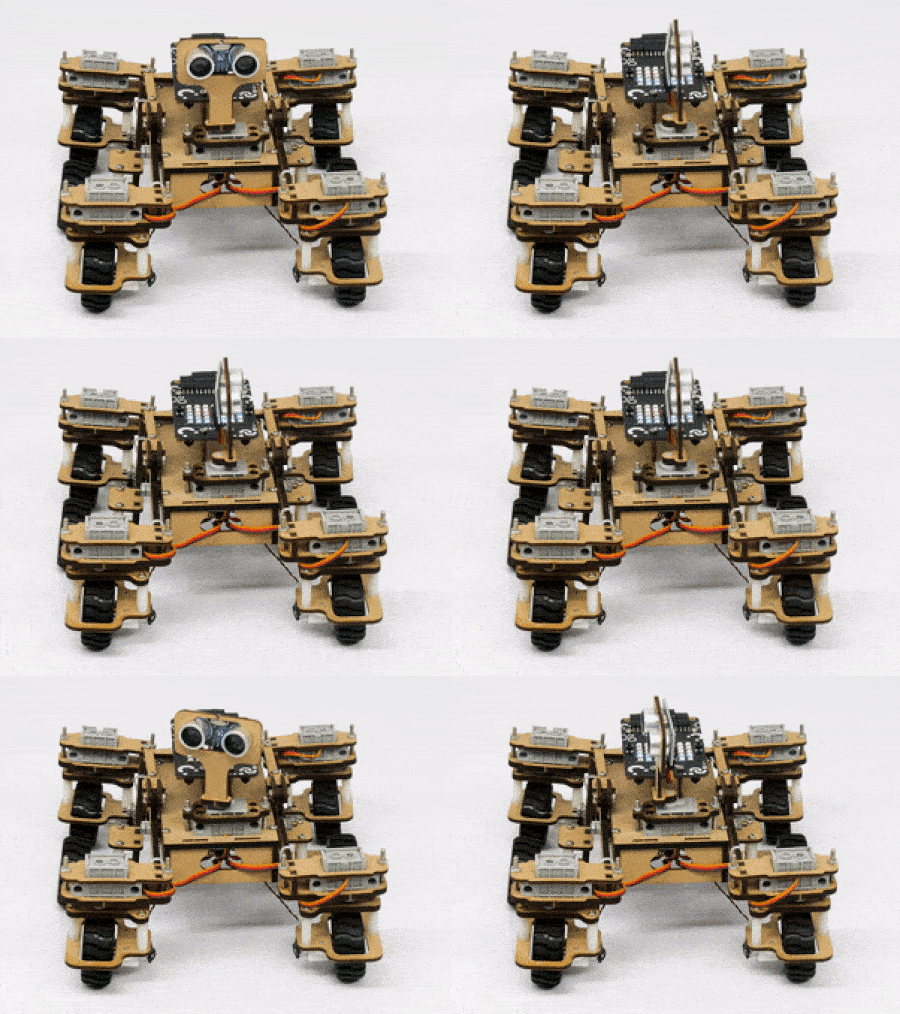
The fifth servo motor is connected to the head portion of the Mars rover so that the rover can rotate its head to detect obstacles. 
Connecting Mars Rover with PictoBlox

Let’s begin by first connecting Quarky to PictoBlox. Select your preferred type of device i.e. either the desktop/laptop or your smartphone and follow the instructions.

Desktop

Follow the steps below for connecting Quarky to PictoBlox:

  1. First, connect Quarky to your laptop using a USB cable.
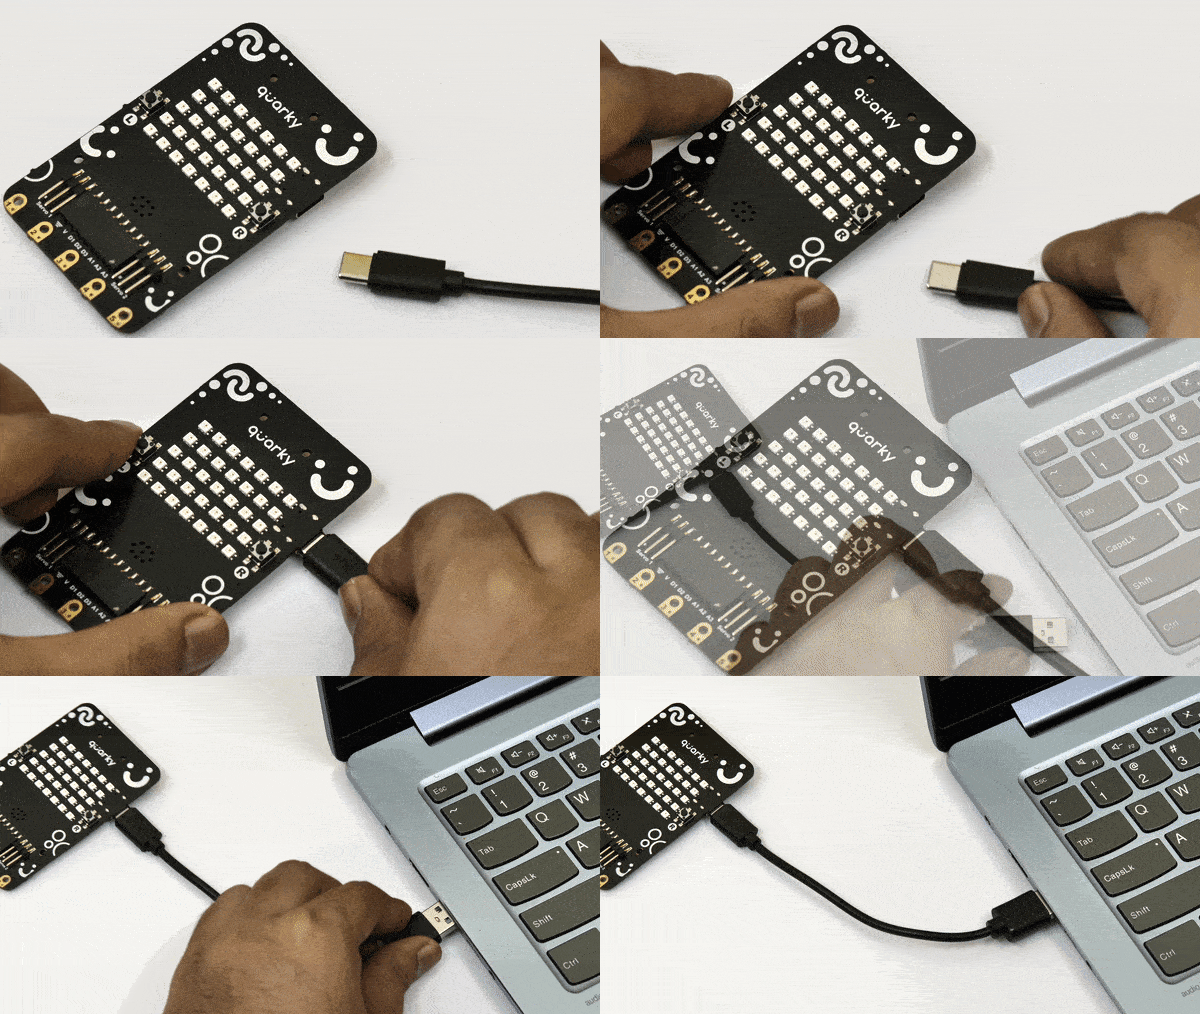
    Power Quarky
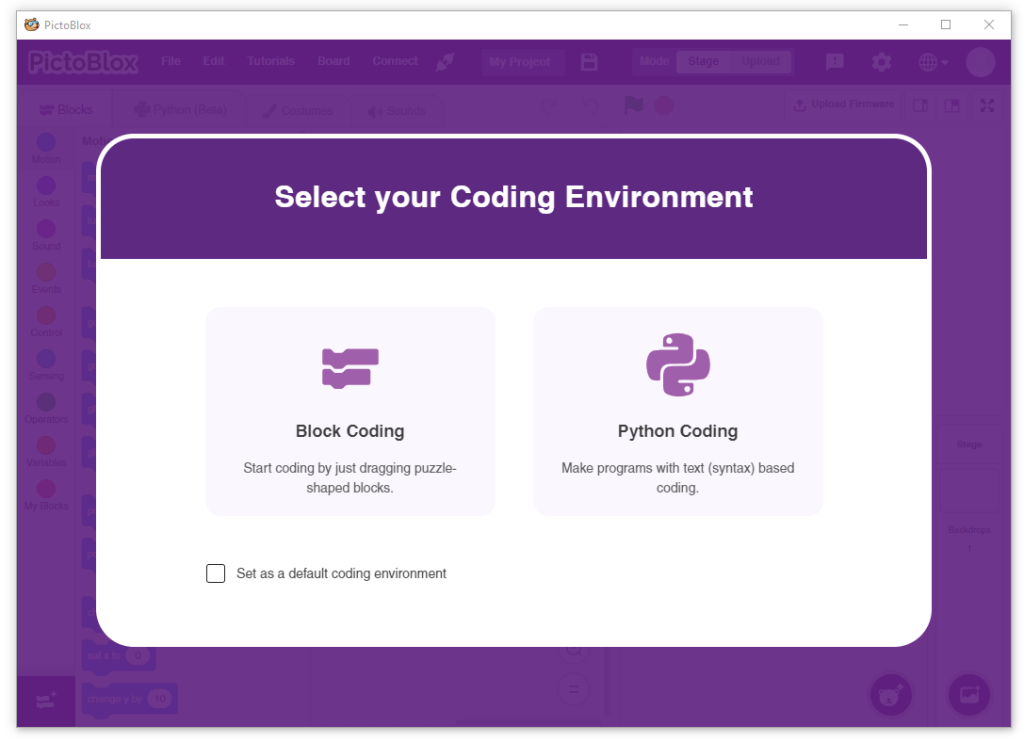
  2. Next, open PictoBlox on your desktop.
  3. After that, select Block or Python Coding as your coding environment.
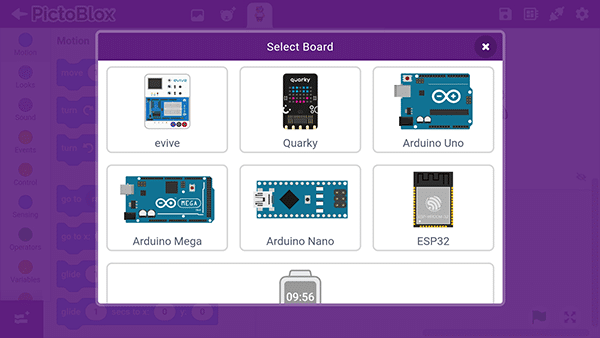
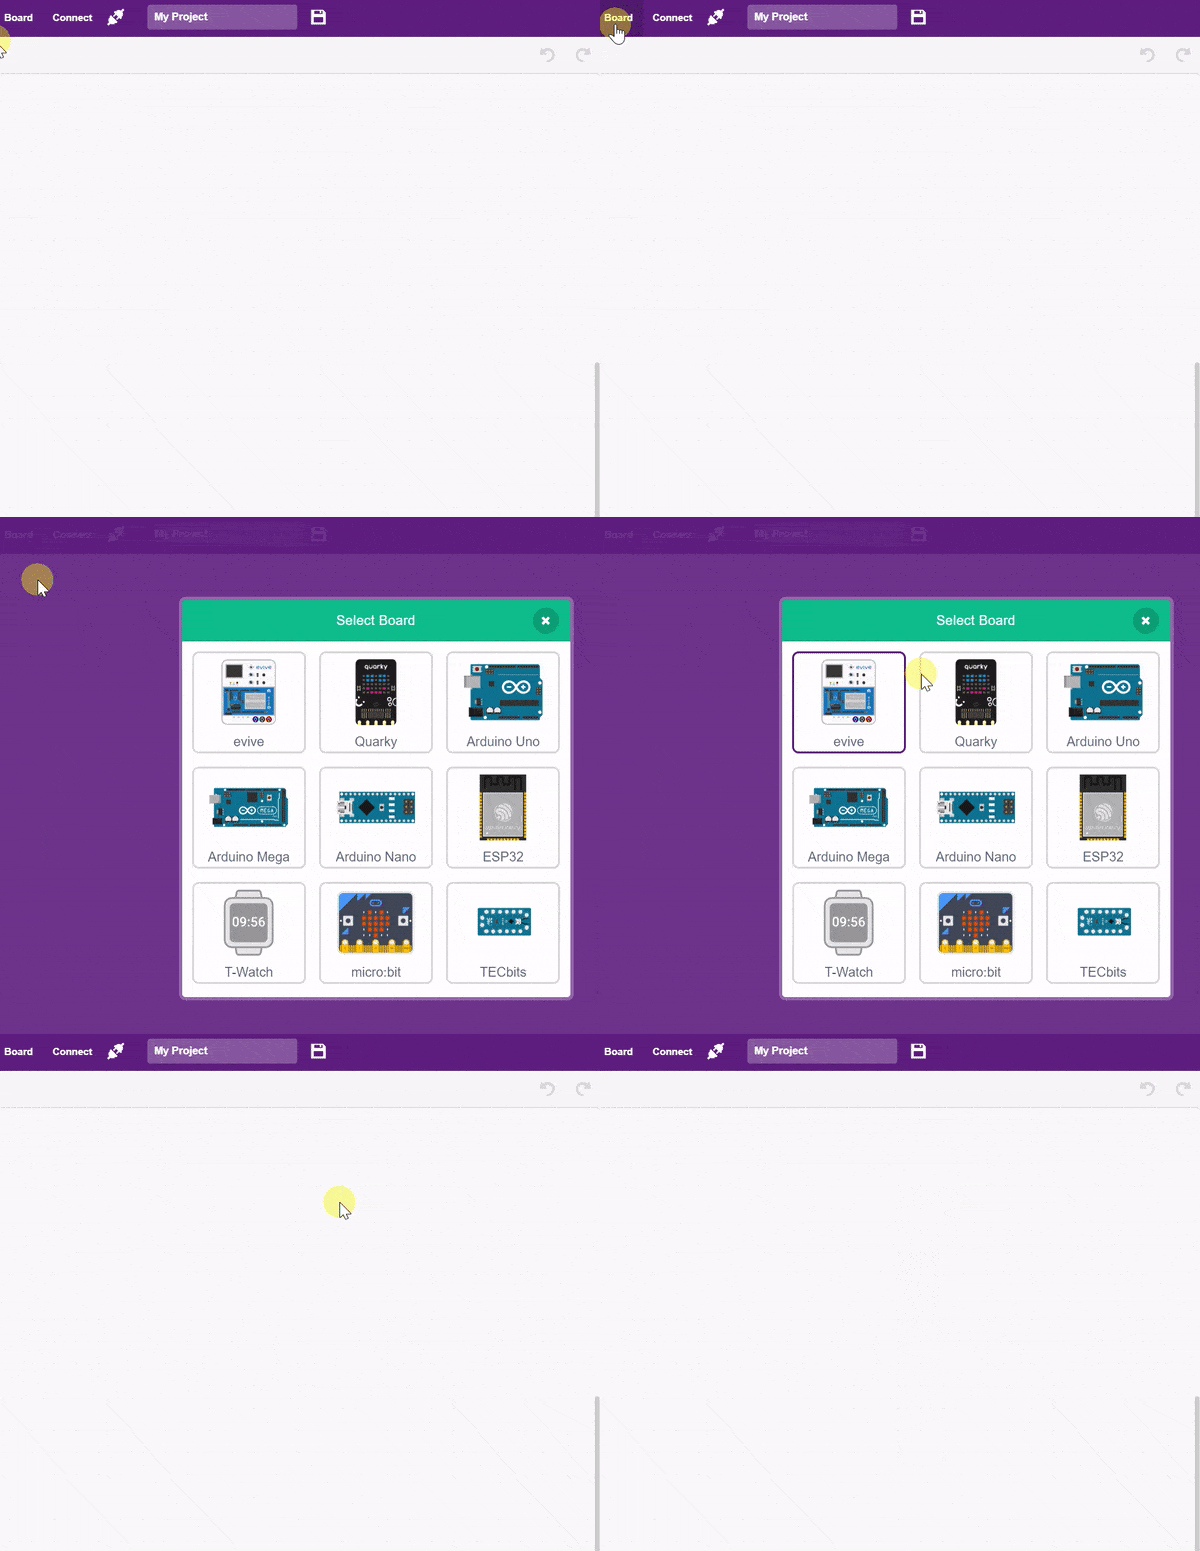
  4. Then, click the Board button in the toolbar and select board as Quarky.
  5. Next, select the appropriate Serial port if the Quarky is connected via USB or the Bluetooth Port if you want to connect Quarky via Bluetooth and press Connect.
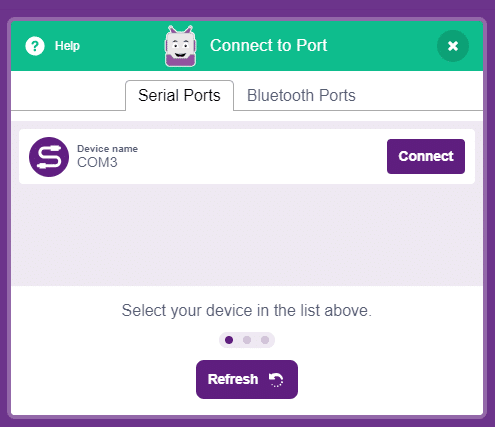
    COM Port

And voila! Quarky is now connected to PictoBlox.

Mobile

Follow the steps below for connecting Quarky to PictoBlox:

  1. First, power ON Quarky.
  2. Open PictoBlox on your smartphone. Go to My Space and make a new project by clicking the ‘+(plus)’ button in the bottom-right corner.
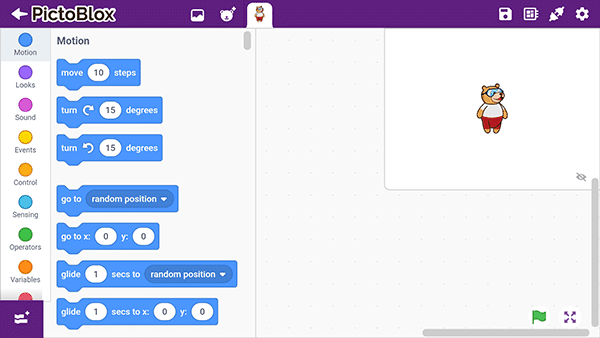
    PictoBlox in Mobile Phone
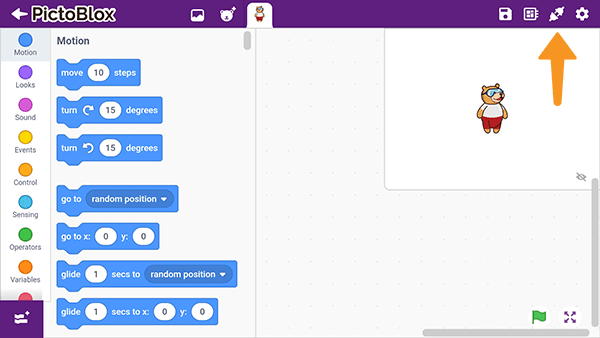
  3. Then, tap the Board button in the top-right corner of the toolbar.
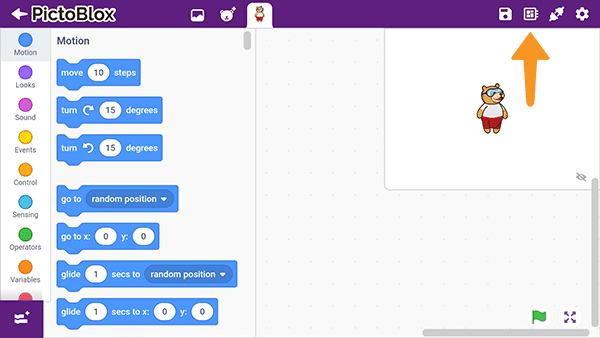
    PictoBlox BoardSelect board as Quarky.
  4. Next, tap the Connect button:
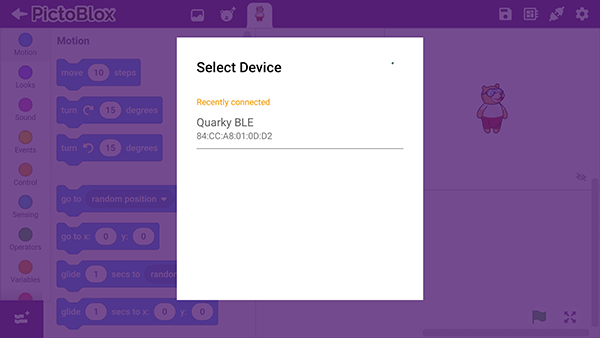
    PictoBlox ConnectSelect your device from the list.

And voila! Quarky is now connected to PictoBlox.

Mars Rover Extension in Block Coding

Click on the Add Extension button and add the Mars Rover extension.

Once loaded, you will find the fresh blocks of Mars Rover in the block palette.


Mars Rover Extension in Python Coding

Click on the Add Modules/Libraries button and add the Mars Rover extension.

To access the library functions, you have to add the object declaration.

quarky = Quarky()
rover = MarsRover(4, 1, 7, 2, 6)
Read More

PictoBlox Blocks

The block enables or disables the automatic display of the box on the QR code on the stage. This is useful when you want to see if the detection happens or not.
The function returns the temperature, minimum, and maximum temperature of the location.
The block pauses its script for the specified amount of beats, which can be a fraction.
The block gets values of the video, either motion (on a scale of 1 to 100) or direction (which way the detected motion is going, measured on the same plane as sprite direction), on either the Stage or the current sprite. If there is no video, the block will return -1. It calculates the values based on “optical flow”.
The block removes all marks made by the pen or stamping. It is the only pen block that the Stage can use.
The block reads the digital value of the sensors connected to the specified pin. The block returns True or False.
The block moves the Quarky robot in the specified direction for the specified time. The direction can be “FORWARD”, “BACKWARD”, “LEFT”, and “RIGHT”.
The block returns the state of the specified push button. If the button is pressed it returns True or else False.
The block plays the specified audio on the Quarky speaker. The block has a callback, so other blocks will be executed after the audio is played.
The turn () video on stage with () % transparency block controls the control the camera feed on the stage.
This block should be included with the Mars Rover for the first time as it calibrates the angles of all five servo motors and saves the angles in the memory of Quarky.
Once the input is given the value using the set () as () block, the analyse numbers block runs the inputs through the ML model and stores the output values in PictoBlox.
The block checks if the currently recognized class from the recognition window is the selected class or not.
The block sets the gravity for the physics engine in the defined x and y directions.
The block activates the sprite under this hat block when the sensor connected to the selected pin becomes HIGH (or 3.3V). The block is used for digital sensors like PIR Sensor, Flame Sensor, or the IR Sensor.
The block sets the servo motor connected to the specified servo pin of the Quarky Expansion board to the specified angle. The expansion board can control 8 servos at a time.
The block set up the API connection between the PictoBlox and the Adafruit server with the specified username and AIO key. 
The block sets the defined value 1, 2, or 3 in the body of the IFTTT request to the specified value.
This block should be included every time you work with the quadruped as this block calibrates the angles of the servo motors and saves it in the memory of Quarky. Due to some mechanical assembly errors, there may be some misalignment of the servos which can be handled with this block.
The block is used for creating the data row for the CSV file. The data number specifies the column for the data value.
This block calibrates the angles of the hip and foot servo motors and saves it in the memory of Quarky. Due to some mechanical assembly errors, there may be some misalignment of the servos which can be handled with this block.
The block makes the robot move in the specified direction at the specified speed.
The maximum length in ChatGPT is the maximum number of words that can be used in a single message. This is usually set by the users and can vary depending on the use case. It is usually set to prevent messages from becoming too long and cluttered.
This block reads the value from the analog pins of boards such as Arduino Uno, Arduino Mega, or Arduino Nano. It returns the 10-bit resolution of the analog pin, with a range of 0 – 1023, which is mapped to the voltage of the pin (usually 0 – 5V). For example, if the value received is 512, then the voltage is roughly 2.5V.
This block of code is setting up an I2C LCD module by initializing it with an address code.
This block is a calibration process for the robotic arm. It is used to measure and save the offset angle of the servo motors in the memory of the Quarky.
Starts the script when you click on the sprite.
Moves the sprite a specified number of steps backward.
Makes the sprite appear as if fully visible.
Runs the blocks inside a specified of times.
All articles loaded
No more articles to load

Block Coding Examples

All articles loaded
No more articles to load

Python Functions

The function is used to draw a text string on any image.
Syntax: cv2.putText(image, text, org, font, fontScale = 2, color = (255, 0, 0), thickness, lineType = cv2.LINE_AA)
The block sets the oscillator parameters for the selected servo motor.
Syntax: setoscillationparameters(servo motor number = 1, amplitude = 30, offset = 90, time period = 1000, phase difference = 0)
The function sets the threshold for the LDR (Light) sensor connected to the selected pin. Threshold helps users decide whether the sensor is active or not. If the sensor value is greater than the threshold value, the sensor is active, or else it is inactive.
Syntax: setldrthreshold(threshold_value = 1500)
The function returns the red, green, or blue value of the color saved from the last data request.
Syntax: adaio.getRGB(color = “red”)
The function sets the servo motors of the humanoid hip, foot and hand to the specified angles at the specified speed.
Syntax: moveall(time = 1000, servo angles = [90,90,90,90,90,90])
The function sets the angles of the pick action of the pick and place robot to a specified value.
Syntax: setpickangle(angle = 40)
The function is used to return the ceiling value of a number, which means it is used to round a number up to the nearest integer that is greater than the number itself.
Syntax: math.ceil(x)
This function creates a anti-clockwise circle trajectory in the Y plane for a robotic arm, given the center position in the X and Z axes, and the radius of the circle.
Syntax: roboticArm.moveincircleanticlockcise(XPOS = 0, ZPOS = 80, RADIUS = 50, YPOS = 180, TIME = 4000)
This function’s parameters match the Quarky board’s regular line following settings, defining motor speeds: F for forward on white, and T1 and T2 for gentle turning along the black line.
Syntax: setlinefollowerparameter(F = 35, T1 = 40, T2 = 10)
This function is used to check whether the expression of the face number specified in the argument is equal to the specified expression. Like is the face 1 happy?
Syntax: isexpression(face = 1, expression = “happy”)
The function changes the specified effect on its sprite by the specified amount. There are seven different effects to choose from: colour, fisheye, whirl, pixelate, mosaic, brightness, and ghost.
Syntax: changeeffect(effect_name = “COLOR”, effect_value = 25)
The function holds a sprite’s or the Stage’s volume. This block can be displayed as a Stage monitor.
Syntax: setvolume()
The function reports how loud the noise that a microphone receives, on a scale of 0 to 100.
Syntax: loudness()
The function sets the RGB LED display matrix to display the specified character.
Syntax: showtext(character = “A”, color = [0, 0 , 0])
The function returns the analog reading of the sensor connected to the specified analog pin of the Quarky. The value varies between 0 to 4095.
Syntax: readanalogsensor(analog_pin = “A1”)
The function sets the servo motor connected to the specified servo pin to the specified angle.
Syntax: moveservo(servo_pin = “Servo 1”, angle = 90)
The function reports the landmark identified in the image on analysis.
Syntax: landmark()
The function sets the current Quarky Gripper Robot’s gripper servo motor angle to the specified value.
Syntax: setgripperangle(angle = 90)
The function resets the oscillator parameter for all the servo motors.
Syntax: resetoscillationparameters()
The function reports the state of the Gas sensor connected to the selected pin. The block returns 1 when the analog reading of the sensor is greater than the threshold value set by the user. Else it reports 0.
Syntax: gassensorstatus(pin = “A1”)
The function sets the selected servo motor angle to the specified angle in the specified time. This creates a smooth motion for the servo motor from the current angle to the specified angle.
Syntax: movelimb(servo name = “RHip”, angle = 90, time = 1000)
The function sets the angles of the place action of the pick and place robot to a specified value.
Syntax: setplaceangle(angle = 90)
This function is used to control an end–effector of the robotic arm to move in an arc.
Syntax: roboticArm.moveinarc(XPOS = 0, ZPOS = 80, RADIUS = 50, START = 90, END = 270, YPOS = 180, TIME = 4000)
This function enables the robot to follow a line continuously until it detects a checkpoint (both IR sensors on black); it stops only at the checkpoint or with a reset.
Syntax: dolinefollowinguntilcheckpointdetect(next_checkpoint = 1)
This function returns the x position of the face detected. You can specify the face for which the value is needed. The position is mapped with the stage coordinates.
Syntax: x(face = 1)
The function points its sprite in the specified direction; this rotates the sprite.
Syntax: setdirection(angle = 15)
The function sets the specified effect on its sprite to the specified amount. There are seven different effects to choose from: color, fisheye, whirl, pixelate, mosaic, brightness, and ghost.
Syntax: seteffect(effect_name = “COLOR”, effect_value = 25)
The function reports the time lapsed since the PictoBlox is launched and increases gradually; every second it will have increased by 1.
Syntax: timer()
The function runs the specified text message on the RGB LED of Quarky. You can also set the speed and the color of the text.
Syntax: showscrollingtext(message = “Hi I am Quarky”, speed = 1, color = [0, 0 , 0])
The function reports the image description identified in the image on analysis – a Human-readable sentence that describes the contents of the image.
Syntax: imagedescription()
All articles loaded
No more articles to load

Python Coding Examples

All articles loaded
No more articles to load
Table of Contents