Deprecated: Required parameter $query follows optional parameter $post in /var/www/html/wp-content/plugins/elementor-extras/modules/breadcrumbs/widgets/breadcrumbs.php on line 1215
Mars Rover - Blocks, Python Functions, Projects | PictoBlox Extension
[PictoBloxExtension]

Mars Rover

Mars rover extension graphics
Extension Description
Control the Mars Rover Robot with Quarky.

Introduction

Mars is a fascinating planet. It’s icy cold and covered in reddish dust and dirt. Like Earth, it has volcanoes, gullies, and flat plains. Scientists can also see channels that look like they were carved by rivers and streams a long, long time ago. Over the years, NASA has sent five robotic vehicles, called rovers, to Mars. The names of the five rovers are Sojourner, Spirit and Opportunity, Curiosity, and Perseverance.

STEMpedia has created a miniature version of the Mars Rover to educate students about the different aspects of the Mars Rover in a more practical way.
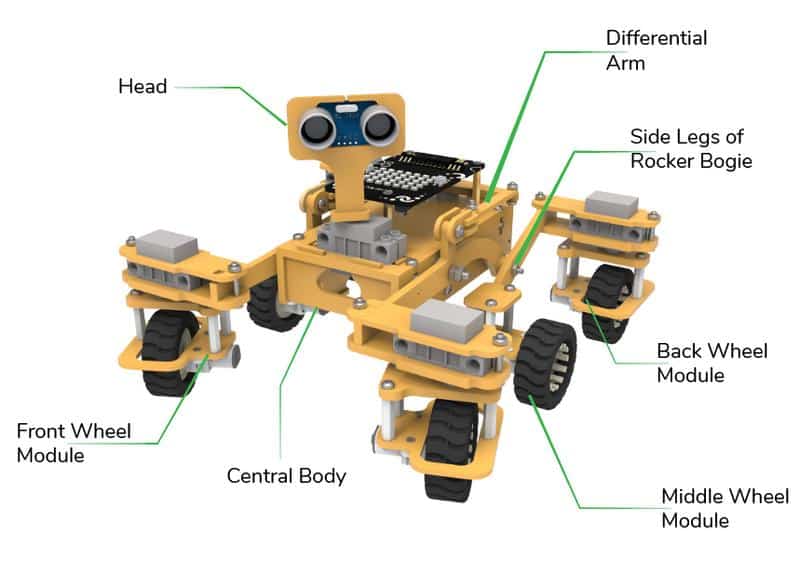
The Mars Rover is programmable with PictoBlox in both modes – Block Coding and Python Coding.

Motor and Servo Motor

In our Mars rover, there are a total of 6 motors and 5 servo motors. 

The motors provide rotation to the wheels which helps the rover to attain motion in both forward and backward directions.  All the left side motors (3 motors) are connected to the left motor port of Quarky and all the right side motors (3 motors) are connected to the right motor port of Quarky using a 3 port wire. This means that to control the Mars rover we have to control only 2 motors – Left and Right. Also, there are 2 parameters to control – Direction (Forward or Backward) and Speed. With this control, the Mars rover can do all the desired motions.
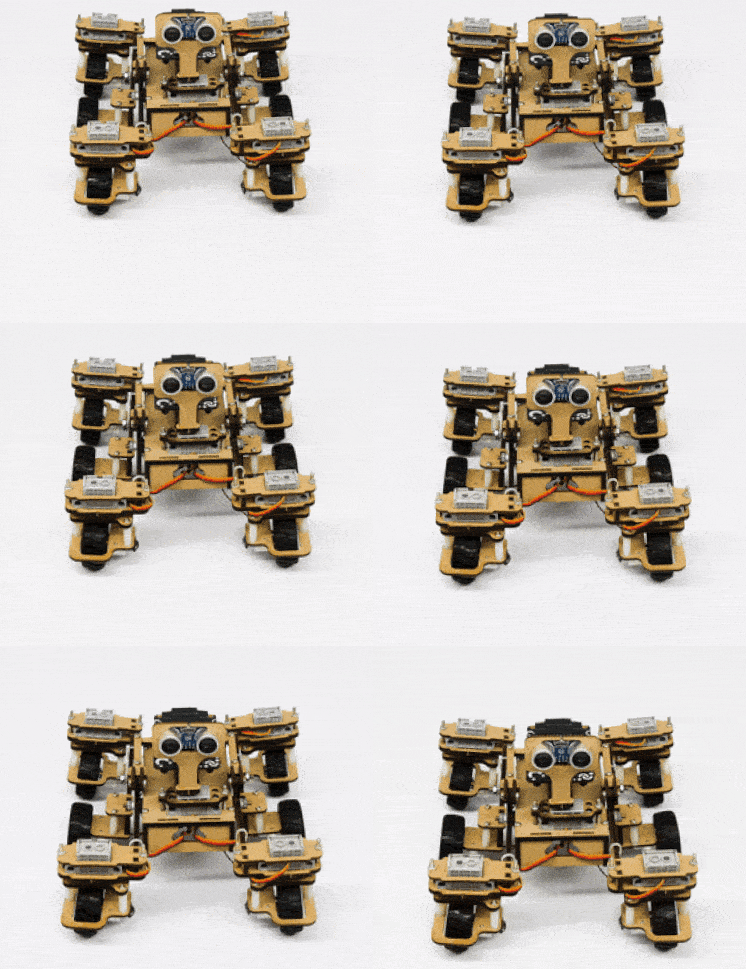
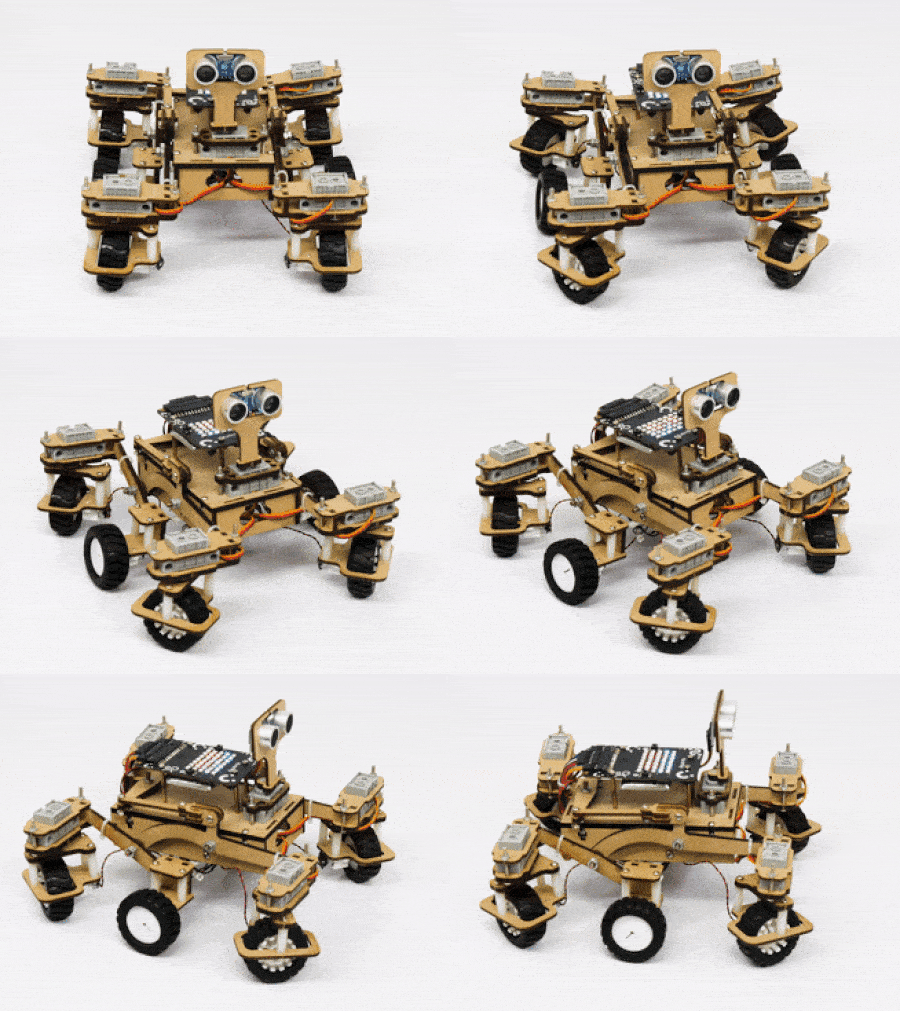
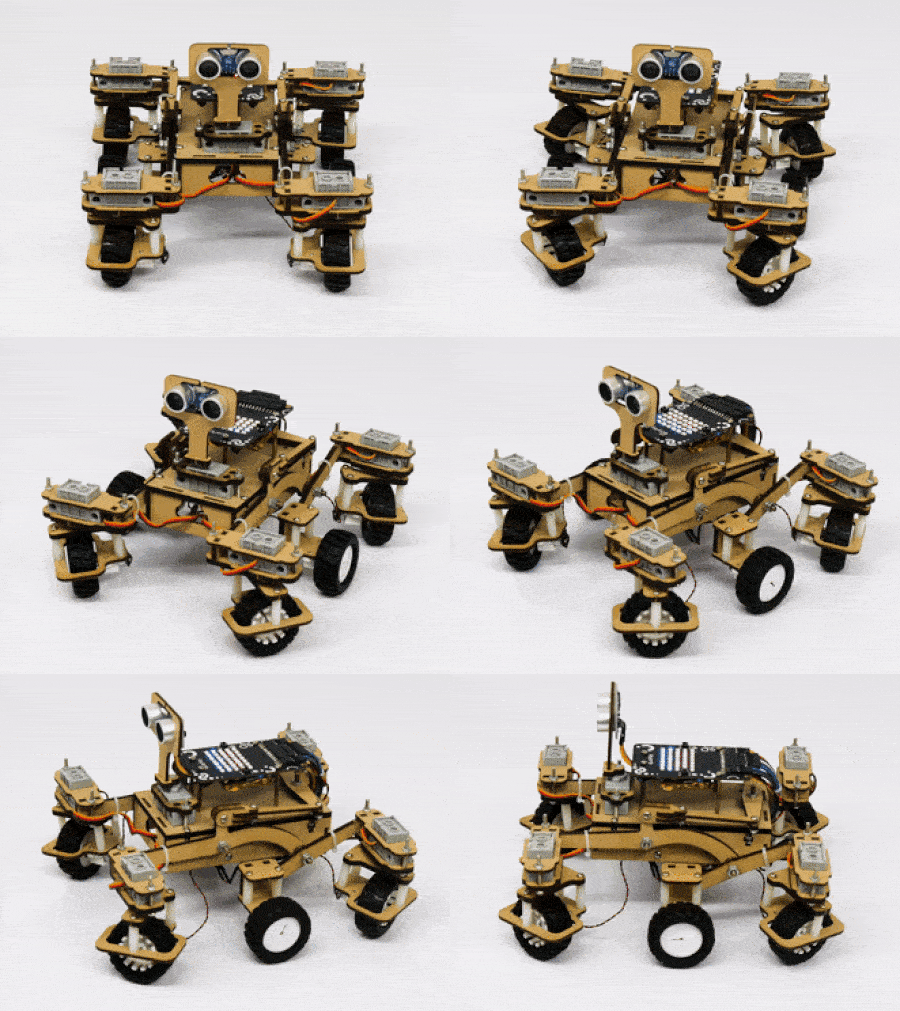
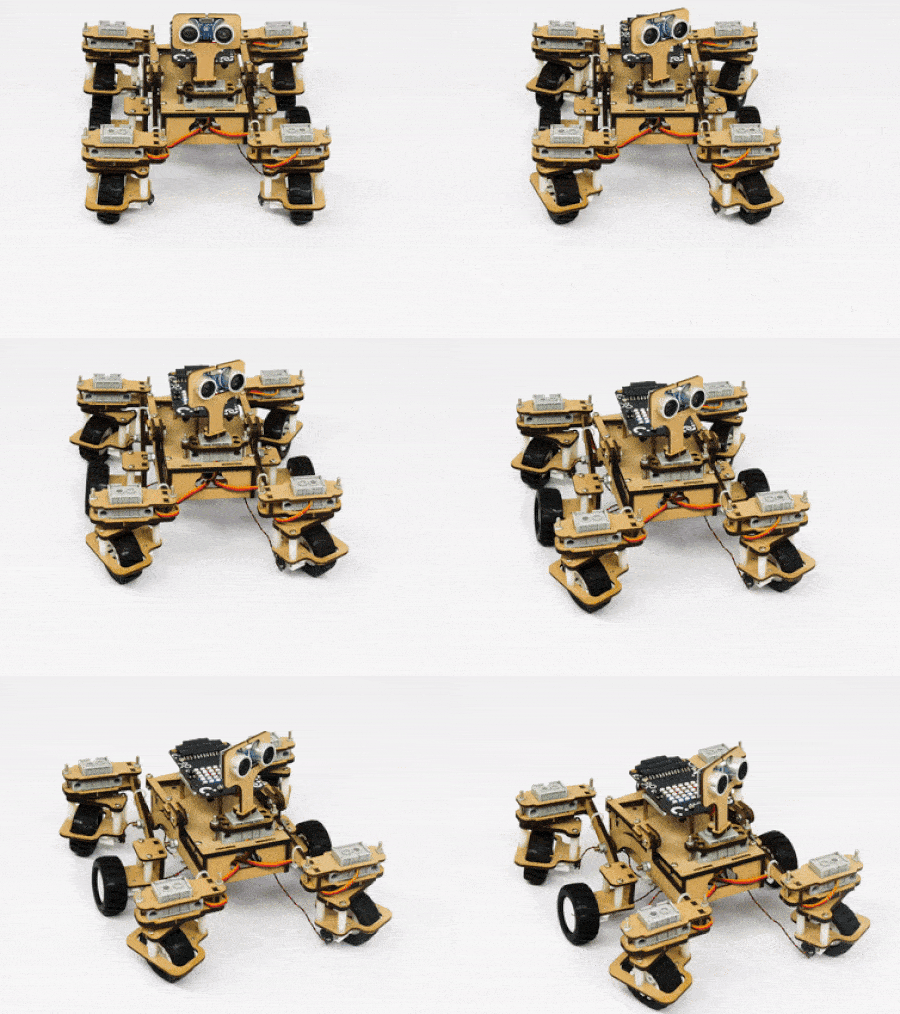
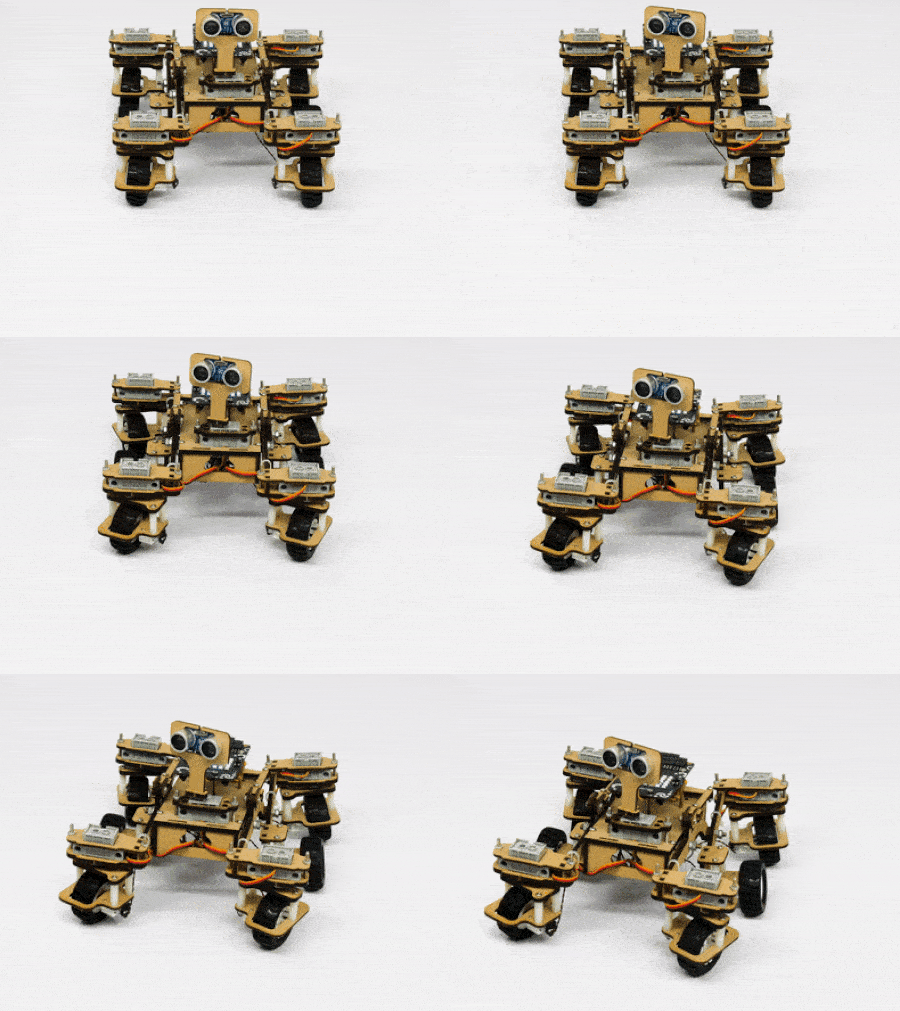
The servo motors help in providing rotation to the complete wheel assembly so that the rover can change its wheel alignments and so its path. These play a major role in turning cases of the mars rover. The front two and the back two-wheel assemblies are connected with one servo motor each. Some important turns:

  1. Turning left on the same point:
  2. Turning right on the same point:
  3. Turning left on a circle:
  4. Turning right on a circle:
Note:  The middle wheel assemblies on either side are not connected to servo motors.

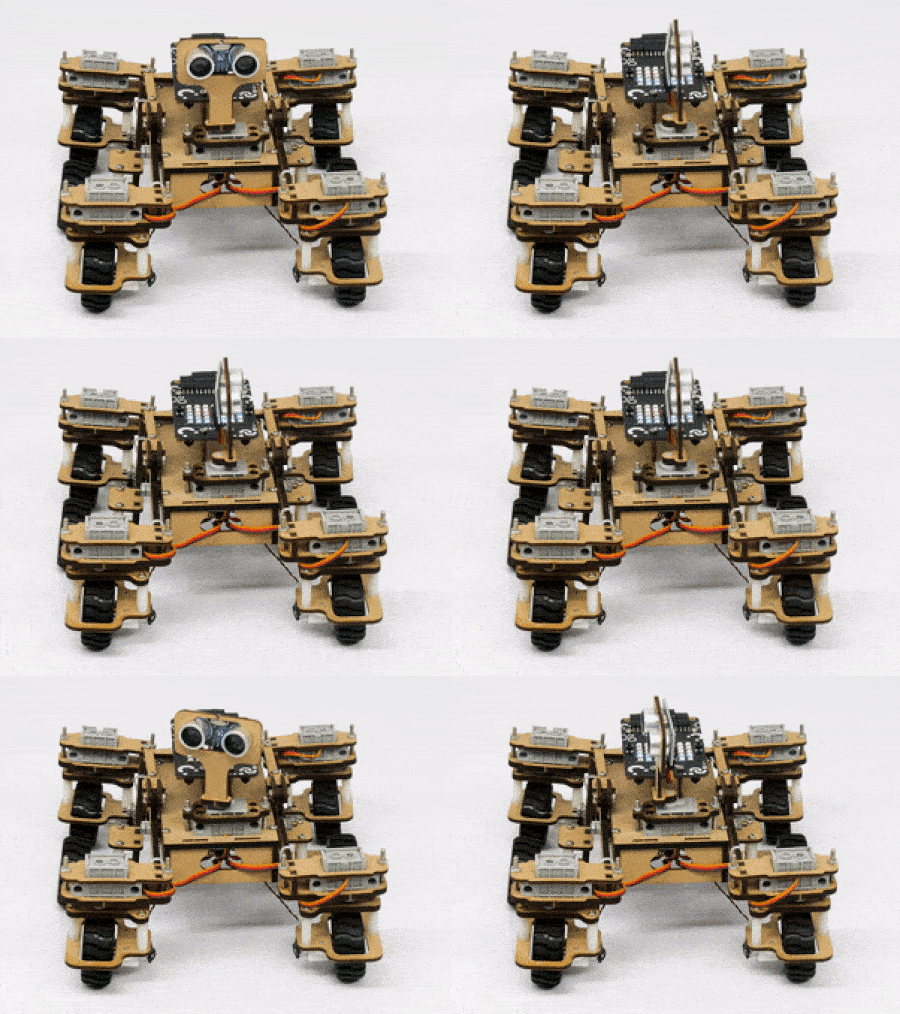
The fifth servo motor is connected to the head portion of the Mars rover so that the rover can rotate its head to detect obstacles. 
Connecting Mars Rover with PictoBlox

Let’s begin by first connecting Quarky to PictoBlox. Select your preferred type of device i.e. either the desktop/laptop or your smartphone and follow the instructions.

Desktop

Follow the steps below for connecting Quarky to PictoBlox:

  1. First, connect Quarky to your laptop using a USB cable.
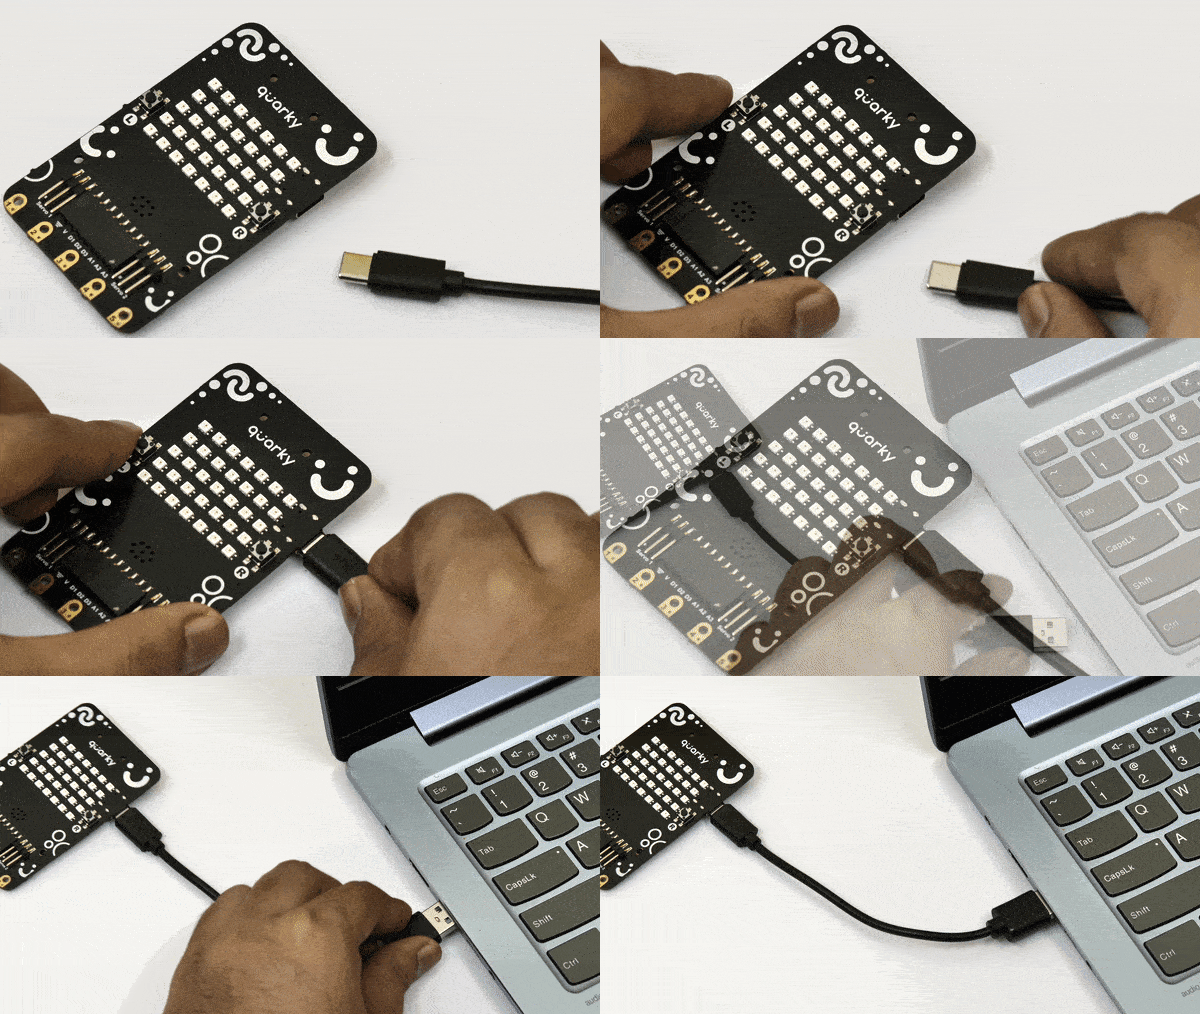
    Power Quarky
  2. Next, open PictoBlox on your desktop.
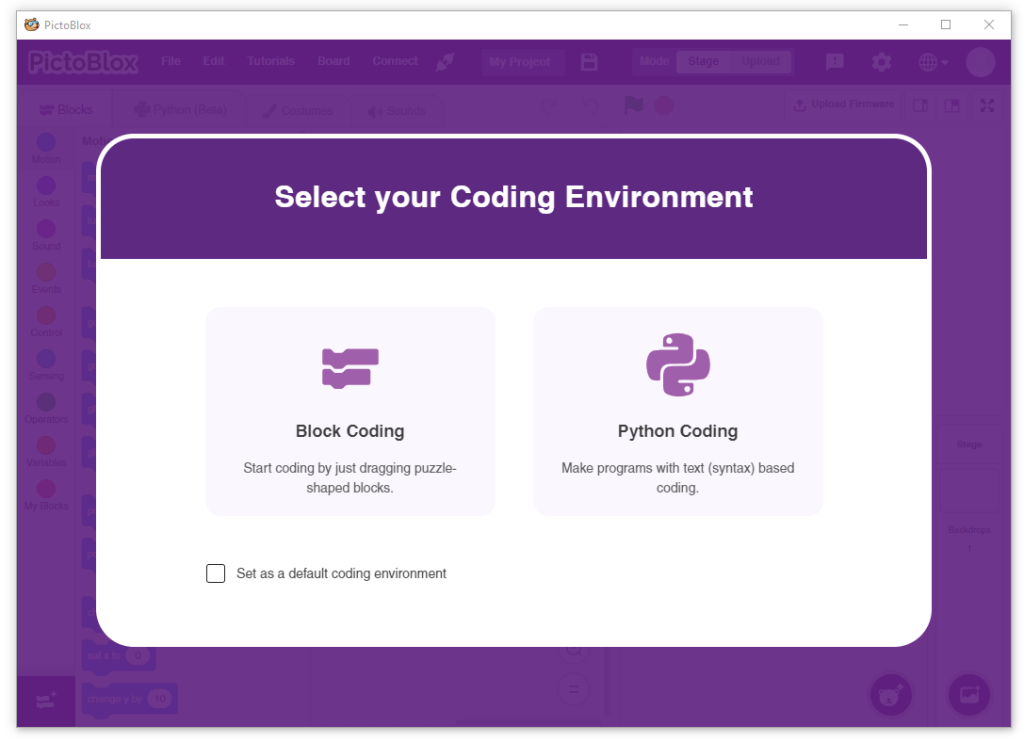
  3. After that, select Block or Python Coding as your coding environment.
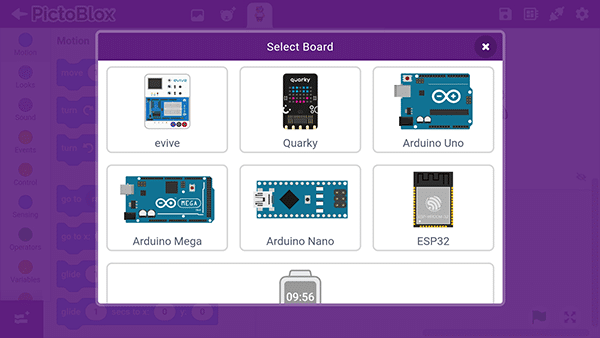
  4. Then, click the Board button in the toolbar and select board as Quarky.
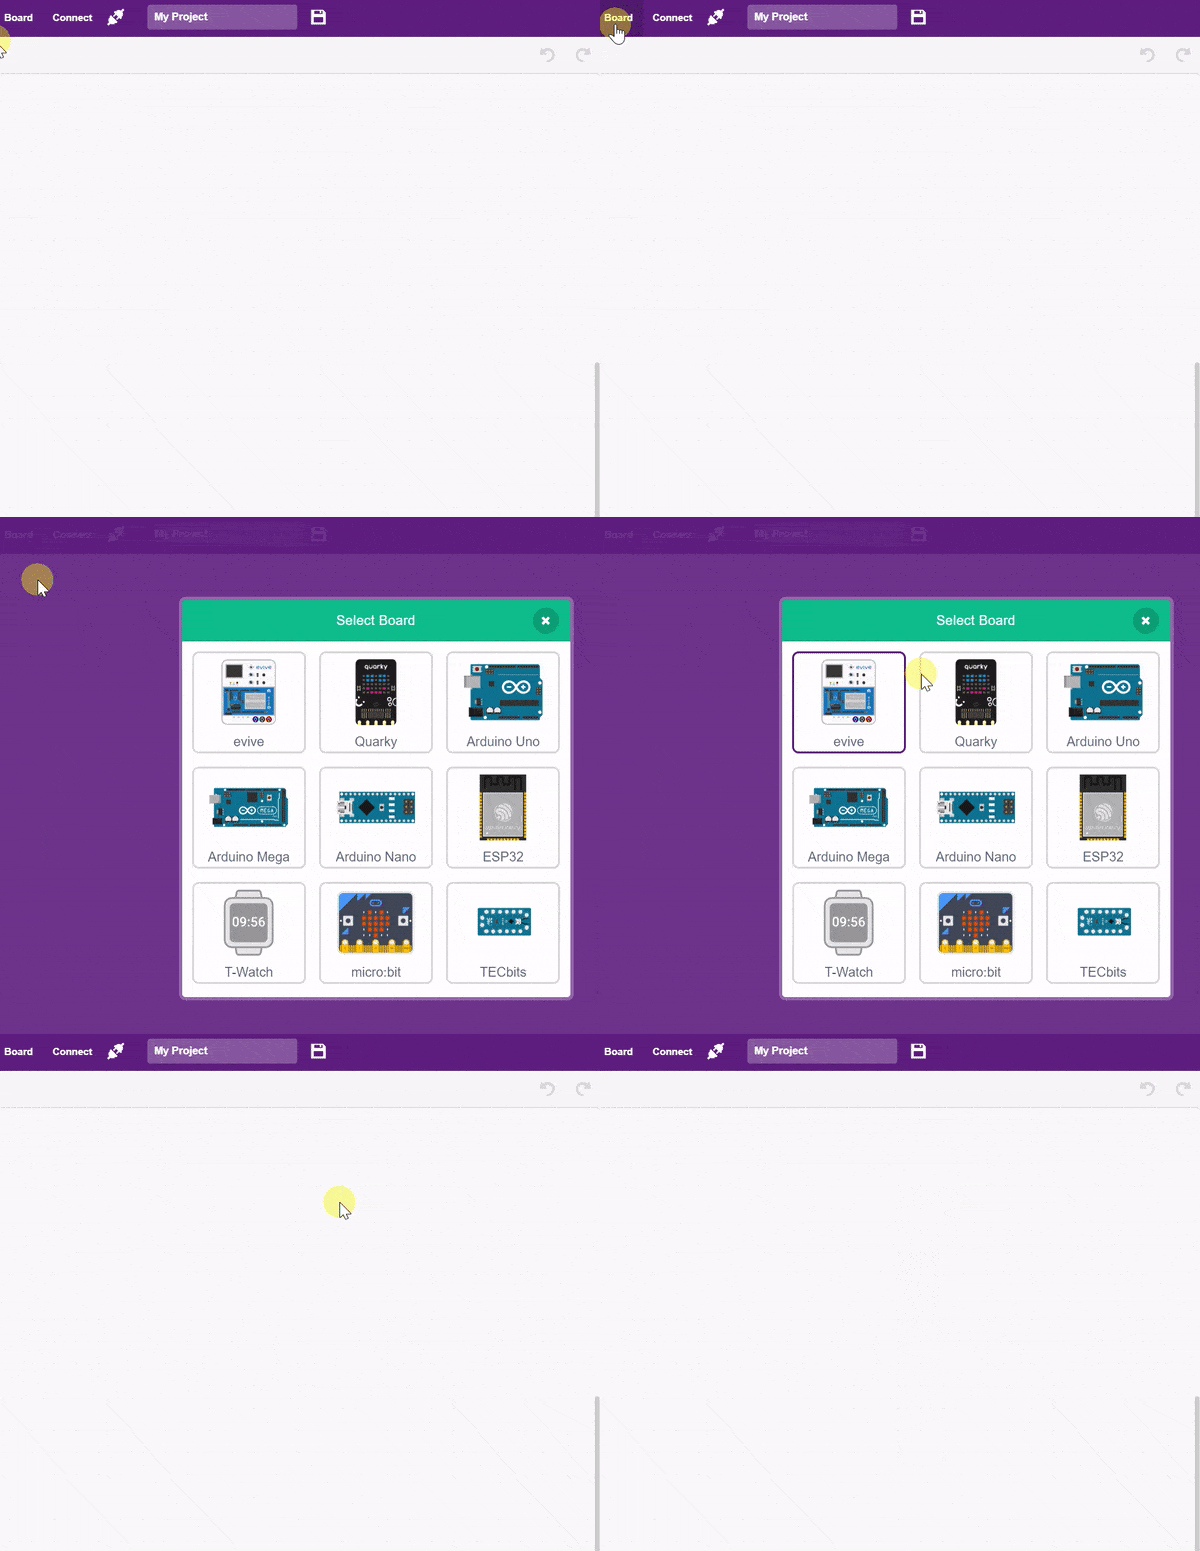
  5. Next, select the appropriate Serial port if the Quarky is connected via USB or the Bluetooth Port if you want to connect Quarky via Bluetooth and press Connect.
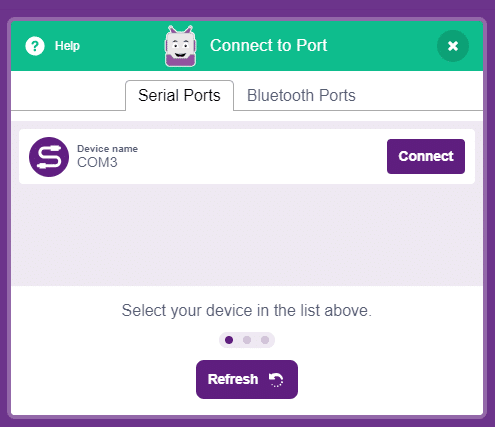
    COM Port

And voila! Quarky is now connected to PictoBlox.

Mobile

Follow the steps below for connecting Quarky to PictoBlox:

  1. First, power ON Quarky.
  2. Open PictoBlox on your smartphone. Go to My Space and make a new project by clicking the ‘+(plus)’ button in the bottom-right corner.
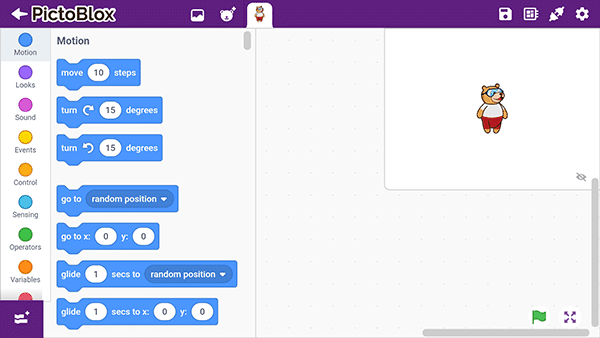
    PictoBlox in Mobile Phone
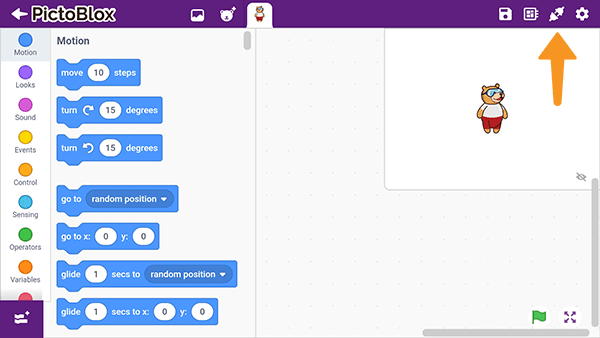
  3. Then, tap the Board button in the top-right corner of the toolbar.
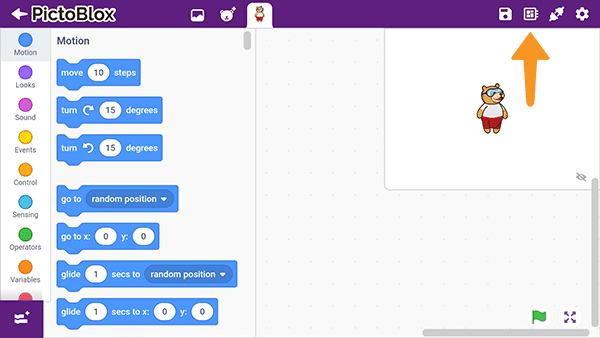
    PictoBlox BoardSelect board as Quarky.
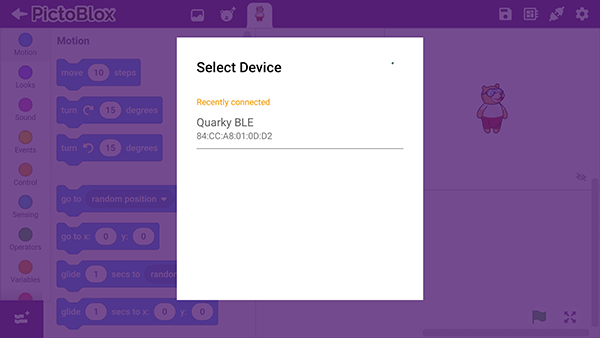
  4. Next, tap the Connect button:
    PictoBlox ConnectSelect your device from the list.

And voila! Quarky is now connected to PictoBlox.

Mars Rover Extension in Block Coding

Click on the Add Extension button and add the Mars Rover extension.
Once loaded, you will find the fresh blocks of Mars Rover in the block palette.


Mars Rover Extension in Python Coding

Click on the Add Modules/Libraries button and add the Mars Rover extension.

To access the library functions, you have to add the object declaration.

quarky = Quarky()
rover = MarsRover(4, 1, 7, 2, 6)
Read More

PictoBlox Blocks

The block holds its sprite’s current costume number.
The block holds the current backdrop number.
The block reports all the objects that are in contact with the sprite. 
The block reports the master or the current RFID tag ID.
The block reports the request-response code received.
The Color Detector module of the Camera Module processes the live video stream and detects colors as per the selected settings. This block gives the value of the selected color component for the selected cell.
The Oscilloscope module allows you to visualize the input and output signals of your hardware device on your smartphone. This block for setting the baud rate by selecting one from the drop-down for the Bluetooth module that you have connected to the boards.
The block holds its sprite’s size. This block can be displayed as a Stage monitor.
The block set the stage view to the defined coordinates with respect to the defined world coordinates. This is very helpful in creating games.
The block reports the body or error value from the HTTP request.
The Data Logger of the IoT module is used to monitor the data of sensors while they are being logged and can finally save the data in form of CSV file. This block is used for sending the data that is to be logged in the file. 
The block changes the stage view by the defined coordinate values with respect to the defined world coordinates. 
The block reports the value of the JSON object from the body.
This block refreshes the data sent to the hardware device from Dabble app.
The block reports the x coordinate value of the stage view.
The block reports the object count of the JSON object from the body.
The Camera module allows you to use your mobile camera for different activities like recording videos, capturing images, color detection, and face detection. This block is used for rotating your Smartphone’s camera in the module. 
The block reports the y coordinate value of the stage view.
The Data Logger of the IoT module is used to monitor the data of sensors while they are being logged and can finally save the data in form of CSV file. This block is used to configure the initial parameters of the data logger file. 
The block sets the velocity unit for the physics engine to the specified unit system.
The Oscilloscope module allows you to visualize the input and output signals of your hardware device on your smartphone. This block sends the data to the oscilloscope channel.  
The block sets the force unit for the physics engine to the specified unit system.
The Notification module of the IoT module triggers a notification in your Smartphone based on events occurring on your hardware. This block creates notifications that need to be sent.
The block sets the mass unit for the physics engine to the specified unit system.
The Oscilloscope module allows you to visualize the input and output signals of your hardware device on your smartphone. This block for setting the baud rate by selecting one from the drop-down for the Bluetooth module that you have connected to evive. 
The block reset the unit system of the physics engine to default.
The Camera module of Dabble app allows you to use your mobile camera for different activities like recording videos, capturing images, and color detection. This block is used to change the flash settings, camera quality, and zoom settings of your Smartphone’s camera.
The block reports the current unit system used for the specified property.
The Color Detector module of Camera Module process live video stream and detects colors as per the selected settings. This block is used for setting grid size, color calculation mode and color mode settings. The block consists of three drop downs.
The block converts the specified value of the distance from the input unit system to the target unit system.
All articles loaded
No more articles to load

Block Coding Examples

There are no block coding examples for the extension to show.

Python Functions

There are no python functions for the extension to show.

Python Coding Examples

There are no python examples for the extension to show.
Table of Contents