Deprecated: Required parameter $query follows optional parameter $post in /var/www/html/wp-content/plugins/elementor-extras/modules/breadcrumbs/widgets/breadcrumbs.php on line 1215
Mars Rover - Blocks, Python Functions, Projects | PictoBlox Extension
[PictoBloxExtension]

Mars Rover

Mars rover extension graphics
Extension Description
Control the Mars Rover Robot with Quarky.

Introduction

Mars is a fascinating planet. It’s icy cold and covered in reddish dust and dirt. Like Earth, it has volcanoes, gullies, and flat plains. Scientists can also see channels that look like they were carved by rivers and streams a long, long time ago. Over the years, NASA has sent five robotic vehicles, called rovers, to Mars. The names of the five rovers are Sojourner, Spirit and Opportunity, Curiosity, and Perseverance.

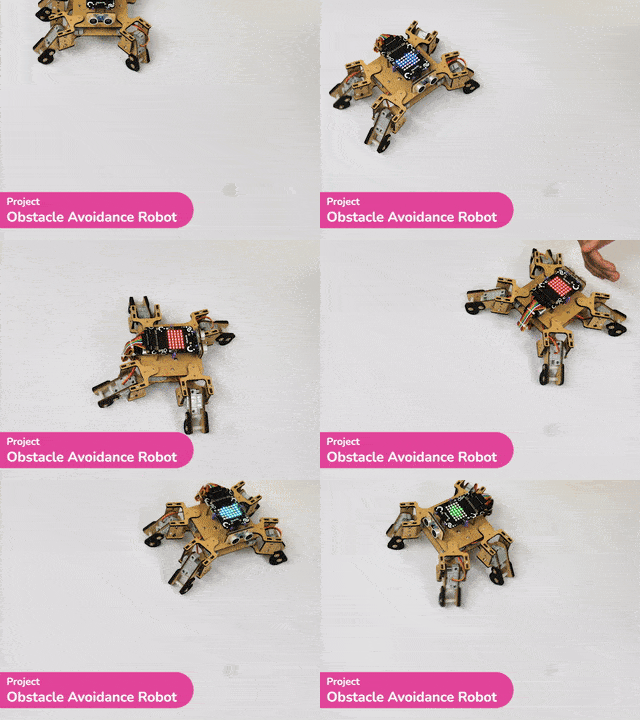
STEMpedia has created a miniature version of the Mars Rover to educate students about the different aspects of the Mars Rover in a more practical way.
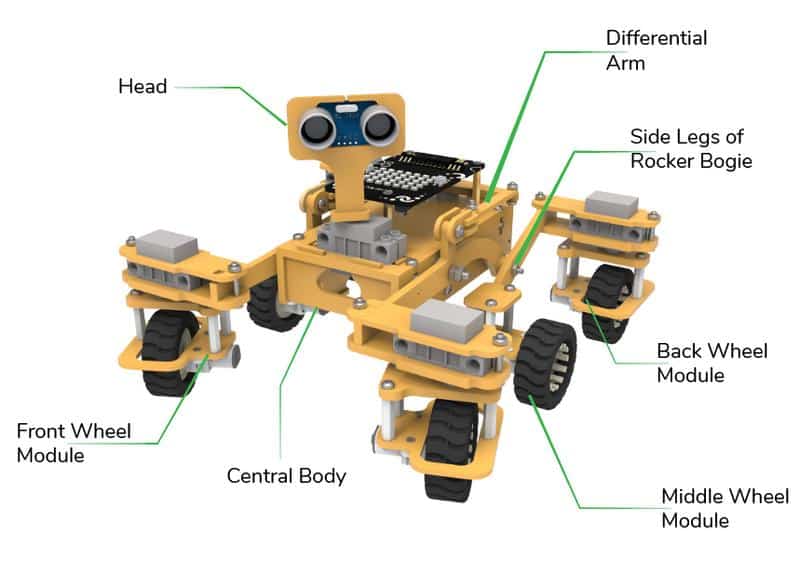
The Mars Rover is programmable with PictoBlox in both modes – Block Coding and Python Coding.

Motor and Servo Motor

In our Mars rover, there are a total of 6 motors and 5 servo motors. 

The motors provide rotation to the wheels which helps the rover to attain motion in both forward and backward directions.  All the left side motors (3 motors) are connected to the left motor port of Quarky and all the right side motors (3 motors) are connected to the right motor port of Quarky using a 3 port wire. This means that to control the Mars rover we have to control only 2 motors – Left and Right. Also, there are 2 parameters to control – Direction (Forward or Backward) and Speed. With this control, the Mars rover can do all the desired motions.
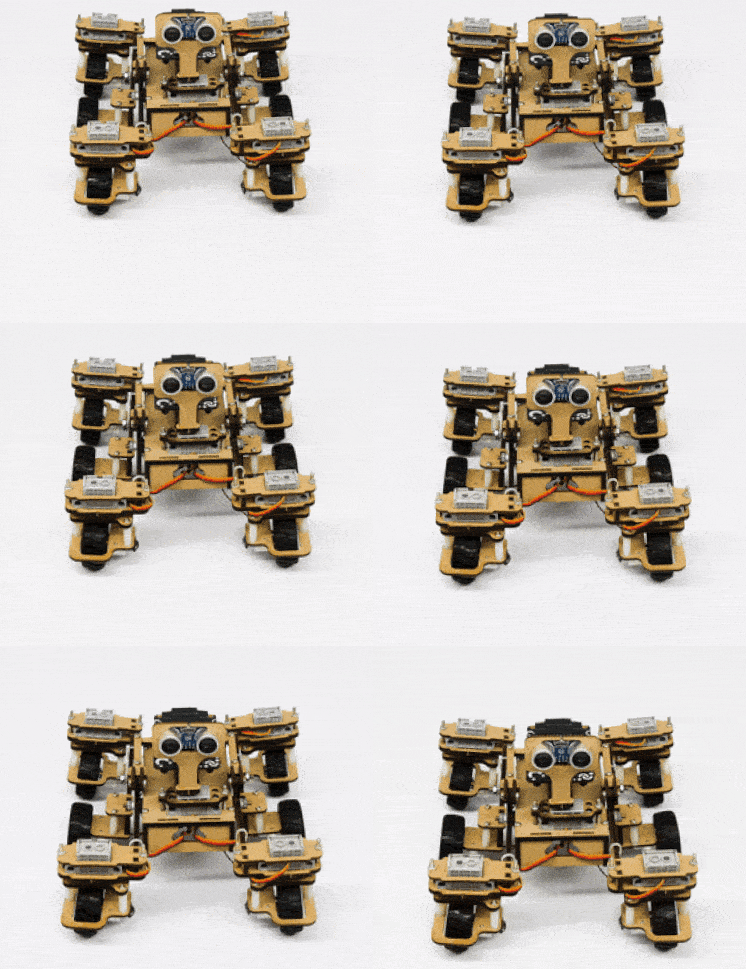
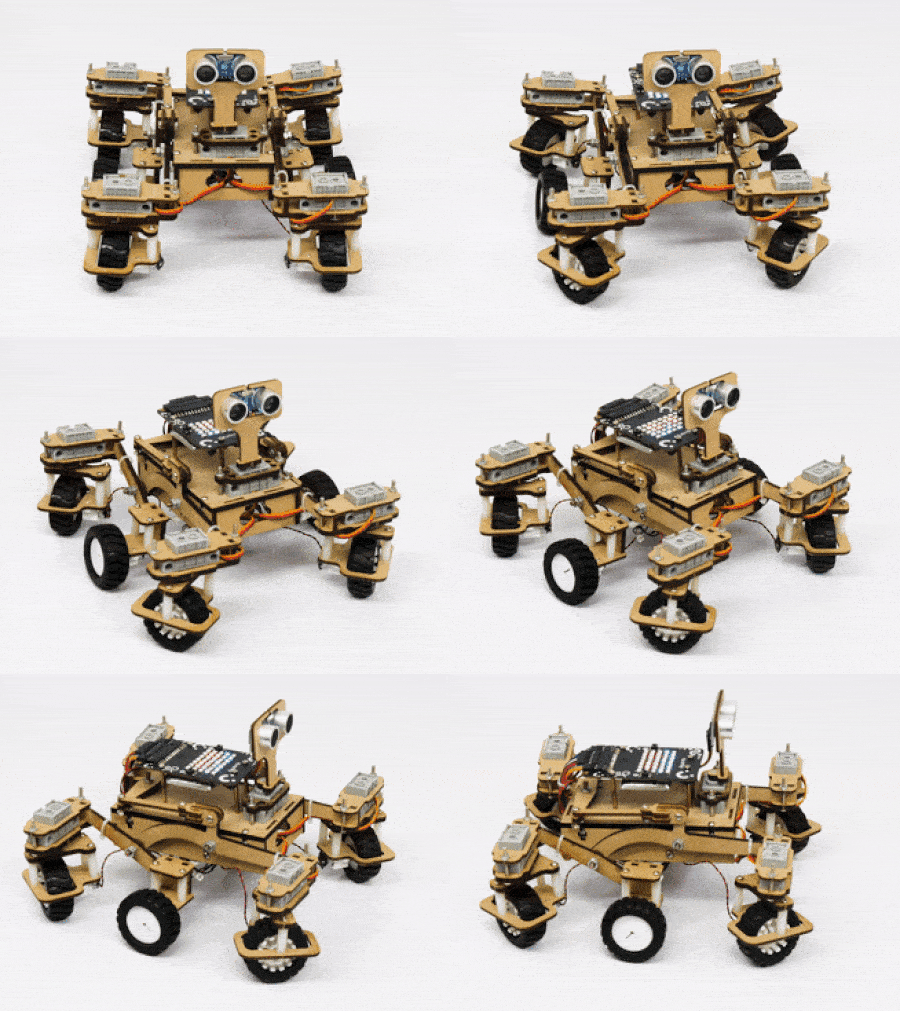
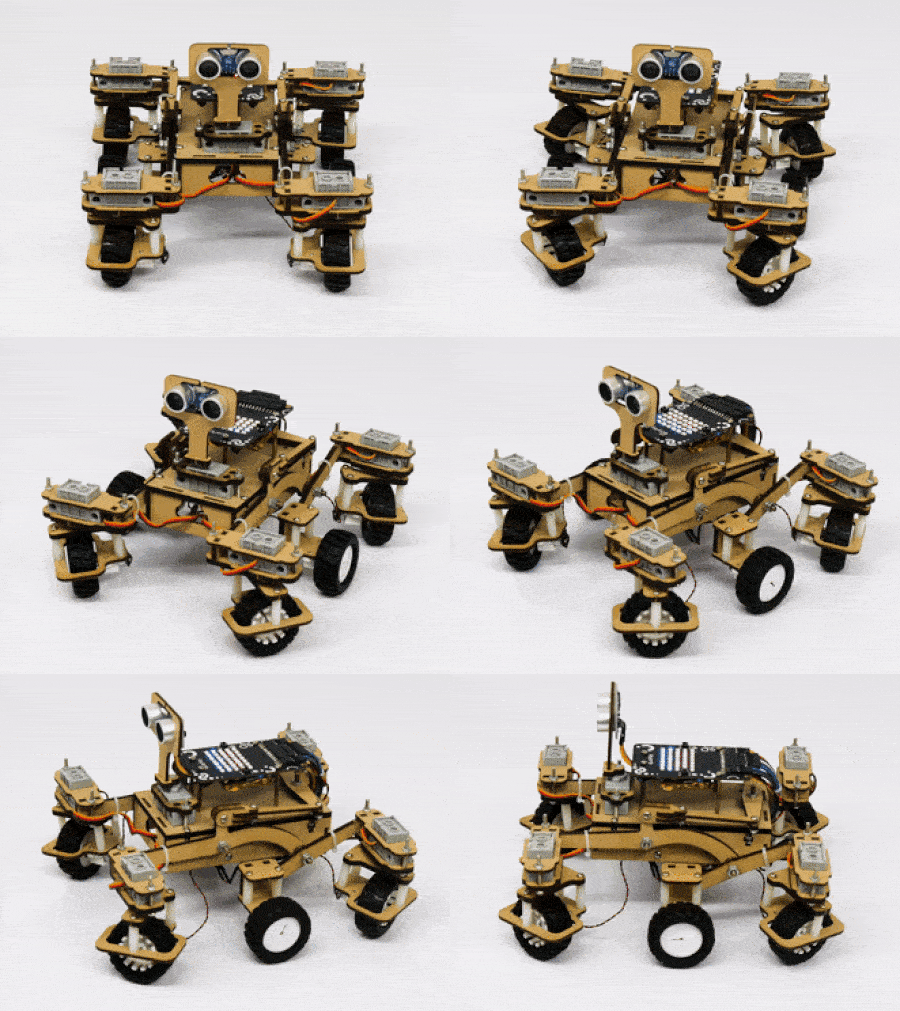
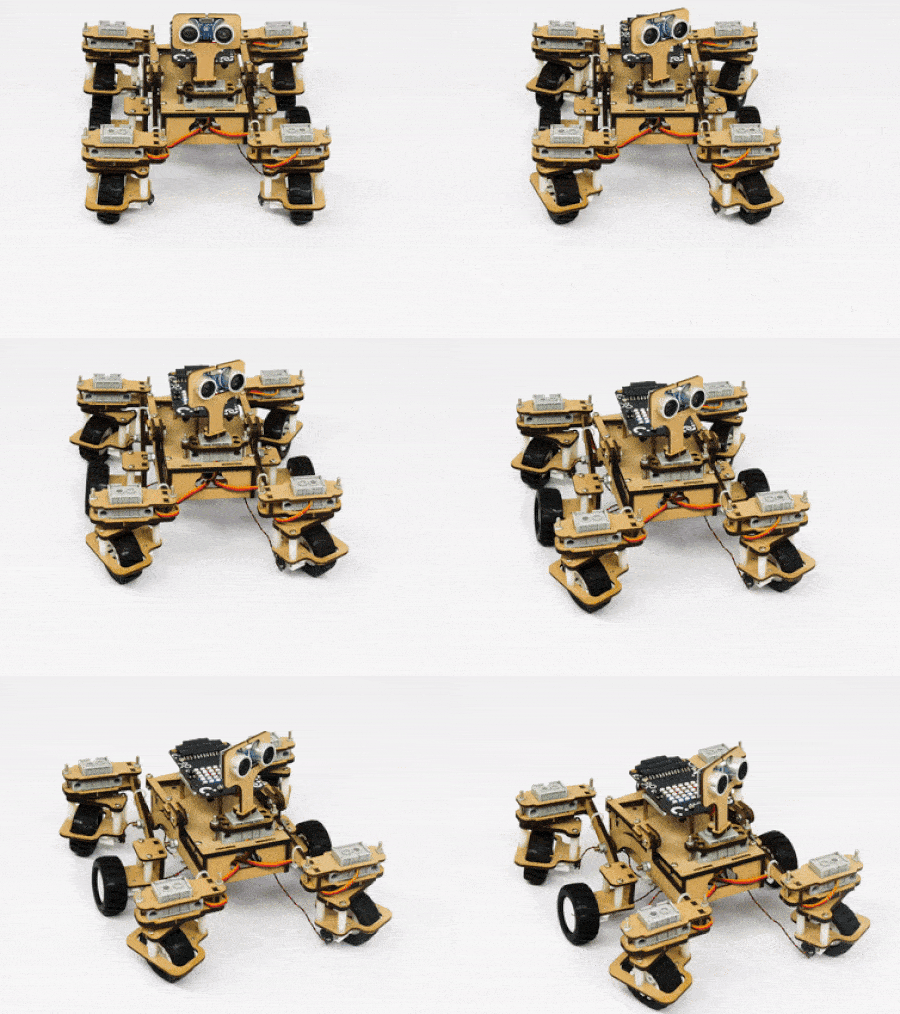
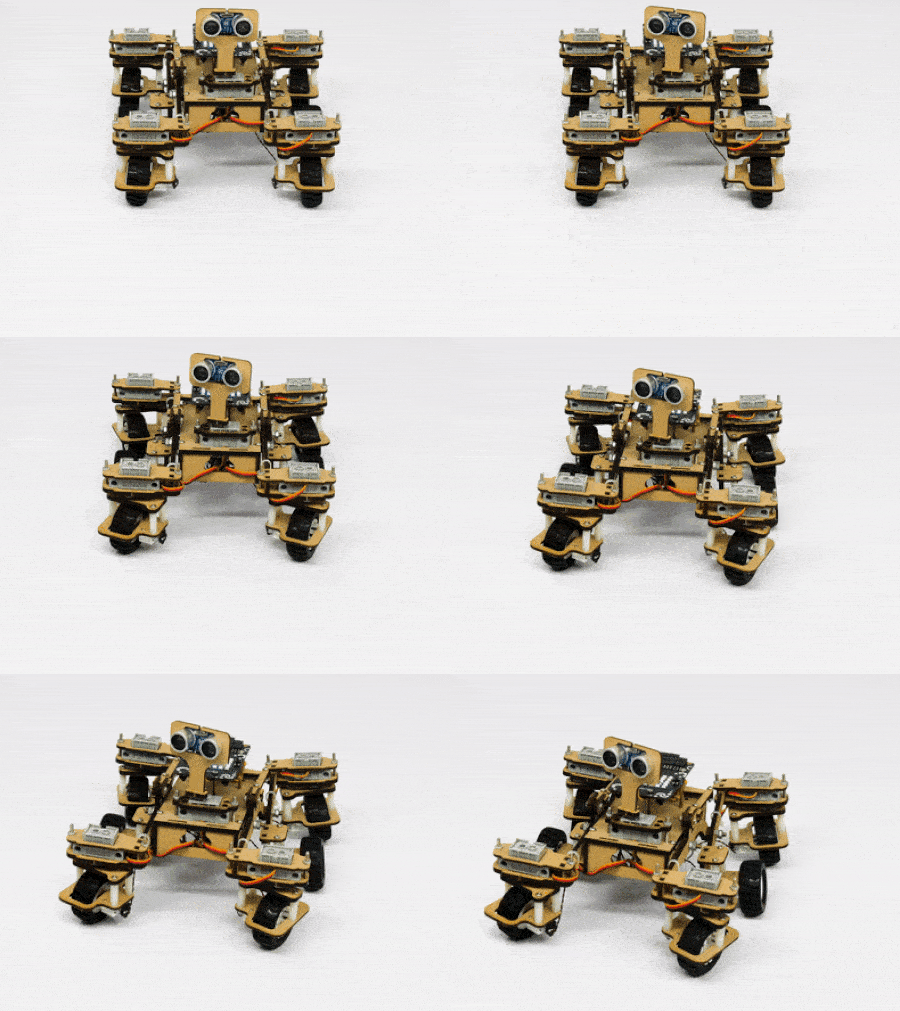
The servo motors help in providing rotation to the complete wheel assembly so that the rover can change its wheel alignments and so its path. These play a major role in turning cases of the mars rover. The front two and the back two-wheel assemblies are connected with one servo motor each. Some important turns:

  1. Turning left on the same point:
  2. Turning right on the same point:
  3. Turning left on a circle:
  4. Turning right on a circle:
Note:  The middle wheel assemblies on either side are not connected to servo motors.

The fifth servo motor is connected to the head portion of the Mars rover so that the rover can rotate its head to detect obstacles. 
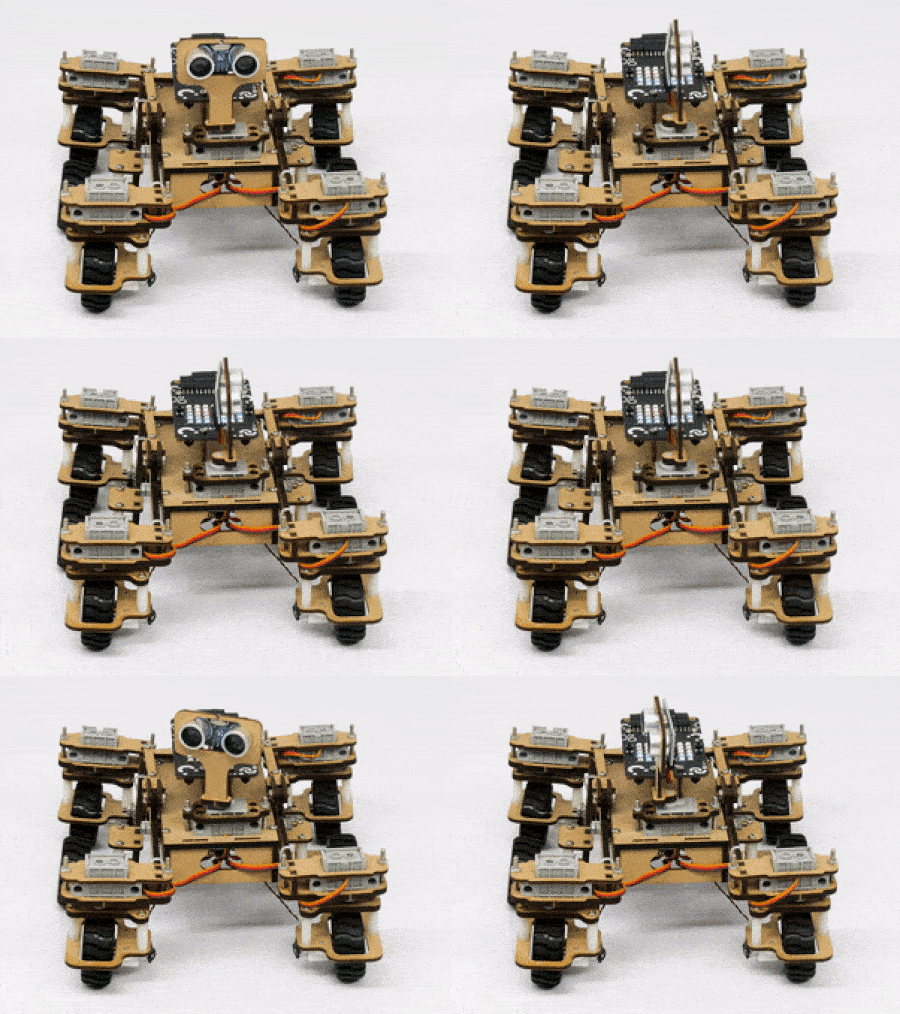
Connecting Mars Rover with PictoBlox

Let’s begin by first connecting Quarky to PictoBlox. Select your preferred type of device i.e. either the desktop/laptop or your smartphone and follow the instructions.

Desktop

Follow the steps below for connecting Quarky to PictoBlox:

  1. First, connect Quarky to your laptop using a USB cable.
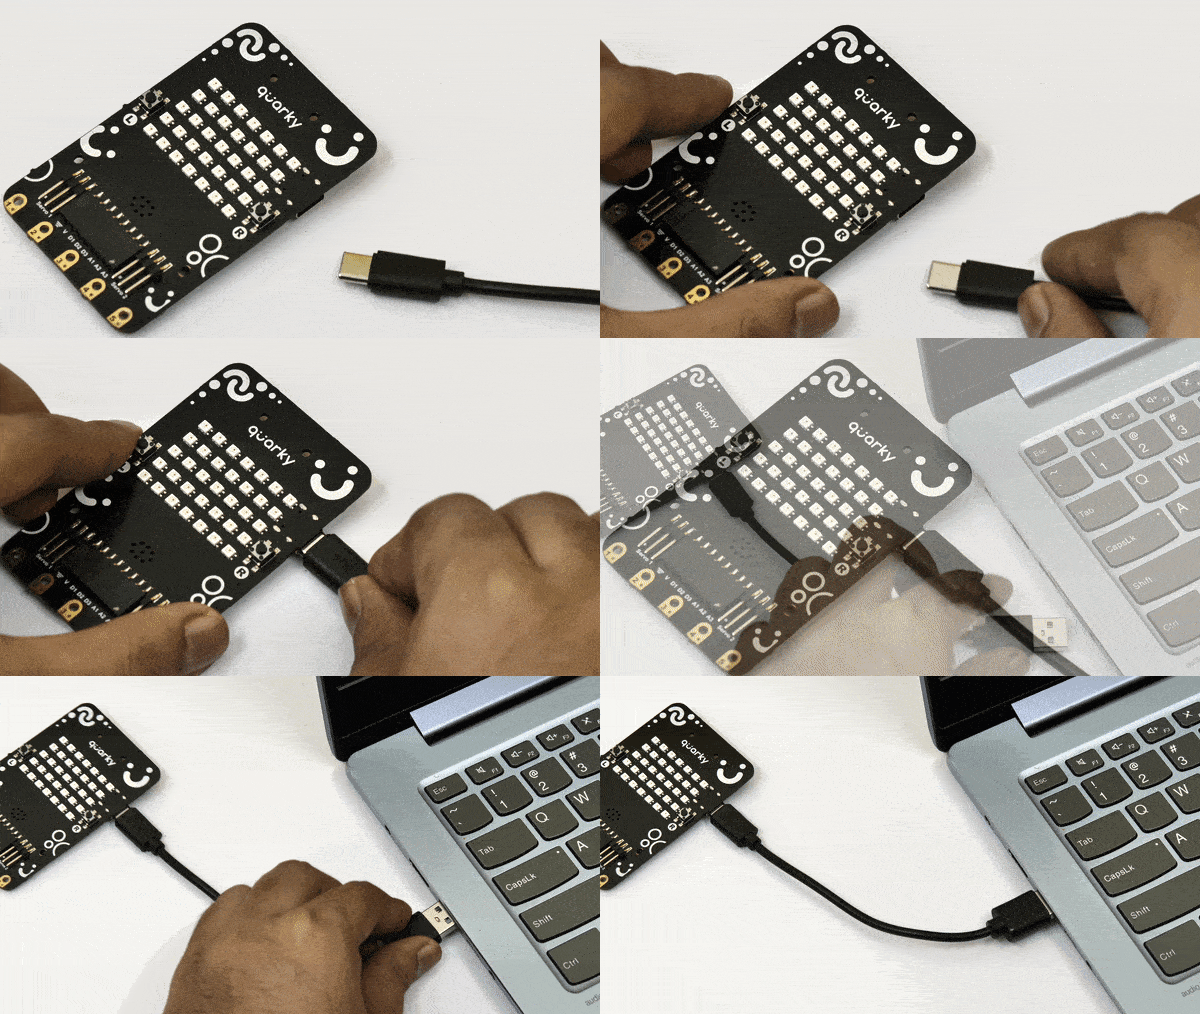
    Power Quarky
  2. Next, open PictoBlox on your desktop.
  3. After that, select Block or Python Coding as your coding environment.
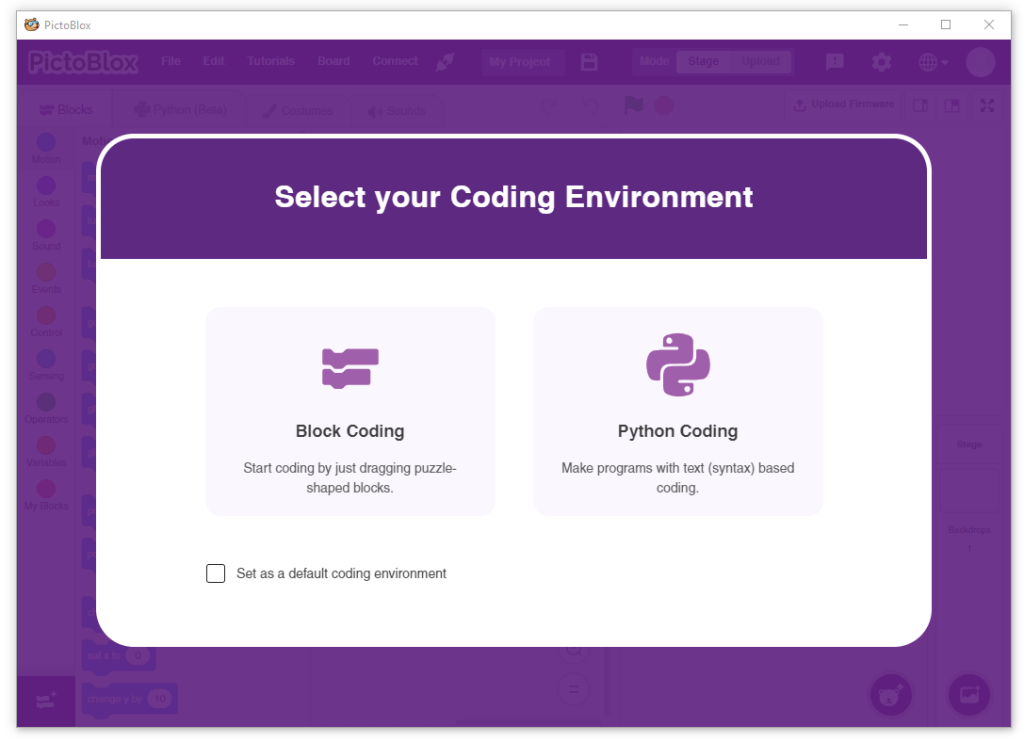
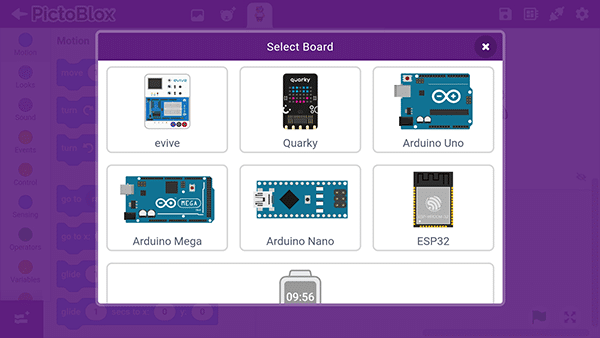
  4. Then, click the Board button in the toolbar and select board as Quarky.
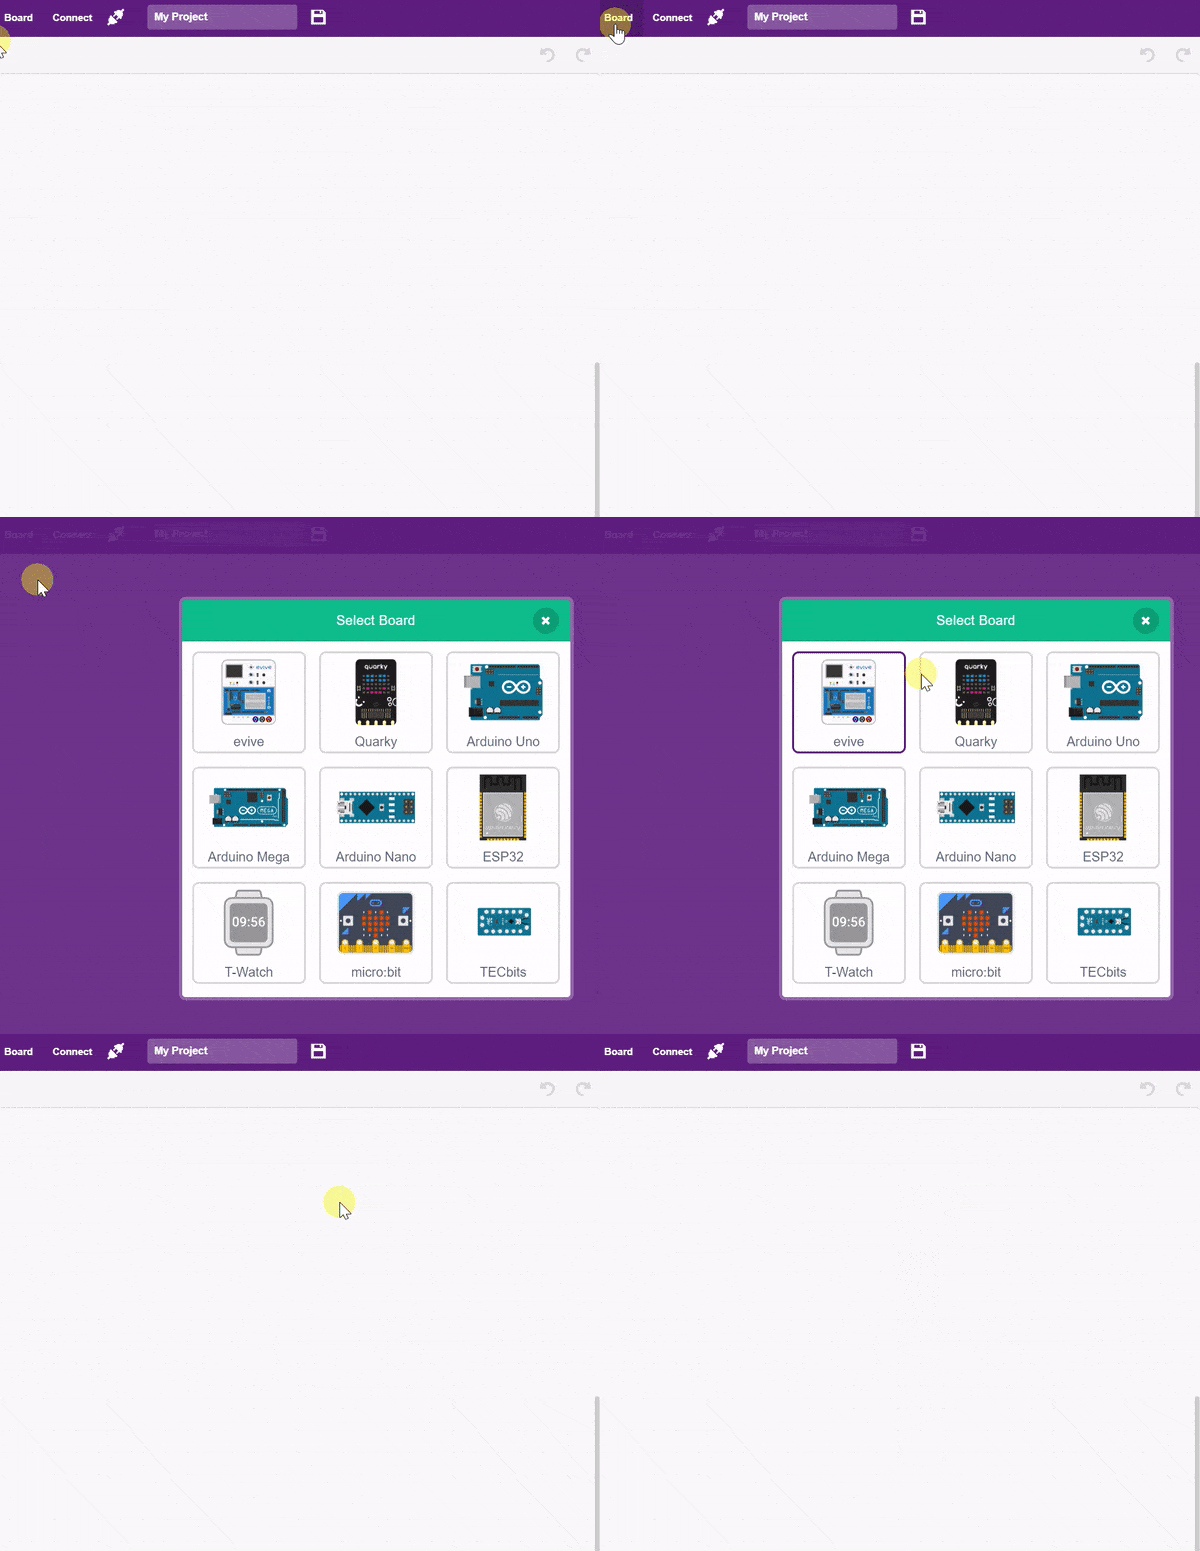
  5. Next, select the appropriate Serial port if the Quarky is connected via USB or the Bluetooth Port if you want to connect Quarky via Bluetooth and press Connect.
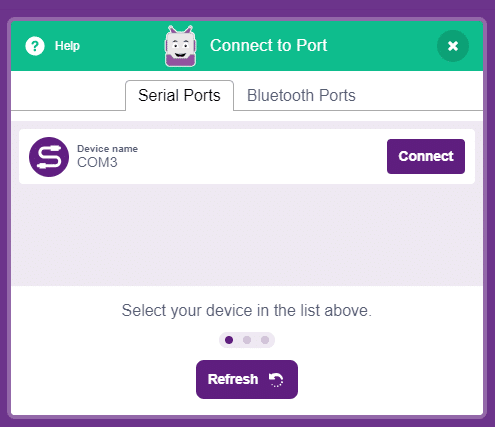
    COM Port

And voila! Quarky is now connected to PictoBlox.

Mobile

Follow the steps below for connecting Quarky to PictoBlox:

  1. First, power ON Quarky.
  2. Open PictoBlox on your smartphone. Go to My Space and make a new project by clicking the ‘+(plus)’ button in the bottom-right corner.
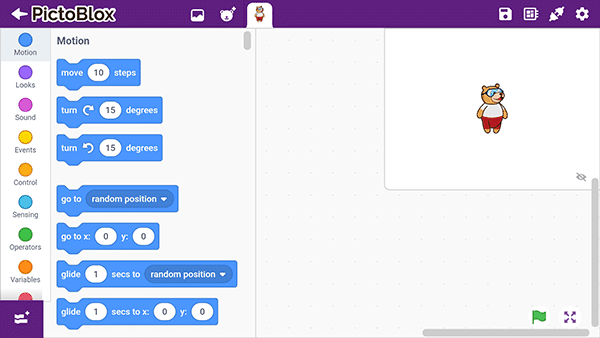
    PictoBlox in Mobile Phone
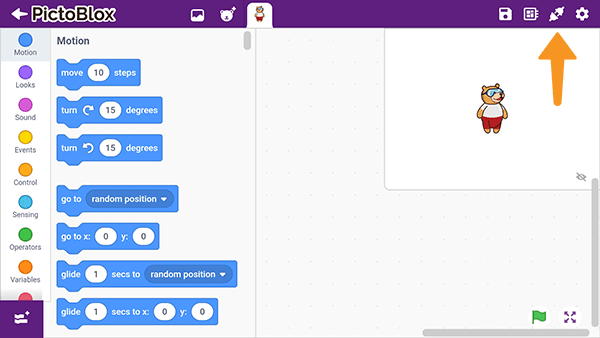
  3. Then, tap the Board button in the top-right corner of the toolbar.
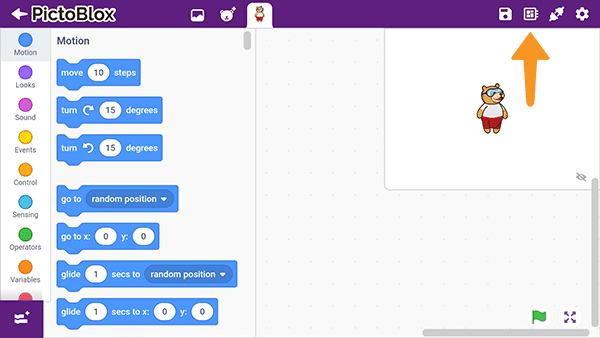
    PictoBlox BoardSelect board as Quarky.
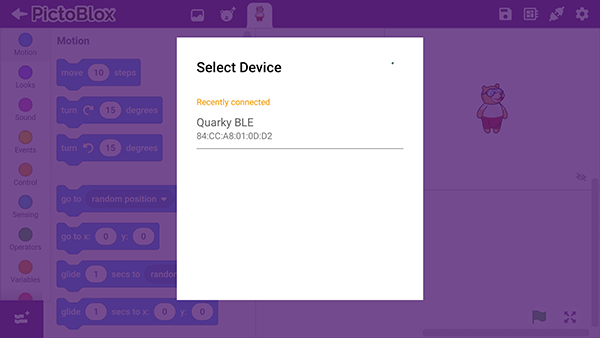
  4. Next, tap the Connect button:
    PictoBlox ConnectSelect your device from the list.

And voila! Quarky is now connected to PictoBlox.

Mars Rover Extension in Block Coding

Click on the Add Extension button and add the Mars Rover extension.
Once loaded, you will find the fresh blocks of Mars Rover in the block palette.


Mars Rover Extension in Python Coding

Click on the Add Modules/Libraries button and add the Mars Rover extension.

To access the library functions, you have to add the object declaration.

quarky = Quarky()
rover = MarsRover(4, 1, 7, 2, 6)
Read More

PictoBlox Blocks

The block joins two Boolean blocks so they both have to be true to return true. If they are both true, the block returns true; if they are not all true or none true, it returns false.
The block hides the specified variable’s Stage monitor.
The recognize () in image from URL () block extracts the image from the specified URL, analyzes it, and saves information in PictoBlox.
The block analyses the image and saves the face information locally, which can be accessed using other blocks similar to computer vision.
This block is used to analyze the image received as input from the image URL specified, for the handwritten and printed text.
The block returns the current loaded model URL or the type (Image or Pose).
The function analyses the specified test and provides the class name under which it has been classified by the NLP model.
The block analyses the image and saves the face information locally, which can be accessed using other blocks.
The block returns whether the QR Code is detected in the analysis or not.
The function returns the humidity in % of the location.
The block sets the transparency of the video stream to a certain value.
If a sprite is currently using the pen because of the Pen Down block, the block will cause the sprite to stop drawing a trail. (Otherwise, it has no effect.)
The block sets the digital state of the specified pin to HIGH or LOW / 0V or 3.3V.
The block displays the specified text on the Quarky RGB LED. 
The block initializes the following line parameters for the Quarky robot – F. T1 and T2.
The block returns the IR sensor analog reading. The reading varies from 0 to 4095.
The block plays the tone on the speaker for the specified note and duration.
This block analyses the image and saves the information locally, which can be accessed using other blocks.
The block sets the servo connected to the PWM pin to the specified angle between 0 to 180.
This block is used to set the threshold for the confidence (accuracy) of object detection, 0 being low confidence and 1 being high confidence. With the threshold value, you can set the level of confidence required for object detection.
The block enables or disables the automatic display of the key points on the human pose on the stage. This is useful when you want to see if the detection is happening or not.
The block set the chassis servo motors to the specified angles.
The block enables or disables the automatic display of the key points on the human hand on the stage. This is useful when you want to see if the detection is happening or not.
The block reports the recognized class from the analyse numbers block.
The block reports the specified class confidence value of the selected class. 0 is low confidence and 1 is high confidence.
The block sets the sprite’s density, roughness, and bounce (restitution) to the defined values.
The block reports the temperature or humidity from the DHT sensor connected to the selected pin.
The block sets the specified motor of the Quarky Expansion board to the specified direction (“FORWARD” or “BACKWARD”) and specified speed.
The block sends the specified data to the selected feed as a number or as a string.
The block clears the values of the body.
All articles loaded
No more articles to load

Block Coding Examples

All articles loaded
No more articles to load

Python Functions

The function reports the value of the JSON object from the body.
Syntax: getapijson(json1 = “value”, json2 = “”, json3 = “”, json4 = “”, json5 = “”)
The function reports the object count of the JSON object from the body.
Syntax: getobjectcountapijson(json1 = “value”, json2 = “”, json3 = “”, json4 = “”)
The function is used to control the state of the camera.
Syntax: video(video_state = “on”, transparency = 1)
The function enables the automatic display of the box on object detection on the stage.
Syntax: enablebox()
The function disables the automatic display of the box on object detection on the stage.
Syntax: disablebox()
This function is used to set the threshold for the confidence (accuracy) of object detection, 0 being low confidence and 1 being high confidence.
Syntax: setthreshold(threshold = 0.5)
This function is used to analyze the image received as input from the camera, for objects.
Syntax: analysecamera()
This function is used to analyze the image received as input from the stage, for objects.
Syntax: analysestage()
This function returns the total number of objects detected in the camera feed or the stage.
Syntax: count()
This function returns the x position of the object detected. You can specify the object for which the value is needed. The position is mapped with the stage coordinates.
Syntax: x(object = 1)
This function returns the y position of the object detected. You can specify the object for which the value is needed. The position is mapped with the stage coordinates.
Syntax: y(object = 1)
This function returns the width of the object detected. You can specify the object for which the value is needed. The position is mapped with the stage coordinates.
Syntax: width(object = 1)
This function returns the height of the object detected. You can specify the object for which the value is needed. The position is mapped with the stage coordinates.
Syntax: height(object = 1)
This function is used to get the class name of the analyzed object.
Syntax: classname(object = 1)
This function is used to get the confidence (accuracy) of object detection, 0 being low confidence and 1 being high confidence.
Syntax: confidence(object = 1)
The function returns whether the specified object is detected in the analysis or not. 
Syntax: isdetected(object_name = “person”)
The function returns whether the number of objects identified with the specified object class.
Syntax: detectedcount(object_name = “person”)
The function runs an API call to get the weather data of the location specified with the Longitude and Latitude.
Syntax: getweather(latitude = 23.02, longitude = 72.57)
The function returns the weather parameters (Rain, Snow, Extreme, etc.) of the location.
Syntax: weather()
The function returns the temperature, minumun, and maximum temperature of the location.
Syntax: temp(temp_type = “C”)
The function returns the atmospheric pressure (on the sea level, if there is no sea_level or grnd_level data), in hPa of the location.
Syntax: pressure()
The function returns the humidity in % of the location.
Syntax: humidity()
The function returns the wind speed (Unit Default: meter/sec) of the location.
Syntax: windspeed()
The function returns the wind direction (in degrees – meteorological) of the location.
Syntax: winddirection()
The function returns the latitude of the location.
Syntax: latitude()
The function returns the longitude of the location.
Syntax: longitude()
The function returns the time data of the location when data capture, sunrise, or sunset happens.
Syntax: time(capture_time = “sunrise”)
The function returns the city name of the location.
Syntax: city()
The function set the API keys for the Open Weather Map API calls.
Syntax: setAPI(openweathermap_API)
The function is used to control the state of the camera.
Syntax: video(video_state = “on”, transparency = 1)
All articles loaded
No more articles to load

Python Coding Examples

All articles loaded
No more articles to load
Table of Contents