[PictoBloxExtension]

Human Body Detection

Hand-Body pose_v1
Extension Description
AI that identifies human pose and human hand landmark points from camera and stage.

Introduction

Human body detection encompasses a range of technologies for detecting the presence of a human body in an area or space. Air conditioners that come with human detecting sensors and can detect people’s location to optimize comfort and energy-saving are one of the most common examples of this technology.

What this extension focuses on is Pose and Hand Pose detection. These algorithms help identify where the body joints are positioned.

Pose Detection

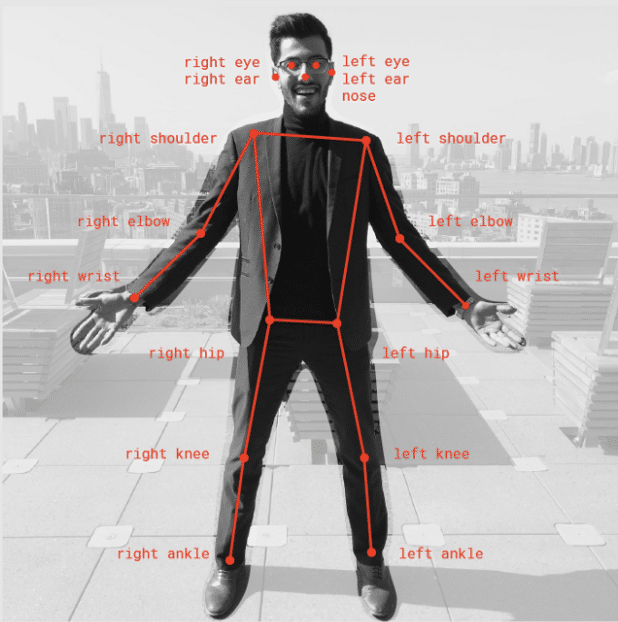
Pose Detection is a real-time pose detection technique with which you can detect human beings’ poses in Images. It allows you to estimate human pose by detecting body parts such as elbows, hips, wrists, knees, and ankles, and form a skeleton structure of your pose by joining these points.

Pictoblox makes use of the PoseNet model for Pose Detection.

PoseNet gives us a total of 17 key points that we can use, right from our eyes to ears to knees and ankles. If the Image we give to PoseNet is not clear the PoseNet displays a confidence score of how much it is confident in detecting a particular pose as well.

Applications of Pose Detection

  1. Used in Snapchat filters, that can see the tongue, aspects, glimpse, dummy faces.
  2. Fitness apps like a cult which uses to detect your exercise poses.
    Jumping Jack
  3. Instagram Reels uses posture detection to provide you with different features to apply to your face and surrounding.
  4. Virtual Games to analyze shots of players.
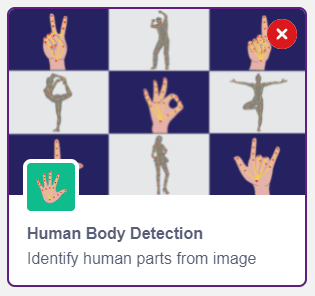
Hand Detection

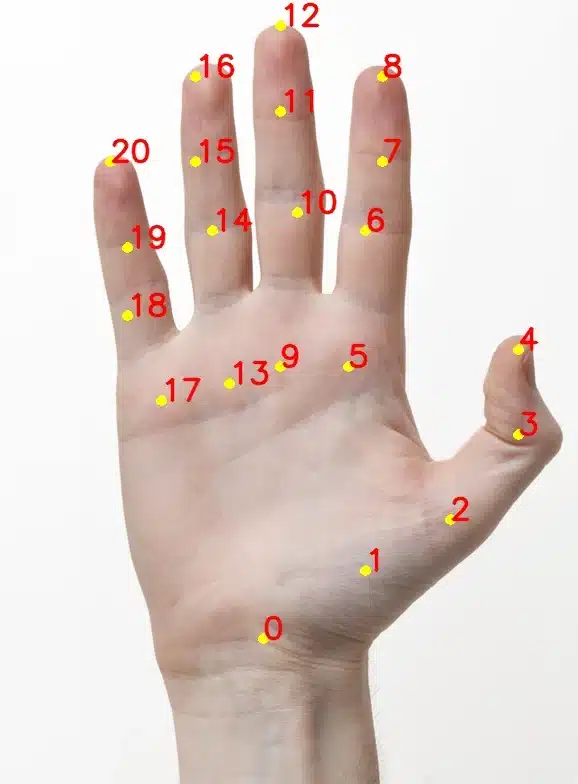
This works in a similar fashion as the Pose Detection algorithm, with much more accurate tracking of the points on the hand. Pictoblox uses the MediaPipe model to detect Hands and Gestures. It predicts 21 3D hand keypoints per detected hand.

Use cases of Hand Detection

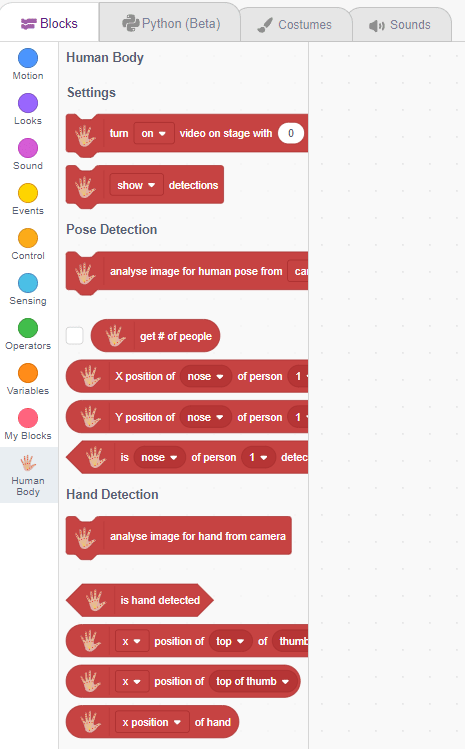
Using the Human Body Detection Extension of PictoBlox, you can analyze an image input from a camera or the stage.  Blocks available under this extension will help:

  1. Get the pose of a human body from an image. 
  2. Get the number of people in an image.
  3. Get the x and y coordinates of body features like shoulder, nose, mouth, etc.
  4. Detect hands in an image.
  5. Get the x and y coordinates of hands and different fingers.

Accessing Human Body Detection in Block Coding

Following is the process to add Human Body Detection capability to the PictoBlox Project.

  1. Open PictoBlox and create a new file.
  2. Select the coding environment as Block Coding.
  3. Next, click on the Add Extension button and add the Human Body Detection extension.
  4. The face detection models will be downloaded, which may take a few seconds to load.
    Downloading Models
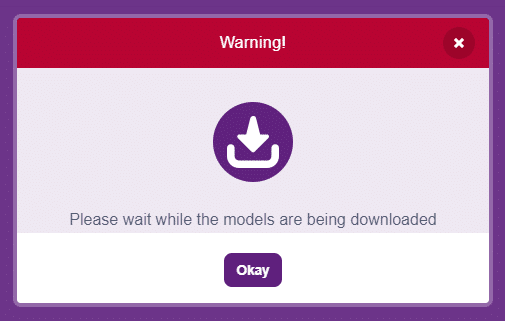
  5. Once downloaded you will get a message saying “Model loaded successfully”.
  6. You can find the face detection blocks available in the project.

Accessing Human Body Detection in Python Coding

Following is the process to add Human Body Detection capability to the PictoBlox Project.

  1. Open PictoBlox and create a new file.
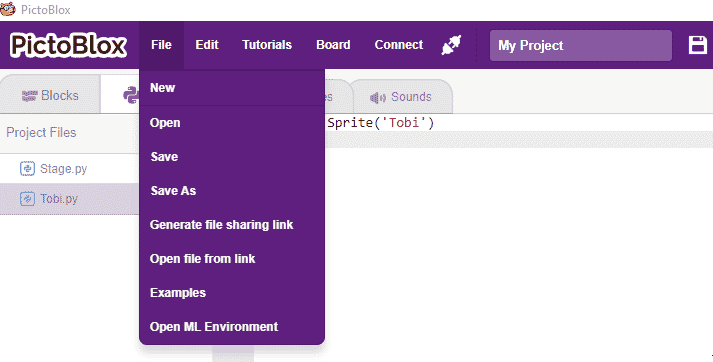
  2. Select the coding environment as Python Coding.
  3. Next, click on the Add Modules/Libraries button and add the Human Body Detection extension.
  4. To access the library functions, you have to add the object declaration.
    pose = Posenet()
Read More

PictoBlox Blocks

Turn () video on stage with () % transparency block controls the control the camera feed on the stage.
This block helps move an object step by step in a given direction within a set time
This block facilitates seamless transitions to your preferred scenes. For instance, if you’re currently viewing Scene 1 and wish to switch to Scene 2, simply select Scene 2 from the dropdown menu to enact the transition.
This block is designed to refresh or reload the current scene.
This block code will give an option to control the object as player control like third person or first person. You can then use arrow keys to make your object move in respective direction.
This block of code applies velocity to the player. 
All articles loaded
No more articles to load

Block Coding Examples

All articles loaded
No more articles to load

Python Functions

The function creates an object to connect Quarky with Wi-Fi.
Syntax: wifi()
The function reads the analog value of the sensors connected to the specified pin. The function returns the int value between 0 to 4096.
Syntax: readanaloginput(pin = “A1”)
The function is used to control the state of the camera.
Syntax: video(video_state = “on”, transparency = 1)
The function moves its sprite forward the specified amount of steps in the direction it is facing. A step is equal to one-pixel length.
Syntax: move(steps = 10)
The function gives its sprite a speech bubble with the specified text — the speech bubble stays until another speech or thought block is activated, or the stop sign is pressed.
Syntax: say(message = “Hello!”, time = 0)
The function will play the specified sound, pausing its script until the sound has finished playing.
Syntax: playuntildone(sound_name = “Grunt”)
The function checks if its sprite is touching the mouse-pointer, edge, or another sprite. If the sprite is touching the selected object, the block returns true; if it is not, it returns false.
Syntax: istouching(object_name = “_edge_”)
The function is used when the sprite needs to produce a bitmap image of itself which is stamped onto the stage. (Because it is merely a picture of the sprite and not a sprite itself, it cannot be programmed). The function will not draw over sprites. 
Syntax: stamp()
The function sets the specified RGB LED of Quarky (specified with X and Y position of the LED) to the specified RGB color and brightness value.
Syntax: setled(x_position = 1, y_position = 1, color = [0, 0 , 0], brightness = 20)
The function returns the state of the specified push button. If the button is pressed it returns True or else False.
Syntax: readpushbutton(button = “L”)
The function moves the Quarky robot in the specified direction. The direction can be “FORWARD”, “BACKWARD”, “LEFT”, and “RIGHT”.
Syntax: runrobot(direction = “FORWARD”, speed = 100)
The function plays the specified audio on the Quarky speaker. The function does not have any callbacks, so other functions can be executed while this function is running.
Syntax: playsound(audio = “QuarkyIntro”)
This function helps turn the video on/off on the stage with a defined level of transparency.
Syntax: video(video_state = “on”, transparency = 1)
This function helps turn the video on/off on the stage with a defined level of transparency.
Syntax: video(video_state = “on”, transparency = 1)
The function sets a loudness filter threshold to remove the background noise from the audio file which is being analyzed.
Syntax: setthreshold(loudness = 30)
The function initializes the pick and place robot with the specified orientation.
Syntax: initialisepickplace(orientation = “HORIZONTAL”)
The function loads a model saved via model.save().
Syntax: tf.keras.models.load_model(filepath = ‘saved_model.h5’, custom_objects = None, compile = True, options = None)
The function initializes the quadruped robot object in Python and maps the 8 servos to the specified pins.
Syntax: Quadruped(Front Right Hip = 4, Front Left Hip = 1, Front Right Leg = 8, Front Left Leg = 5, Back Right Hip = 3, Back Left Hip = 2, Back Right Leg = 7, Back Left Leg = 6)
The function set the state of the relay connected to the selected pin to High or Low. A high state means that the pin will have 3.3V and for Low, the pin will be 0 V.
Syntax: setrelay(state = 1, pin = “D3”)
The function connects the Quarky or ESP32 to the specified Wi-Fi and password. The block is only available in the Upload Mode when the code is uploaded to Quarky.
Syntax: wifi.connecttowifi(WIFI = “Wi-Fi Name”, PASSWORD = “password”)
The function reports if the Wi-Fi is connected to the Quarky or ESP32 or not. This block is only available in Upload Mode.
Syntax: wifi.iswificonnected()
The function initializes the Mars Rover object in Python and maps the 5 servos to the specified pins.
Syntax: MarsRover(Head = 4, Front Left = 1, Front Right = 7, Back Left = 2, Back Right = 6)
The function initializes the humanoid robot object in Python and maps the 6 servos to the specified pins.
Syntax: Humanoid(Right Hip = 7, Left Hip = 2, Right Foot = 6, Left Foot = 3, Right Hand = 8, Left Hand = 1)
The Quarky Mecanum Robot Drive Motors are initialized by the function, which assigns each motor to a specific port. This allows the robot to be programmed to move the motors in the desired direction.
Syntax: Mecanum(Front Left = 1, Back Left = 2, Back Right = 7, Front Right = 8)
The function initializes the Expansion Board of Quarky for use. Without initialization, the board will not respond to any other functions.
Syntax: initexpansion()
The function returns the arc cosine of a number.
Syntax: math.acos(x)
This function performs the calibration process for a robotic arm by taking in the error angles of each of its three servos (link 1, link 2, and base). It then stores the offset angle for each servo to the memory of the Quarky, ensuring that the robotic arm is functioning correctly at all times.
Syntax: roboticArm.calibrate(Link1 Offset = 0, Link2 Offset = 0, Base Offset = 0)
This function ensures proper sensor alignment for precise line-following control.
Syntax: AdvanceLineFollowing(ir_num = 2)
The function sets the digital state of the specified pin to HIGH or LOW / 0V or 3.3V.
Syntax: setdigitaloutput(pin, state)
The function enables the automatic display of the box on face detection on the stage.
Syntax: enablebox()
All articles loaded
No more articles to load

Python Coding Examples

All articles loaded
No more articles to load
Table of Contents