Deprecated: Required parameter $query follows optional parameter $post in /var/www/html/wp-content/plugins/elementor-extras/modules/breadcrumbs/widgets/breadcrumbs.php on line 1215
3D and XR Studio Transform - Blocks, Python Functions, Projects | PictoBlox Extension
[PictoBloxExtension]

3D and XR Studio Transform
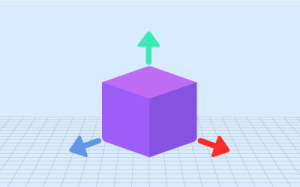
Transform
Extension Description
PictoBlox Transform lets users move, rotate, and scale 3D objects along the X, Y, and Z axes, providing precise control for seamless modeling and animation.

Introduction

Transform provides users with an interface to manipulate layers:

1. Position, Scale, Rotation:

– Position: Users can precisely define the location of layers within their scenes, ensuring objects are placed exactly where they want them. This capability is essential for arranging elements in a scene to achieve desired compositions or layouts.

– Scale: Scaling allows users to adjust the size of layers, either uniformly or along specific axes. This flexibility enables them to create objects of varying sizes and proportions, enhancing visual diversity and realism in their scenes.

– Rotation: Users can specify the orientation of layers in three-dimensional space, controlling their tilt, angle, and orientation relative to the scene’s coordinate system. Rotation adds depth and dynamism to scenes, allowing users to create immersive environments and unique visual perspectives.

2. Animation Integration:

– Custom Animations: Platform provides users with a library of pre-defined animations that can be easily applied to layers. These animations cover common motions such as scaling, rotation, and more, allowing users to quickly add movement and interactivity to their scenes without the need for extensive scripting or programming.

– In-built Animations: User can also use the inbuilt animation created while creation of the 3D objects.

Read More

PictoBlox Blocks

The block reports value 2 of the webhook event.
The block sets the selected servo motor angle to the specified angle in the specified time. This creates a smooth motion for the servo motor from the current angle to the specified angle.
The block sets the servo motors of humanoid legs & hips to the specified angles at the speed.
The block makes the selected motor to run at the specified speed.
The block makes a request to ChatGPT to translate the text specified in the first input field into the language specified in the second input field. The response of ChatGPT is then stored in PictoBlox and can be accessed using the get AI response block.
This block allows users to measure the amount of time that has passed since their device was turned on or since the timer was reset. It returns this time in milliseconds, making it a useful tool for measuring elapsed intervals.
This block allows the user to control a Brushless DC (BLDC) motor via Pulse Width Modulation (PWM) on a selected pin. The speed of the motor is adjustable, allowing the user to create the desired speed profile.
The block sets the cursor mode on a given LCD display. The mode specifies how the cursor will appear when characters are written or commands are executed. 
This block is used to move the robotic arm from its current position to a specific X, Y, and Z coordinate position over a specified period of time. This block breaks up the motion into smaller line segments for the robot to more accurately and efficiently reach the desired end position.
Set the IR threshold for onboard or external sensors connected to Quarky’s analog pin.
Starts the script whenever you press a specified key of the keyboard.
Rotate the sprite anti-clockwise a specified amount. Turn with 12 for a full rotation.
Returns the character to its default size.
Sets the color of the pen lines that can be drawn.
Displays a custom pattern from list on the quarky LED display.
Runs the blocks inside if the specified face expression is detected.
Changes the speed of the quarky robot. Speed can be set as slow, normal and fast.
After connection is established, turns the wizbot a specified number of step to the right.
Runs the blocks inside if a specified button is pressed of the wizbot.
The block is used to draw or fill a rectangle on the evive TFT display. It takes the coordinates of a point as input alongside the required width, height, and color and draws/fill the rectangle.
The block reads the state of the digital pin on evive (“High” or “Low”). If the state of the pin is “High”, it returns True, else False.
The block allows the user to remotely monitor the live status of devices and debug them by displaying the values of all the pins – both digital and analog.
This block moves the robotic arm’s end-effector to the specified X, Y, and Z positions in the specified time.
This block is to assign pre-defined hand actions to our Humanoid Robot.
The block sets its sprite’s X and Y position to that of the mouse-pointer or another sprite — in other words, it moves the sprite to a random position, the mouse-pointer, or another sprite.
The block changes the Stage’s backdrop to the specified one.
The block changes the volume of a sprite by the specified amount.
Depending on the argument, it is either a Cap block (all or this script), or a Stack block (other scripts in sprite). It is the only block that changes its shape.
The block sends a broadcast throughout the whole Scratch project — any scripts that are halted with the When I Receive () block and are set to the broadcast will activate. This broadcast block lets scripts send broadcasts, and have them wait until all scripts are activated by the broadcast ends.
All articles loaded
No more articles to load
Table of Contents