Deprecated: Required parameter $query follows optional parameter $post in /var/www/html/wp-content/plugins/elementor-extras/modules/breadcrumbs/widgets/breadcrumbs.php on line 1215
Program Your Quarky Mecanum Wheel Robot with PictoBlox
[Mecanum]

Programming the Mecanum Robot with Block Coding in PictoBlox

Description
Learn how to program your Quarky Mecanum Wheel Robot with PictoBlox. With the help of PictoBlox, you can control the robot to move, grip, and perform pick & place actions.

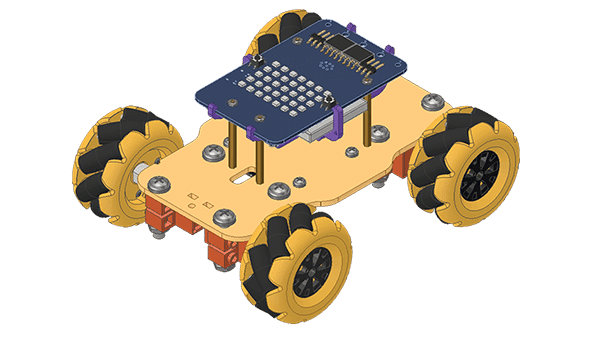
The Quarky Mecanum Wheel Robot is a type of robot that uses a special type of wheel to move. The wheel is made of four rollers mounted at 45-degree angles to the wheel‘s hub. Each roller has its own motor and can spin in either direction. This allows the wheel to move in any direction, making it an ideal choice for navigating around obstacles and tight spaces. The mecanum wheel robot can also turn on the spot, allowing it to make sharp turns without having to reverse direction.

The robot is programmable with PictoBlox. PictoBlox is coding education software that uses both graphical block-based coding and Python programming.

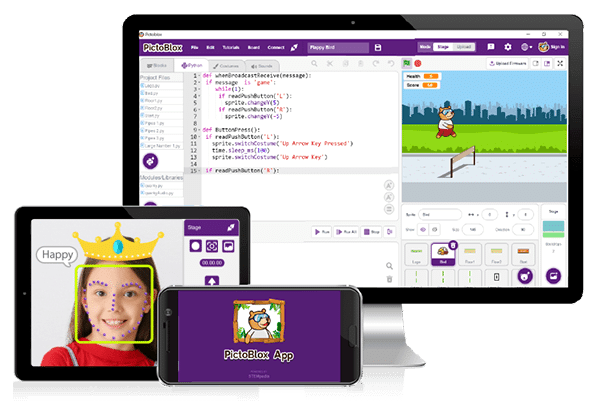
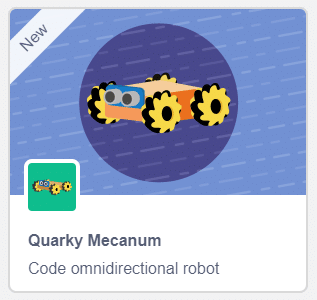
With PictoBlox, you can program the Mecanum Robot to move, grip, and perform pick & place actions!

If you haven’t installed PictoBlox, please follow the instructions:

Windows Installer (.exe)

STEP 1: Download the Pictoblox Installer (.exe) for Windows 7 and above (Release Notes).

STEP 2: Run the .exe file.

Some of the device gives the warning popup. You don’t have to worry, this software is harmless. Click on More info and then click on Run anyway.

STEP 3: Rest of the installation is straight forward, you can follow the popup and check on the option appropriate for your need.


Your software is now installed!

macOS Installer

STEP 1: Download the Pictoblox Installer (.dmg).

STEP 2: Run the .dmg file.

Mobile App Installer

STEP 1: Open Google Play Store on your Smartphone and and search for PictoBlox or visit the link here to head over to the Google Play Store. You can even scan the QR Code below from your Smartphone to head to the PictoBlox App.

STEP 2: Install the PictoBlox App.

Connecting Quarky with PictoBlox

Let’s begin by first connecting Quarky to PictoBlox. Select your preferred type of device i.e. either the desktop/laptop or your smartphone and follow the instructions.

Desktop

Follow the steps below for connecting Quarky to PictoBlox:

  1. First, connect Quarky to your laptop using a USB cable.
  2. Next, open PictoBlox on your desktop.
  3. After that, select Block as your coding environment.
  4. Then, click the Board button in the toolbar and select board as Quarky.
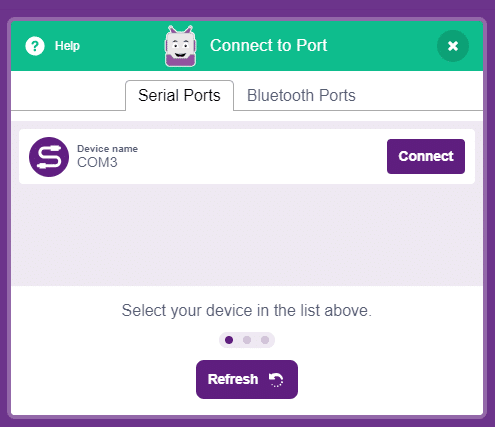
  5. Next, select the appropriate Serial port if the Quarky is connected via USB or the Bluetooth Port if you want to connect Quarky via Bluetooth and press Connect.
    COM Port
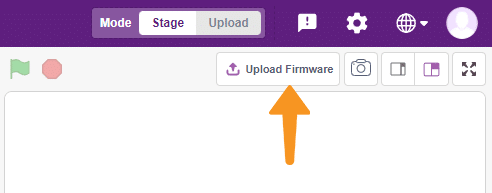
  6. Click on the Upload Firmware button. This will upload the latest firmware in Quarky.
    Note: If your device already has the latest firmware, then PictoBlox will show the message – Firmware is already updated. For learning more you can refer to this tutorial: https://ai.thestempedia.com/docs/quarky/quarky-toubleshooting/updating-quarky-firmaware-with-pictoblox/
  7. Once the firmware is uploaded, Quarky starts the Getting Started program. This runs only for the first time. Run through it.

And voila! Quarky is now connected to PictoBlox.

Mobile

Follow the steps below for connecting Quarky to PictoBlox:

  1. First, power ON Quarky.
  2. Open PictoBlox on your smartphone. Go to My Space and make a new project by clicking the ‘+(plus)’ button in the bottom-right corner.
    PictoBlox in Mobile Phone
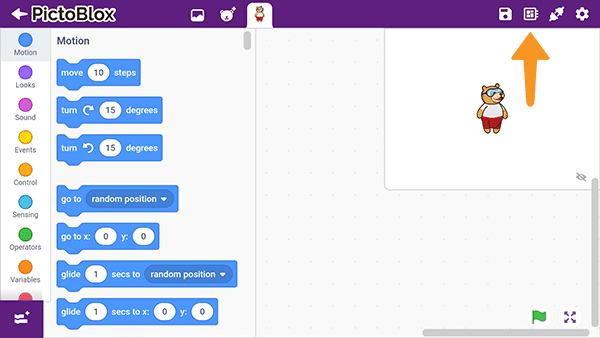
  3. Then, tap the Board button in the top-right corner of the toolbar.
    PictoBlox Board
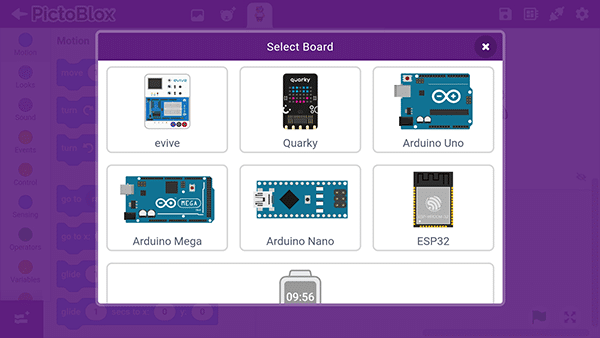
Select board as Quarky.
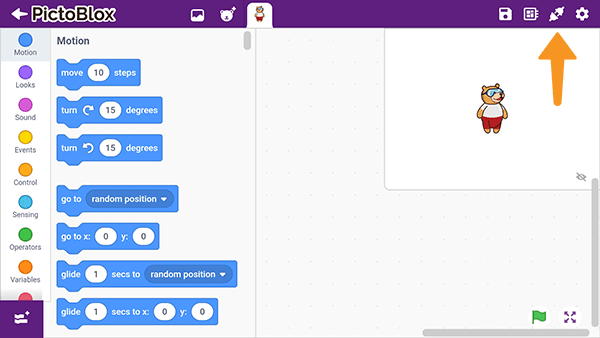
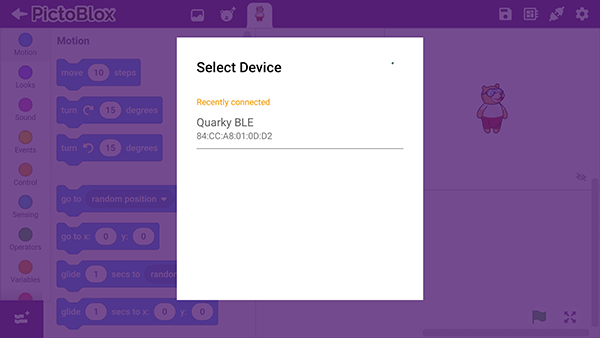
  4. Next, tap the Connect button:
    PictoBlox ConnectSelect your device from the list.

And voila! Quarky is now connected to PictoBlox.

Quarky Mecanum Extension

The Quarky Mecanum extension in PictoBlox allows you to control the robot. It has blocks for specific applications. To add the Quarky Mecanum extension follow the instructions:

  1. Click on the Add Extension button and add the Quarky Mecanum extension.
  2. You can find the Quarky Mecanum blocks available in the project.

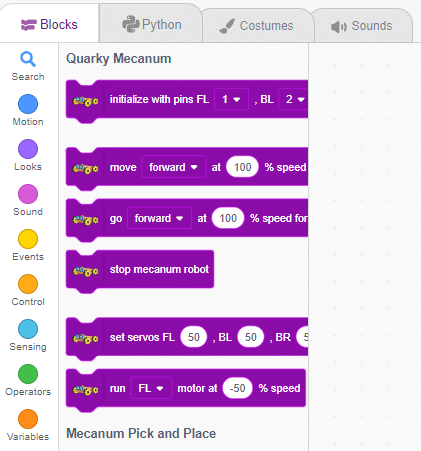
PictoBlox Blocks for Quarky Mecanum

The following blocks are available for the Quarky Mecanum:


Warning: Undefined array key "pp_wrapper_link" in /var/www/html/wp-content/plugins/powerpack-elements/extensions/wrapper-link.php on line 194

Warning: Undefined array key "pp_wrapper_link_enable" in /var/www/html/wp-content/plugins/powerpack-elements/extensions/wrapper-link.php on line 196

Warning: Undefined array key "pp_custom_cursor_icon" in /var/www/html/wp-content/plugins/powerpack-elements/extensions/custom-cursor.php on line 350

Warning: Undefined array key "pp_custom_cursor_text" in /var/www/html/wp-content/plugins/powerpack-elements/extensions/custom-cursor.php on line 351

Warning: Undefined array key "pp_custom_cursor_target" in /var/www/html/wp-content/plugins/powerpack-elements/extensions/custom-cursor.php on line 352

Warning: Undefined array key "pp_custom_cursor_css_selector" in /var/www/html/wp-content/plugins/powerpack-elements/extensions/custom-cursor.php on line 353

Warning: Undefined array key "pp_custom_cursor_enable" in /var/www/html/wp-content/plugins/powerpack-elements/extensions/custom-cursor.php on line 355
Moves the wizbot in arc length in specified direction and step length from the options.
The block is used to draw an outline of the triangle or a filled triangle from three points on evive TFT display. It takes the color and the 3 points for the corner of the triangle to draws a triangle.
When the block is executed it plays the tone of specified frequency/note for a specific duration/beat. The note and the beat can be selected from the drop-down menu. Also, the user can input the specific frequency and duration (in milliseconds).
Dabble input module has 2 potentiometers whose value can be varied from 0 to 1023 by the user. This block reports the current value of the selected potentiometer.
The block sets the end-effector to the specified position on the selected axis and the other two positions remain the same.
This block sets the value of the selected servo by the value you enter. Whereas the angle of other servos remains the same.
The block changes the selected sprite’s X position to a specified value.
The block changes the specified effect on its sprite by the specified amount. There are seven different effects to choose from: colour, fisheye, whirl, pixelate, mosaic, brightness and ghost.
The block reports how loud the noise is that a microphone receives, on a scale of 0 to 100. To use this block, a microphone must be used, and so a message will appear on the screen, asking for permission to use the microphone. If you deny it, the block will report a loudness of 0 or -1.
The block picks a pseudorandom number ranging from the first given number to the second, including both endpoints. If both numbers have no decimals, it will report a whole number. For example, if a 1 and a 3 were inputted, the block could return a 1, 2 or 3. If one of the numbers has a decimal point, even .0, it reports a number with a decimal. For example, if 0.1 and 0.14 were given, the output will be 0.1, 0.11, 0.12, 0.13, or 0.14.
The block replaces the specified item; in other words, it changes the item’s content to the given text.
The function allows the user to add a particular face into the database from the camera or stage. The user can specify the name of the face with the argument as well. This addition of the face in the database is also stored inside the PictoBlox file while saving.
The block returns the specified parameter for the specified number card detected.
The function set the API keys for the Open Weather Map API calls.
The block returns the hex code of the Red, Green, and Blue values specified.
The block returns the state of the digital sensor connected to the specified pin of the Quarky.
The block does the step simulation for the Physics Engine. This block is required to run in a loop for the physics to work.
The block reports the moisture reading from the sensor. The value varies from 0 to 100%.
The block sends multiple data to the ThingSpeak channel with a delay of the specified time seconds. The data is mapped to the 8 fields of the ThingSpeak channel.
The block executes the oscillator according to stored parameters for the servo motor and the current angle specified in the block.
The block sets the oscillator parameters for the selected servo motor.
The block moves the servo motors of the pick and place robot to the place angle specified by the user.
The block sets the user API key of the ChatGPT in the project. 
The block makes the specified LED turn ON or OFF on the 8×8 Dot Matrix display.
This block is used to move the end-effector to the specified position of the selected axis, while the other two positions remain the same.
This block allows the user to control the end-effector of a robotic arm to move in a specified axis by a set value, with all other axes remaining constant.
This block is use for set the motor speed while doing the line following and Turning.
Moves the wizbot forward for a √2 step length on the grid pattern.
The block sets the time on evive’s Real Time Clock (RTC) to the time specified by the user in the input.
Dabble phone sensor module give the real-time reading of the following sensors to evive: Accelerometer, gyroscope, proximity sensor, magnetometer, light meter, sound meter, GPS, temperature sensor and barometer. This block reports the current value of the selected sensor.
All articles loaded
No more articles to load

Conclusion

In conclusion, the Quarky Mecanum Wheel Robot is a powerful and versatile robot that can be programmed using PictoBlox. With its Mecanum extension, it can be programmed to move in any direction, grip objects, and perform pick & place actions. With the help of PictoBlox, users can easily program the robot to perform their desired tasks.

Table of Contents