Quarky Mecanum Wheel Robot - Documentation

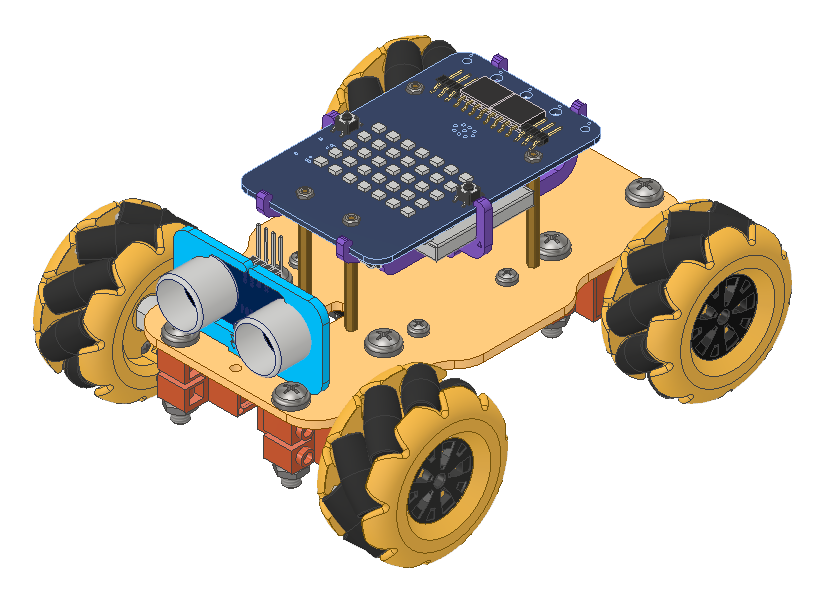
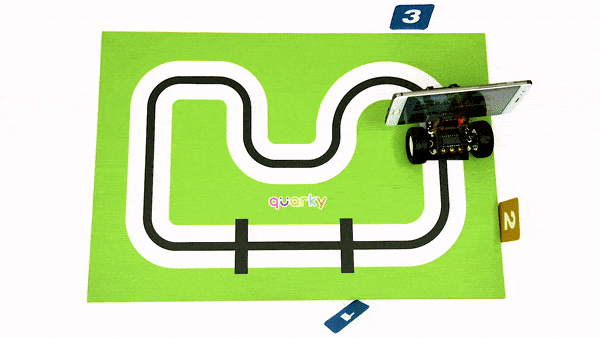
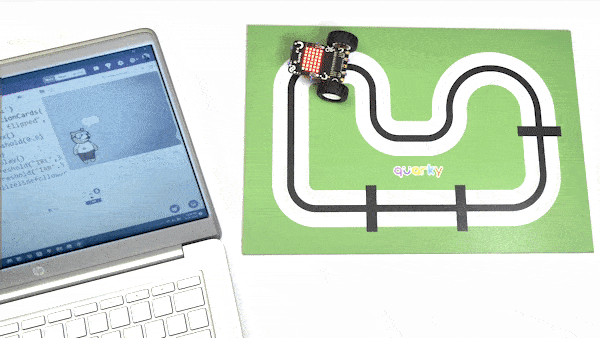
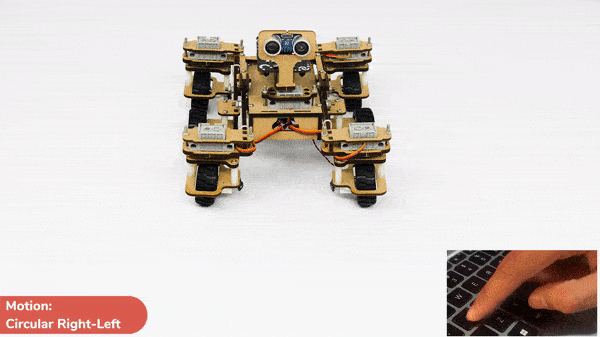
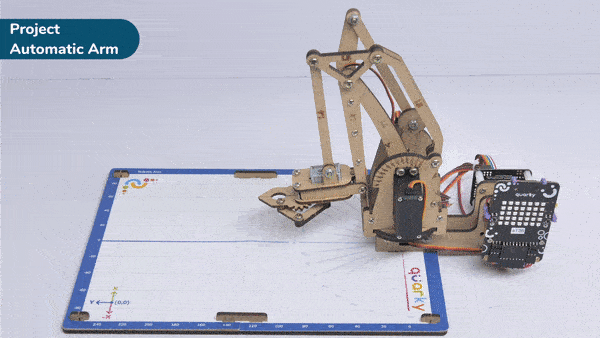
The Quarky Mecanum Wheel Robot is a type of robot that uses a special type of wheel to move. The wheel is made of four rollers mounted at 45-degree angles to the wheel‘s hub. Each roller has its own motor and can spin in either direction. This allows the wheel to move in any direction, making it an ideal choice for navigating around obstacles and tight spaces. The mecanum wheel robot can also turn on the spot, allowing it to make sharp turns without having to reverse direction. With 10+ different activities, this kit will guide you through the basics of Mecanum Wheel robotics.

Getting Started with Quarky Mecanum

Refer to the tutorials to learn about the Quaky Mecanum Wheel Robot, and how to assemble and program it in block coding or Python coding. 

Learn how to assemble the basic version of the Quarky Mecanum Wheel Robot with this step-by-step guide. Connect all components as per the wiring diagram and ensure that the various parts are securely in place.
Learn how to assemble a Basic Quarky Mecanum Wheel Robot with Gripper with this step-by-step guide. We will be calibrating the servo motor, assembling the robot, and attaching the ultrasonic sensor and servo motor for you to explore robotics projects.
In this lesson, we will learn how to assemble the Pick and Place Quarky Mecanum Wheel Robot. We will go through the steps to connect the servo motors, ultrasonic sensor, and Quarky Expansion Board to the robot.
Learn how to program your Quarky Mecanum Wheel Robot with PictoBlox. With the help of PictoBlox, you can control the robot to move, grip, and perform pick & place actions.
In this lesson, learn how to program the Quarky Mecanum robot with PictoBlox and Python in both Stage and Upload modes. Understand the functions provided in the Quarky Mecanum library, and see how to control the robot’s motors, pick-and-place robot, and gripper robot.

Quarky Mecanum Wheel Robot Project - Block Coding

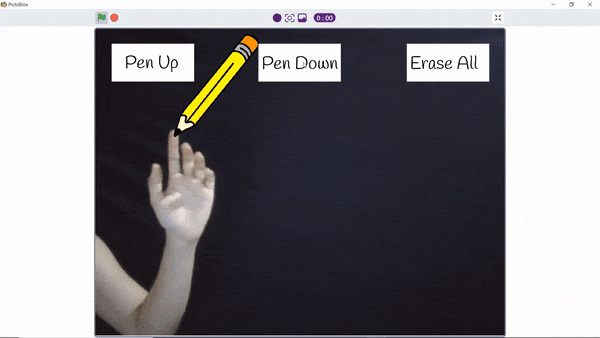
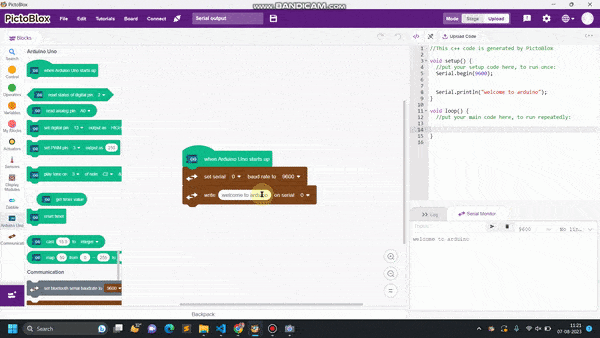
Refer to the tutorials to learn how to use PictoBlox Block Coding Environment to code Quarky Mecanum Wheel Robot for different applications

The project detects the number of faces detected on the stage.
The example demonstrates how face recognition works with analysis on the stage.
The example demonstrates how face recognition works with analysis on the camera.
The example demonstrates the application of face detection with a stage feed.
The example demonstrates how to use face landmarks in the projects.
The example demonstrates how to use face detection with a camera feed.
The project shows how to create custom patterns on Quarky RGB LED in Stage Mode.
The project shows how to create custom patterns on Quarky RGB LED in Upload Mode.
The project makes the Quarky display the expression according to the expression identified from the Face Recognition.
The example shows how to run image classification in Python on a webcam feed using OpenCV.
The example shows how to run image classification in Python on an image file using OpenCV.
The example shows how to run image classification in Block Coding.
The example demonstrates how to use the confidence threshold in face detection (Block Coding).
The example displays how to detect expression using face detection and mimic the expression on Quarky. The expression is detected by the camera.
The example shows how to create a face filter with Face Detection. It also includes how to make the filter tilt with face angles.
The example demonstrates how to use face landmarks in the projects.
The example demonstrates how face recognition works with analysis on the camera.
The example demonstrates how face recognition works with analysis on the stage.
The example demonstrates the use of clone and gliding function in Sprite. 
The example demonstrates how to make the sprite glide to a random position on the stage when it is clicked.
The example demonstrates how to use stamping and the mouse location sensing in Block coding.
The example demonstrates how to use keys sensing to control the movement of the sprite.
The example demonstrates the wall bouncing of the sprite and rotation style.
The example demonstrates how to make the sprite follow the mouse.
The example demonstrates how to add gravity into the project on a bouncing ball.
The example demonstrates how to implement mouse tracking.
The example demonstrates how to add movement to a sprite using the key detection hat block.
The example demonstrates the sprite direction in PictoBlox.
All articles loaded
No more articles to load

Quarky Mecanum Wheel Robot Project - Python Coding

Refer to the tutorials to learn how to use PictoBlox Python Coding Environment to code Quarky Mecanum Wheel Robot for different applications

In Python, this code demonstrates how the global variables allow us to access and update their values outside of functions.
In this example, we will retrieve the color information from the cloud and make the Quarky lights ON and OFF with the selected color on the cloud.
In this example, we will retrieve the information from the cloud and make the Quarky lights ON and OFF. 
This example shows how to create an IoT House Monitoring system that sends humidity, temperature, plant soil moisture, gas, and light sensor data to the cloud on Adafruit IO servers.
We will use the Adafruit IO cloud service to send data from a humidity and temperature sensor to the cloud.
Python code: Adds 5 to user input using a function. Displays id() before and after the call to check memory location change.
The example demonstrates how to make a delivery robot that follows the line and stops when it reaches checkpoint 1.
The example demonstrates how to make a delivery robot that follows the line and stops when it reaches checkpoint 1 in the Python Coding Mode.
The example demonstrates how to use hand recognition and pen extensions to make an air draw game.
The example demonstrates how to use hand recognition and pen extensions to make an air draw game in the Python Coding Environment.
Learn how to code the Mars Rover to turn left and right on a circle with the set () to () block. Try different left and right orientations and move the Mars Rover with the up and down keys.
Discover the fascinating world of Arduino Serial Communication and how it enables data exchange between the Arduino board and the user.
Discover the fundamentals of Arduino Serial Communication using Pictoblox and the importance of setting the correct baud rate for proper data exchange.
Learn how to create a dataset and Machine Learning Model for an automated game from the user’s input. See how to open the ML environment, upload data, label images, train the model, and export the Python script.
In this example, we are going to learn how to program the Quarky to detect the ambient light reading and make the light turn ON and OFF accordingly.
This example demonstrates how to use the Soil Moisture sensor to detect the moisture in the soil and water the plant using the drip system. The system will water the plant when the moisture of the soil is low.
Explore the capabilities of controlling robotic arms for efficient material handling.
In this example, we are going to learn how to program Quarky to detect the temperature (using DHT Sensor) and make the fan ON and OFF accordingly.
In this example, we will demonstrate how to use the Moisture sensor to detect how much the tank is filled and start the pump whenever the water level is low.
Automate watering your plants using PictoBlox and Python with the help of the Soil Moisture sensor and the IoT House Quarky Addon Kit. Learn how to assemble the drip irrigation system, set up the circuit, and write Python code to control it.
The example demonstrates how to add movement to a sprite using the key detection hat block.
The example demonstrates how to add movement to a sprite.
The example demonstrates the ball falling in gravity in a box. Using the pen extension we are also tracking the trajectory of the ball.
This module contains basic arithmetic operations like addition, subtraction, multiplication, and division that can be performed on numbers.
Learn about servo motors and interface it with Arduino , servo control with ardunio
The project shows how to create custom patterns on Quarky RGB LED in Upload Mode.
The project shows how to create custom patterns on Quarky RGB LED in Stage Mode.
All articles loaded
No more articles to load

PictoBlox Extension Documentation

Refer to the documentation of PictoBlox Extension to understand how to use the blocks and functions for the Quarky Mecanum Wheel Robot.